Color Me Home Episode 8: Repurposing Your Furniture

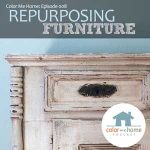
This week, Betsy and Dan talk about repurposing furniture. Specifically, we focus on a variety of uses for those old entertainment centers that don’t fit modern HDTVs. We also highlight some interesting uses for old dressers. (And if you’re really interested, check out the BONUS CONTENT feature below. So many of the projects we talked about involved removing the drawers from the dressers. Well, what do you do with those extra drawers? Is there a creative way to use them? Of course! We talk about 4 different projects in the BONUS CONTENT, so check it out!)

View our Pinterest Board for Episode 8!

Episode Outline

  • Repurpose Your Entertainment Center (1:07)
    • Diaper Changing Station (2:00)
    • Potting Station (for you gardeners out there!) (4:58)
    • Coffee Bar (7:15)
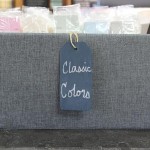
    • Betsy’s Shoe Display Center (10:04)
  • Repurpose Those Old Dressers (14:57)
    • Storage Shelves (15:10)
    • Kitchen Islands (17:25)
    • Dan’s Little Throne (or Seating and Storage and Things Like That) (19:50)
      • Dan’s Voice Breaks while saying “Bop” and Betsy Makes Fun (24:16)

Bonus Content and Outline

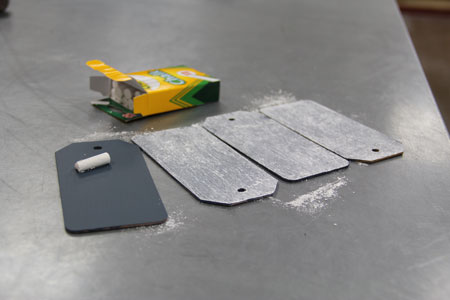
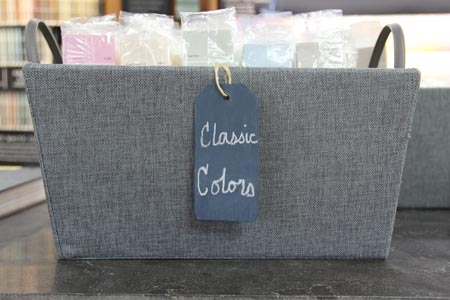
  • Repurpose Those Drawers
    • Under-the-Bed Storage (0:35)
    • Drawer Dollhouses (4:15)
    • Shelves and Shadow Boxes (6:08)
    • Make Tables (9:31)

Anaglypta Wallpaper

anaglypta2 
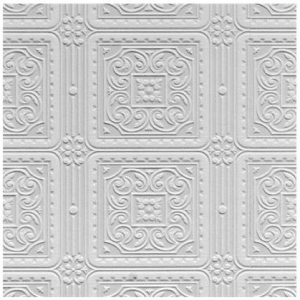
Anaglypta wallpaper is a textured, paintable wallpaper. In this episode, we talk about using it on the backers of entertainment centers to provide a unique, interesting backdrop.

However, these papers can be used anywhere. They are reasonably priced and look great on walls, on furniture, on stair risers . . . and on and on and on.

Be sure to check out our Pinterest page for this episode for a variety of photos showing painted and faux-finished anaglypta paper. We have books you can look through in our Lakewood, Plainfield, and 17th Street RepcoLite locations. If you have any questions at all, please stop out, email, or give us a call!

Color Me Home Episode 7: Creative Kids’ Rooms (The Chalkboard Paint Episode)

This week, Betsy and Dan discuss specific projects that will help you design remarkably creative kids’ rooms! They discuss ways to use your kids artwork on the walls of their room to add color and interest! And then they shift gears and talk about a number of interesting projects involving Benjamin Moore’s Chalkboard Paint. Also, (and perhaps most importantly), Betsy finds herself unable to say the word “great”, and in the process makes great radio memories….

View our Pinterest Board for Episode 7!

Episode Outline

  • Using Your Kids’ Artwork in their Room (1:26)
    • Betsy Can’t Say “Great” (1:40)
    • Empty Frames (2:33)
    • Corkboard Frames (4:56)
    • Clipboards (5:52)
  • Chalkboard Paint Projects (7:25)
    • There Are Some Dumb Projects Out There (8:02)
    • Paint the Wall (but not in the boring way you’re thinking!) (10:42)
      • Paint Random Shapes (11:08)
      • Replace Your Wallpaper Border with Chalkboard Paint (12:45)
      • Cityscape (14:07)
      • A Tree (15:47)
    • Paint some furniture! (16:35)
    • Chalk Markers (This is Awesome!) (22:21)
    • Various Accessories (27:43)

Frame Their Artwork

We had a lot of fun with this topic and really, we only scratched the surface. This is such a great project for a kid’s room or playrooms because it gives you the chance to put some of their creativity on display, give them some input in the room, and bring in some (typically) bold, vibrant colors without letting them overpower the room.

The ideas we talked about were designed to be easy to change out. When your kids create new art, you (or even they) can swap out older art for newer. The walls can be updated regularly, often, and best of all, easily!

Check out the ideas in the podcast and then, if you come up with something even better, be sure to let us know! Email your photos to colormehome@repcolite.com!

Benjamin Moore Chalkboard Paint

We spent a fair amount of time in this episode talking about Chalkboard Paint from Benjamin Moore. And that’s because we really believe this to be one of the coolest paints available! If you’re even mildly creative, it’s not going to take you long to dream up hundreds of uses. And remember, as we mentioned, Benjamin Moore’s Chalkboard Paint is available in ANY Benjamin Moore color. So, say goodbye to black chalkboards! (Unless of course, that’s what you want.)

Chalk Markers

chalktastic_markers

Betsy made a remarkably bold statement when we started talking about Chalk Markers. She declared that chalk markers were, and I quote, the “greatest invention ever.” Yes. Not one given to overstatement, Betsy firmly places Chalk Markers above electric lights, automobiles, moving pictures, and even computers on her list of “Greatest Inventions of All-Time”. Sorry Edison, Benz, and all you other thinkers and inventors. Sure, Betsy enjoys driving, having lights that go on with the flick of a switch, watching movies, and using her new Mac. But all of those things pale in comparison to doodling with Chalktastic Markers.

I, on the other hand, am a little more grounded and would likely place chalk markers just slightly further down on the list. Still, they’re pretty cool. And they’ll keep a lot of the chalk dust and mess off your floors. Click here for a link to purchase your own set from Amazon. (These are the ones Betsy uses and recommends. And remember, she says they’re the “greatest invention ever.”)

Color Me Home Episode 6: Decorating Kids’ Rooms

This week, Betsy and Dan talk about decorating kids’ rooms. These are great projects and can be a lot of fun: you’ll get to use colors you might not typically use and you really get to put your creativity on display! But how do you create something that the kids will love–with all their favorite colors–without having the whole thing turn into, quite literally, a circus? That’s what we talk about in this episode, so give it a listen!

View our Pinterest Board for Episode 6!

Episode Outline

  • Involve Your Kids With the Decorating! (0:30)
  • What Do We Do When the Kids Pick Crazy Colors? You Compromise! (4:32)
    • My Son Embarrasses Me In Public (5:00)
    • Pick a Lighter Version of the Color (8:02)
    • Pick a Muted or Muddier Version of the Color (10:11)
    • Paint an Accent Wall (13:43)
    • Doors, Window Frames, Ceilings . . . (15:0o)
    • Accessories (16:30)
  • Choose the Right Paint and the Right Finish (17:30)
    • The Right Paint (17:57)
    • The Right Finish (21:46)
  • Our First Email Question! (23:06)

Benjamin Moore Waterborne Ceiling Paint56295-9030107

In the podcast, we mentioned ceilings as a potential area to bring in some color. If you’re going to give that a try (and you should, because it’s a very cool idea that’ll payoff with great results!) then you should definitely be using Benjamin Moore’s Waterborne Ceiling Paint. It’s specifically formulated for ceilings, and provides an ultra flat finish that easily hides common ceiling imperfections. It’s easy to work with, has minimal spatter and dries very quickly for fast recoats.

  • Superior hide for a flawless finish
  • Flattest finish offered by Benjamin Moore
  • Conceals common surface imperfections
  • Easy application with fantastic results
  • Formulated for minimal spatter

Recommended Paints for Kids’ Rooms

We covered 4 different products that would be perfect. Here’s a quick summary in case you didn’t have a note pad to jot all the good ideas down while the podcast was playing:

Hallmark Ceramic Paint by RepcoLite

Hallmark is our Premium interior paint. It’s created with Ceramic microspheres and provides exceptional washability and durability even in our matte finish. Hallmark is available in a Matte, Eggshell, Satin Sheen, and Semi-Gloss.

Aura by Benjamin Moore

Aura delivers remarkable durability and offers the most advanced way to bring color to life. Using Benjamin Moore’s exclusive Color Lock® technology, Aura paint brings you discernibly richer, truer color. Aura is ideal for kids’ rooms whenever you’re using colors with poor coverage or if you’re covering over other bright and bold colors. The reason? Aura’s specifically formulated to cover and hide better than any other paint out there. If you don’t want to fuss with 3 or 4 coats, choose Aura!

Regal by Benjamin Moore

Regal paint stands up to today’s active lifestyles in colors and finishes that create the home you’ve always imagined. A premium quality coating featuring Advanced Particle Technology® which includes our proprietary 100% acrylic resin. This makes the finish itself more durable, providing for superior uniform coverage as well as easier touch-ups. Additional benefits include spatter resistance for easier clean-up, and superior coverage for a flawless finish in fewer coats.

Natura by Benjamin Moore

Natura Waterborne Interior Paint continues Benjamin Moore’s commitment to providing the most environmentally friendly paint. Natura goes beyond zero VOC* to offer zero emissions** and no harsh fumes***, making it a safer paint for your family and the environment, all without compromise to performance or color selection. Natura is truly “Green Without Compromise®.”

Carefree by RepcoLite

While we didn’t mention Carefree in the podcast, we certainly should have! Carefree is a tremendous product for walls, will give you great washability and durability, and will price out below all of the other products here! If you’re working on a budget, Carefree might be a great option to consider.

Recommended Finishes for Kids’ Rooms

When it came to finishes, we strongly recommend either Satin Sheen or Semi-Gloss for your trim, doors, and furniture. Semi-Gloss finishes hold up well and wash up readily.

For your walls, however, our favorite choice is an Eggshell Finish. It’s dull enough to hide wall imperfections (Betsy kept referring to the dings and dents made by someone bouncing a ball of the wall . . . perhaps something she was guilty of long ago) but it also has enough of a finish to be washable.

Further Reading

We drew from a lot of articles and posts when we gathered info for this podcast. Here are just a few of them if you’d like to read further!


From Bottle to Vase in 6 Easy Steps

paintedbottles_030716_4If you’re into decorating and if you’ve got even the slightest amount of creativity, you’re always looking for a project. Something outside the norms, something a little different, little things that will set your home and your decorating apart from everyone else.

Well, if that’s you–if you’d love a quick project with a huge payoff–then read on!

Betsy Thompson, at our 17th Street Store, came up with the following project. And I’ve got to admit, when I walked by and saw her working on this in the store, I was intrigued. In my opinion, it’s one of those perfect projects: easy, inexpensive, and there’s no limit to what you could do with it.

Now, the concept behind this project is simple. Betsy taped off or masked off sections of the bottles and then painted them. Once the paint was dry, she removed the tape or masking to reveal areas that received no paint, thus creating the designs.

To do this on your own, all you need to do is follow these simple steps:

1. OBTAIN SOME BOTTLES

The bottles Betsy used for our project are a dark green. Any color glass would work, but clear glass might not provide you with quite the same contrast in the finished look.

2. CREATE YOUR DESIGNS

To create your designs, you can use tape, stickers, or whatever else you can come up with! In her project, Betsy used a combination of masking tape and scrapbooking border stickers. Simply apply the stickers and tape over the bottles in whatever patterns you would like to create. Get creative here and don’t be afraid to experiment with a few different looks!

3. IT’S TIME TO PRIME

Glass is a tough surface to get paint to bond to, so it’s necessary to use a special primer. Betsy used XIM primer to solve this problem and to give the finish paint a good surface to adhere to. XIM is what we call a “bonding primer” and is designed to bond to tough-to-paint surfaces like porcelain, tile, glass, plastics, and more. So it’s the perfect primer for this project.

4. SPRAY ON THE FINISH PAINT

When the primer is dried (typically anywhere from 20 – 40 minutes), it’s time for your finish paint. Betsy used white spray paint. She applied a couple coats to ensure solid coverage and then left it to dry.

5. REMOVE THE STICKERS

This can be somewhat tricky and requires a little patience to do it well. You may want to carefully run an X-Acto knife along all the edges to cut through any paint film that might have formed over both the bottle and the tape. Failing to do this could result in peeling paint off the bottle when you remove your tape. At any rate, carefully remove the tape, the stickers, or whatever it was you used to mask the bottle off.

6. A LITTLE CLEANUP and then ENJOY!

Once that’s all done, you’re basically finished! You may need to clean up any areas where the paint bled under your tape or stickers, but you can do that with your X-Acto knife or, if you start soon enough, a little of the proper cleanup solvent on a Q-tip.

This is a simple project with a huge payoff!  You create a very unique piece that’s perfect for displaying cut flowers, dried flowers, or just sitting empty on a shelf.

Give it a try and see what you can come up with. Experiment with different designs and paint colors. Get creative and post your projects in the comments section below! We’d love to see what you’re working on.

Chalkboard Paint Tags in 5 Easy Steps!

Benjamin Moore’s Chalkboard Paint is a versatile product that can really bring out the “creative” in us! Here’s an interesting project by Betsy Thompson from our 17th Street Store that might get you thinking about some different ways you can use Chalkboard Paint in your own home!

Chalkboard Storage Tags

chalkboard_paint5

STEP 1

The first step is to gather all your supplies. You’ll need some wooden tags from a local art supply store as well as some light-colored chalk designed specifically for chalkboards. Finally, you’ll want to stop at RepcoLite for some primer, a quart of Benjamin Moore’s Chalkboard Paint (in whatever color you want!), and a sheet of 180 grit sandpaper.

chalkboard_paint4

STEP 2

The second step is to apply primer to the wooden tags. In our project, we used a spray primer to minimize brush strokes or roller marks on the tags and because it’s a little quicker!  Now, even though “Primer-and-Paint-in-one” products are very popular, we still recommend the primer step in a project like this. The reason is that bare wood can be exceptionally porous. The helps fill in the wood grain and creates a smooth surface for the Chalkboard Paint.

STEP 3

The third step involves a light sanding of the primed tags. Depending on how quickly your particular primer dries, you might be able to do this quite soon after application. At any rate, when the primer is sufficiently dry, lightly sand the surface to knock down any raised wood fibers. When finished, wipe the tags clean with a damp cloth. Don’t introduce a lot of water to the surface. We’re only talking about using a damp rag to get the dust that you created from the sanding step off of the surface.

chalkboard_paint3

See Corona Excalibur Brushes in our Shop!

STEP 4

The fourth step is to apply the Chalkboard Paint. Once the tags have dried from step four, apply one or two coats of Benjamin Moore Chalkboard Paint. In our project, we used a high quality Corona Excalibur Brush for application. However you accomplish it, Whether rolling or brushing, make sure you use a high quality applicator. Cheap brushes will be more likely to leave brush strokes (or release bristles into your finish). Cheaper roller covers will provide you with a rougher, orange-peel, texture.

chalkboard_paint2

STEP 5

The final step is to condition the chalkboard surface. After allowing the painted area to cure for at least 3 days, rub the entire chalkboard surface with a piece of white chalk. After you’ve erased that, you’re chalkboard surface is ready for use!

chalkboard_paint1

Benjamin Moore’s Chalkboard Paint is available in any color in the Benjamin Moore spectrum. So, get creative! Think outside the box and see what you can come up with!

Some Hints:

  • For erasing, we recommend using a clean, damp cloth or paper towel. We do not recommend using a chalkboard eraser.
  • You’ll acheive the best results when using light-colored chalk designed for use on chalkboards.


Stenciled Dresser Project

green_furniture_web_030816
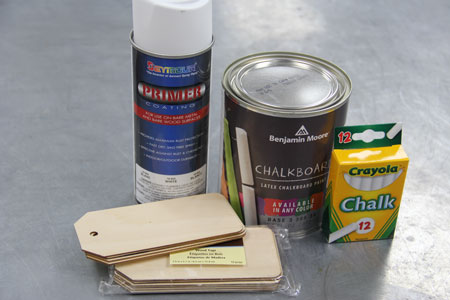
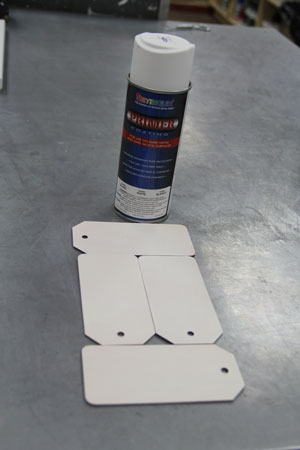
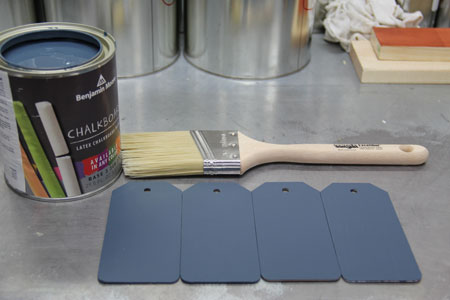
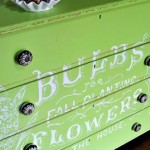
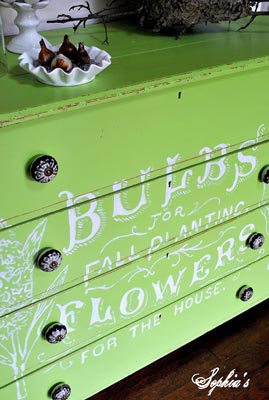
Finding and old piece of furniture–something that’s seen it’s better days–and breathing new life into it with a little paint and some creativity is easily one of my favorite do-it-yourself projects. I love it because it’s usually inexpensive (if you’re a smart shopper), doesn’t take much time, and the results can be dramatic.

Today, I want to highlight and recommend a simple project we discovered on a great decorating blog called “Sophia’s Decor“.  (Check it out sometime–you’ll thank us later!)

This is a simple project that anyone can accomplish.  Please head to Sophia’s Decor for some great pictures and more detailed comments about the project.  But to quickly summarize:

Here’s What You Need:

  • A piece of furniture to paint (this is important)
  • Paint (main color and stencil color)
  • TSP
  • Sandpaper
  • Paint Supplies
  • Stencil or Projector

Here’s What You Do:

1 Start by scuff sanding your furniture piece with some 120-150 grit sandpaper.  This doesn’t need to be a complicated, lengthy, arm-breaking, sweat-producing sanding job.  You’re basically just dusting over the piece to dull the previous finish so your paint will bond.
2 After the scuff-sanding, wash the piece down with a TSP and water mixture.  This will remove the sanding dust and will also help to clean away any surface contaminants that might be left from cleaners and so on.
3 When the piece is completely dry, apply your main color.  Brush or roll it directly onto the furniture piece without a primer.  (If you plan to distress it, it’s important to skip the primer step.)
4 Once the piece is painted (it may take one or two coats depending on your color), go ahead and distress it.  This is a bit of an art project and takes a little bit of thought.  It’s not complicated, but you want to be careful to create an authentic distressed look without going too far.  Carefully run your sandpaper over the edges of the drawers and the top and the legs and you’ll notice that very quickly you cut through to the wood beneath.  Work around the spots that would see normal wear over the years:  the drawer pulls, edges and so on. Continue like this until you’ve achieved the look you desire and then wipe the piece clean with a damp rag.
5 When it’s dry, it’s time to apply the stencil.  This part will take some planning and some thinking and some searching to find just the right graphic.  In this case, the blogger at Sophia’s Decor used a projector to display the image on the dresser and then she traced it with a pencil, using an off white paint to fill in the lines.  You could also accomplish the same affect if you found a stencil to your liking.
6 However you put the design on, let it dry a couple days.  Once it’s dry, the last step is a light sanding over the letters.  (Don’t work too hard with this sanding or you’ll remove too much of the lettering!)  The goal here is to lightly distress the lettering and give the piece an aged look.
7 At that point, you can leave the piece as is, or, if you prefer, you could apply a light, single coat of polyurethane in a low-gloss or flat finish.  A solvent-based polyurethane will yellow slightly over time, so be aware of that before you top-coat anything that’s white!

Overall, this project will take you a couple days from start to finish–though most of that time will be just letting it dry in between paint coats. It’s fun, easy and, because the furniture piece is small compared to the room it is eventually placed in, you can experiment with colors that might be too strong for the walls.

If you try something like this, or have a project you think turned out really well, please post a pic on our Facebook page here.  We love to see what you’ve come up with!