If you’re wondering how to paint a ceiling, you’re not alone. It’s one of the most commonly skipped steps in a DIY room makeover because it feels overwhelming. You’re working overhead, dealing with drips, and worried about lap marks or roller lines. But here’s the truth: a freshly painted ceiling can completely transform a room—making it feel brighter, cleaner, and more finished.
Many homeowners repaint walls without touching the ceiling, only to realize afterward how dingy it looks in contrast. Don’t fall into that trap—give your ceiling a chance to shine, too.
Step 1: Clear the Room and Protect Your Floors
Start by removing as much furniture as possible. Cover what remains with plastic sheeting or drop cloths. Protect your floors using canvas drop cloths, plastic, or masking paper. RepcoLite offers options if you’re unsure what’s best.
Step 2: Prep the Room and the Ceiling
Use painter’s tape to protect fixtures, trim, and anything else that shouldn’t be painted. Make sure your lighting is bright enough to catch missed spots. Clean the ceiling thoroughly—dust, cobwebs, and grease can affect paint adhesion. If you have water stains, spot-prime those areas with a stain-blocking primer.
Step 3: Choose the Right Paint
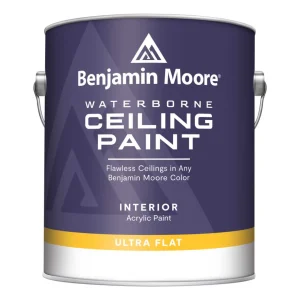
Most professionals recommend flat ceiling paint because it hides imperfections and keeps reflections to a minimum. Benjamin Moore’s Waterborne Ceiling Paint is ideal—it stays ultra-flat even when tinted. If you’re budget-conscious, consider Super Hide or Final Touch, both great options available at RepcoLite. Check out these inspiring ceilings to spark your creativity.
Step 4: Select the Right Tools
Use a roller with a 3/8″ to 1/2″ nap for smooth ceilings. For textured surfaces, go up to 3/4″. An extension pole will save your back and help you maintain a consistent stroke.
Step 5: Cut In First
Before rolling, use a brush to cut in around the edges—2 to 3 inches from the walls. This keeps you from having to roll too close and risk splashing paint onto the walls.
Step 6: Roll It On
You’ve got two main methods:
-
Work in 4-by-4-foot sections, overlapping as you go.
-
Roll the entire length of the ceiling in straight lines, overlapping slightly and always maintaining a wet edge.
Roll toward the main light source to minimize visible imperfections. For longer ceilings, method one may give you better results.
Step 7: Keep a Steady Pace
Don’t rush, but don’t dawdle either. If the paint dries too quickly, you’ll see lap marks. Use a thick enough roller cover to carry a good amount of paint, and consider turning down the room temperature slightly to slow drying time.
Step 8: Apply a Second Coat (If Needed)
If the ceiling’s original color was dark or uneven, or if coverage isn’t perfect after the first coat, wait until it’s completely dry and then apply a second.
Step 9: Final Touches
Remove painter’s tape while the paint is still a little wet for cleaner lines. Then, step back and enjoy the clean, bright new look of your ceiling.
Pro Tips
-
Don’t overload your roller. Drips and splatters are a sign of too much paint.
-
Keep your roller flat and apply even pressure.
-
Don’t obsess over perfection—most people aren’t scrutinizing your ceiling.
-
Always use high-quality paint. It saves time, effort, and money in the long run.
Painting your ceiling might not be the most exciting project, but it’s one of the most rewarding. Done right, it can make your entire room feel brand new. And if you ever get stuck or have questions, the team at RepcoLite is here to help.

