

 My family and I just wrapped up another Little League season and among all the wonderful things that baseball season brings into our lives, there’s one thing that I could do without: the Inevitable Forgetting of Important Things.
There are a number of Capital Letters in that phrase, so let me explain: Whenever there was a baseball game on a week night, our evening would devolve into chaos quite quickly. I’d arrive home from work five minutes after the time we should have left. To get back on schedule, I’d typically eat dinner without chewing it while I changed my clothes and brushed my teeth. This was a multi-tasking miracle in regards to the number of tasks accomplished at once. However, because of the diverse nature of the tasks, it was also messy and somewhat disgusting. Still, it’s what was necessary to get to the game on time. So I did it.
Once that strange combination of eating/teeth brushing/clothes changing was done, I’d run out to the van, hop into the driver’s seat, turn the key and then, for the first time in the entire evening, I’d pause. Turning around, I’d stare each of the kids in the eye, hold their attention for a second or two, let the import of the moment sink into their little heads, and then I’d ask: “Do you have everything?”
It was a simple question. A question meant to jog their little memories. A question meant to make them ask the question in their own heads: “Do I really, truly have everything I might need for tonight’s athletic event?”
Instead, every time I asked the question, they’d respond immediately, with absolutely zero thought (and with some exasperation): “yes, dad”.
Well, I’ve got five children and the oldest two are 13, so this isn’t my first rodeo, so to speak. And so I would never let them off that easily: “You have everything? Really? How about your glove? Your hat? Your bat bag? Your bat? Your cleats?” I’d rattle off every single piece of baseball gear I could think of as they answered with an immediate “yes” to each item.
Finally, after what felt like a 30 minute deposition, I’d turn around in my seat, ease the van out of the driveway, and begin the journey to the baseball field. And every single time, after I was far enough away from home to make going back frustrating, I’d hear it start: the scuffling of their little fingers as they clawed through their bat bags looking for something.
I’d hope against hope every time I heard this that they were looking for a Mento. But no. After about 30 seconds of frantic scuffling, someone would nervously clear his throat as happened several nights ago:
“Uh, Dad?”
“Yes…” (through gritted teeth).
“Ummm. Funny thing . . . you know when you asked if we had everything and then listed off all the things?”
“Yes.”
“Well, you know what you forgot to list off?”
“No. What did I forget to list off?” (through gritted teeth again).
“Well . . . and this really is hilarious . . . you never asked me if I was wearing my cup.” At this point the kid usually breaks into nervous laughter and falls silent. No one else typically laughs at this point because they know trouble when they see it.
I try to keep my cool and clinging to a very unreasonable hope, I ask: “Are you wearing your cup?”
“Ummm. Not technically. I actually forgot it. We’ll have to go back and get it. But don’t worry. I’m pretty sure I know where it might be…”
Every time. Every game. Oh, sometimes they’d forget gloves. Sometimes, it was their bat. Maybe their hat, their sunglasses, their Gatorade . . . it doesn’t matter. Whatever it was they forgot, it was always something we’d have to go flying back to the house to retrieve.
And it drove me nuts, stressed me out, and got almost every single game night off to a rocky and uncomfortable start. All because we weren’t organized. All because we were starting something without having all the right equipment.
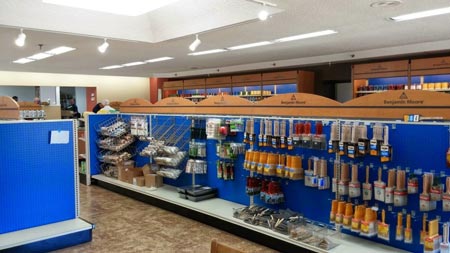
Well, the same thing often happens when we’re working on paint projects. We start the work and after we dip our expensive brush into a new gallon of oil-based paint, we realize we forgot to pick up paint thinner. Or we pour our paint into a tray and realize that the roller cover we had isn’t the right one for the project. Or–and this just happened to me a week or so ago–we run downstairs to grab that paint brush we’ve got in the basement only to find that we didn’t clean it out well enough the last time. Now it’s unusable and we’re standing there with our paint can open and no brush to apply it with.

When we forget to amass the right tools for our paint projects, we find the stress level rises quickly. Our schedules are thrown into chaos, and all too often (if you’re like me) we try to make things work using the tools we have, not necessarily the right ones. And usually, the results are frustrating and disappointing.
The good news about all of this is there’s a fix. At least for the paint project part of it (I don’t know how to fix the baseball stuff!). Anyway, the way to make sure you’ve got all the right tools for your next paint job is as simple as using a basic “Project Checklist”.
We’ve got one that you can download by clicking this link. It’s a simple tool that will help you mentally go through your project ahead of time. The list will recommend certain items and most of the time, you’ll discover one or two things you would never have thought to gather ahead of time.
Tackling a paint project can be a very rewarding and fulfilling experience. It can even be somewhat of a stress reliever–almost therapeutic in a way. Just make sure you’ve got all the items necessary before you start and you’ll discover how smoothly a project can go!


 My wife and I just bought a new home. And while everything ended well, the process of searching was not without its fair share of stress. However, despite all that, I discovered that touring many different homes and asking questions like “can we live here” was also very interesting and very eye-opening to me.
 Last week I went to the doctor. It was nothing serious–at least it didn’t start out that way–it was just a routine visit. Kind of a maintenance thing. However, in the course of this “maintenance” visit, I was made aware of potentially life-changing information: I’m shrinking. At an incredible rate.
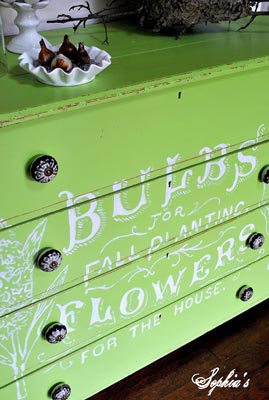 Finding and old piece of furniture–something that’s seen it’s better days–and breathing new life into it with a little paint and some creativity is easily one of my favorite do-it-yourself projects. I love it because it’s usually inexpensive (if you’re a smart shopper), doesn’t take much time, and the results can be dramatic.


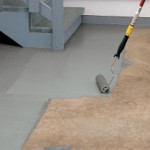
 Painting a basement floor is a great way to improve your home without dropping a lot of money. However, while the project isn’t complicated, there are a few things you should know. First off, as we wrote here, you first must make sure that your floor is even a candidate for paint. If you’ve done that and you’ve determined that your floor can be painted, the next step is to determine which floor paint to use.