
 Painting your vinyl siding isn’t typically a project we’d consider “low-budget”. Yet, in the grand scheme of things, it really is. Here’s why: painting the vinyl siding of your home will produce a remarkable change. In fact, not many outdoor projects (if any!) are going to produce as profound a change in the curb appeal of your home. So, the project produces amazing results. And to get those amazing results, you typically only have to spend anywhere from $300 – $600 on paint. Add some supplies and figure in your time to do the work and you’re still talking about a relatively low expenditure to produce the biggest change possible without remodeling or re-siding your home. So, relatively speaking, it’s inexpensive when you consider the results!
Best of all, it’s not a difficult project. In fact, it’s pretty simple. Here are the basics:
CLEAN THE SIDING: Before you apply any paint, the siding needs to be cleaned and free from any surface contaminants. The paint you will later use bonds to the surface of the vinyl. If that surface is not clean and ready for paint, you can end up with the paint bonding to whatever contaminant was there (dust, dirt, etc). So, make sure you clean the siding.
And when it comes to cleaning, there are a couple of options. First, you can go to the old paint prep standby: TSP TriSodium Phosphate. It’s inexpensive and functions as a degreaser, mild deglosser, and cleaner. If you’re painting your vinyl siding, it’s perfect. If you have mold or mildew on the siding around your gutters or downspouts, just mix a little bleach in the TSP mixture.
Never use TSP on your siding if you’re only trying to clean it because it will dull the finish of your vinyl that you mix with water and it’s an excellent cleaner
A second cleaner that would be excellent on your vinyl siding is called Jomax. It’s designed to clean vinyl siding and if you use this in conjunction with a scrub brush and a power washer, you’ll be able to get the dust, mildew, and any other surface contaminants off the siding to make it ready for paint.
Jomax is safe to use on your vinyl if you’re only trying to clean it!
Whatever cleaner you choose, make sure you scrub with a scrub brush before rinsing with a power washer or a garden hose!
PICK YOUR PAINT: Once the siding’s ready for paint, it’s time to get the paint! We recommend Benjamin Moore’s Regal Select Revive. Revive provides excellent color retention, is resistant to mildew and can be applied as long as surface temperatures are 40 degrees Fahrenheit (and rising).
Revive is designed specifically for vinyl siding and comes in a wide palette of vinyl-safe colors. This is a big deal because when you use standard paints in non-vinyl-safe colors, you run the risk of warping, damaging, or even destroying your vinyl siding.
The short story is this: the old rule of thumb when painting vinyl siding is that you need to make sure you only select a new color that is the same shade or a little lighter than the original vinyl siding color. If you don’t do that, you run the risk that the new paint color (the darker color) will absorb so much heat that it will case the panels to warp!
Vinyl Safe Colors are another story entirely. With Revive and it’s incredible palette of colors, you can safely change your light tan siding into a charcoal grey with no worries whatsoever!
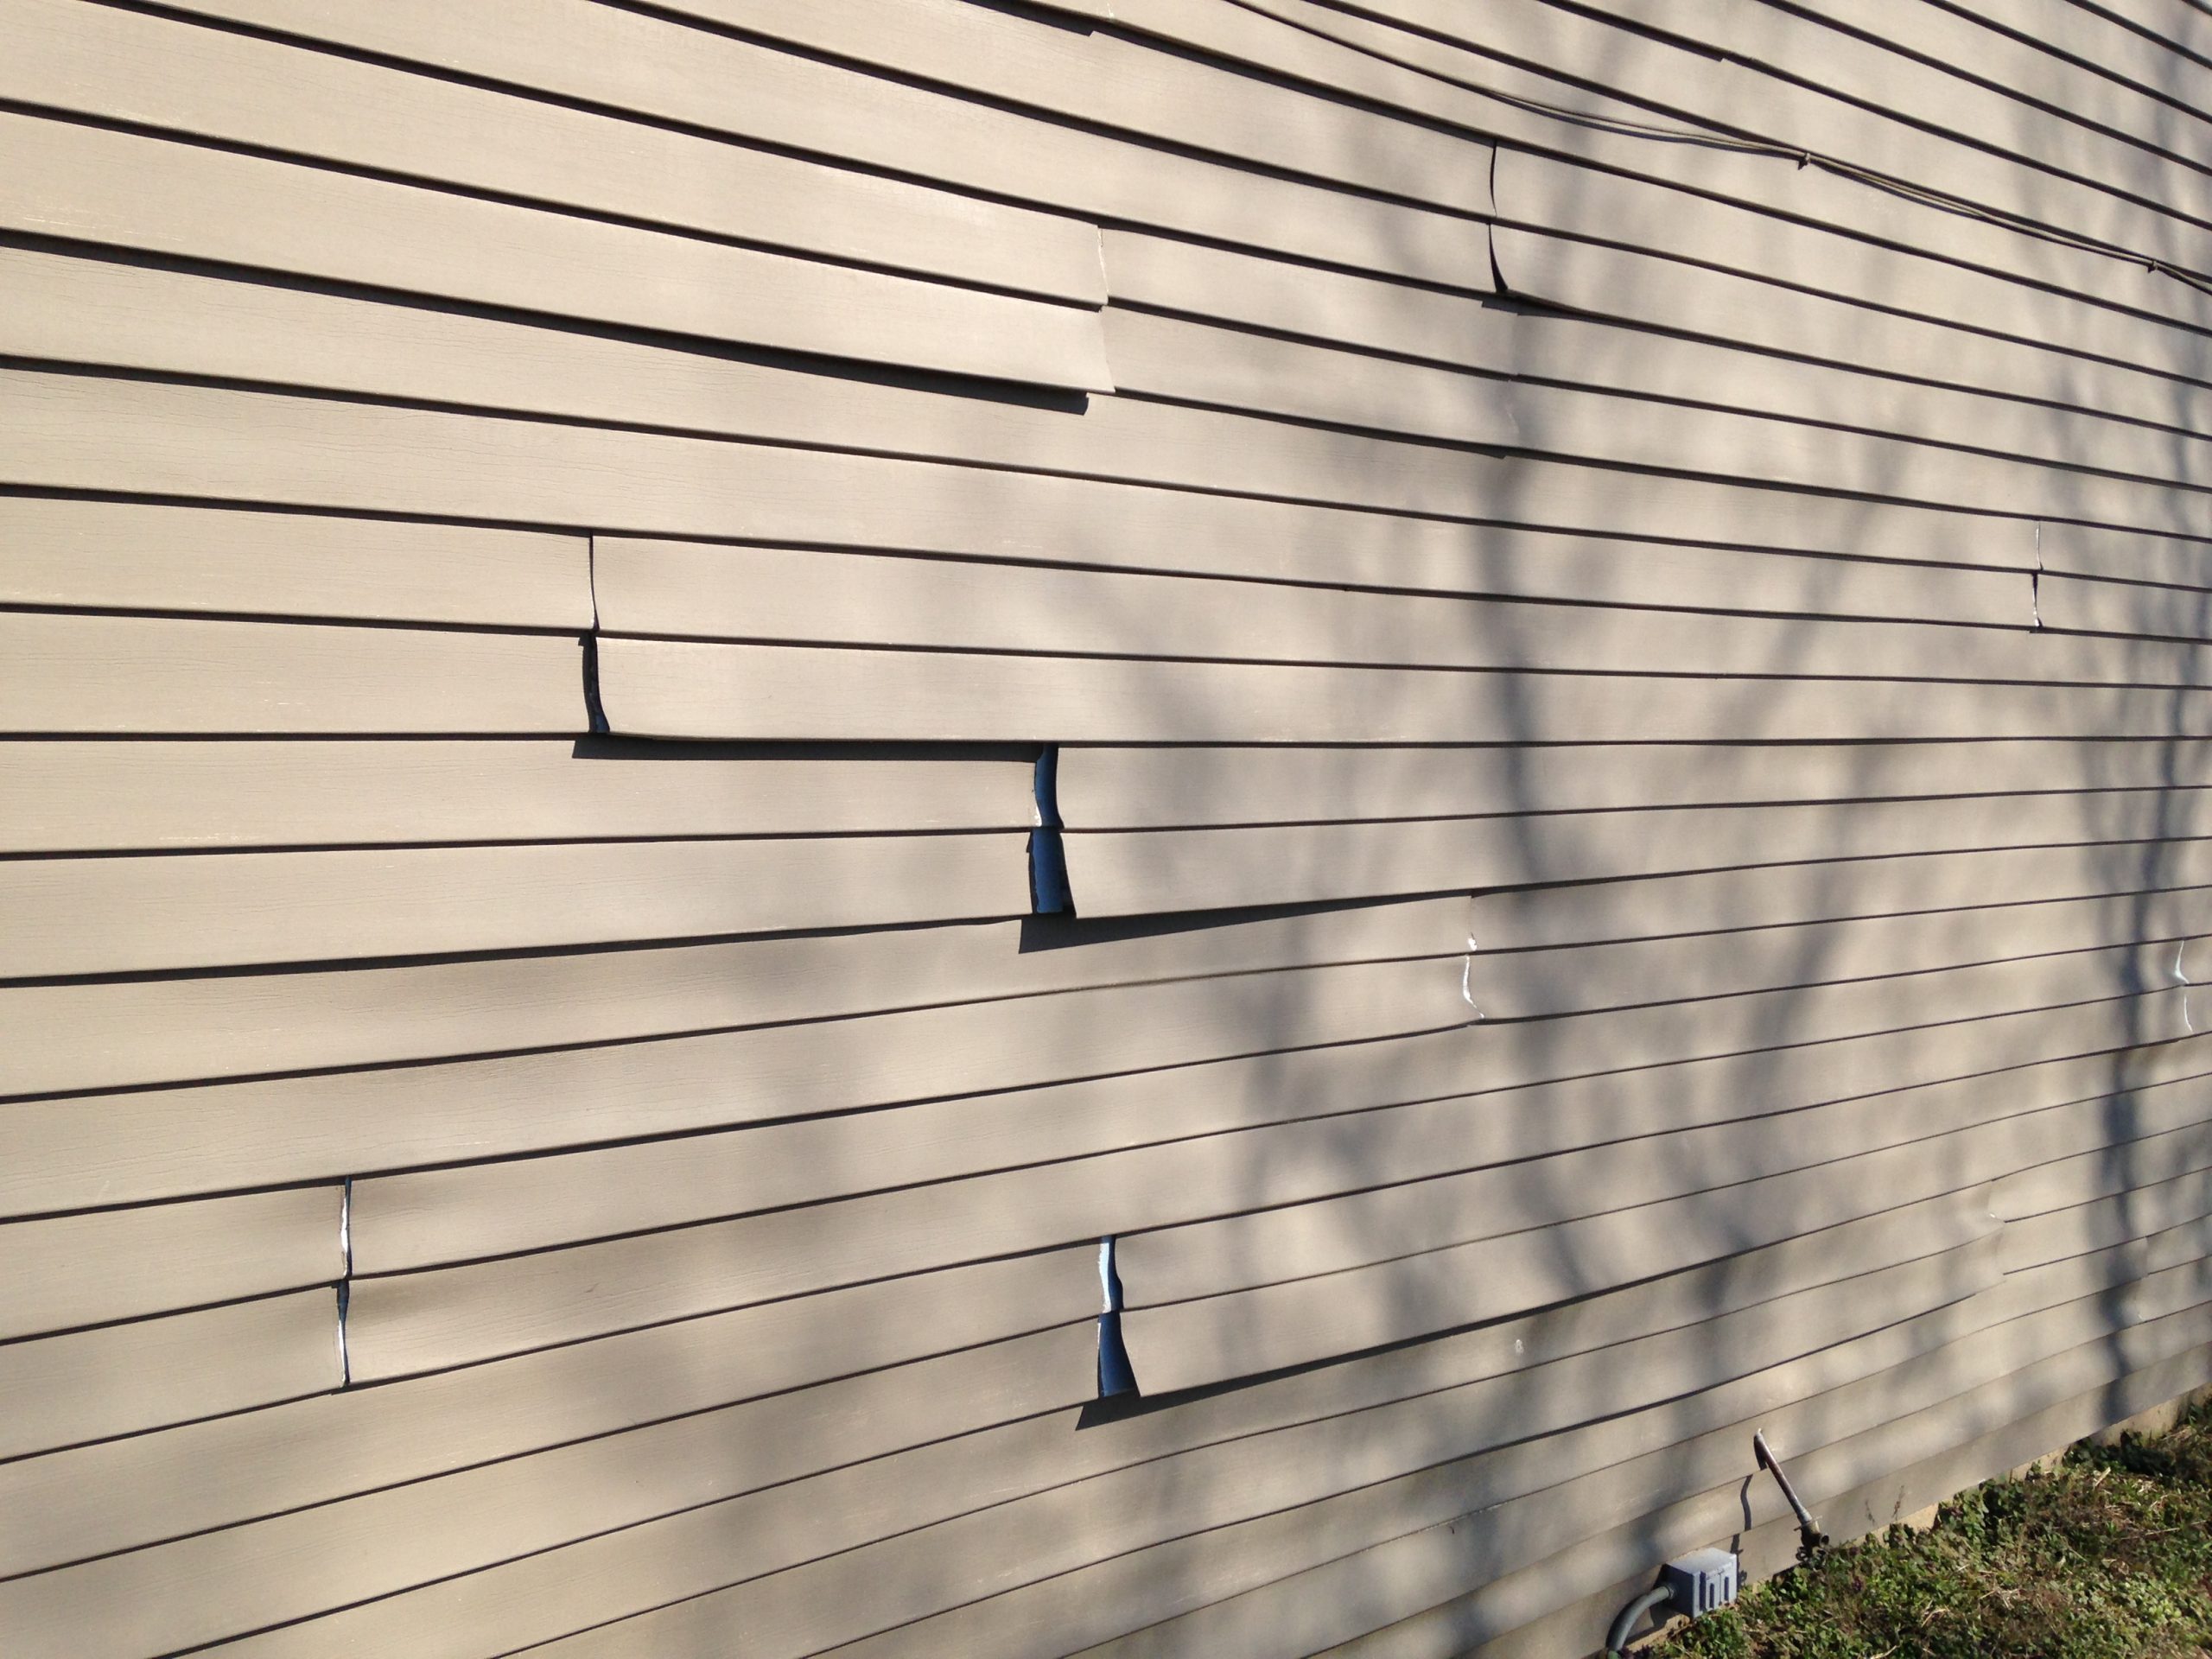
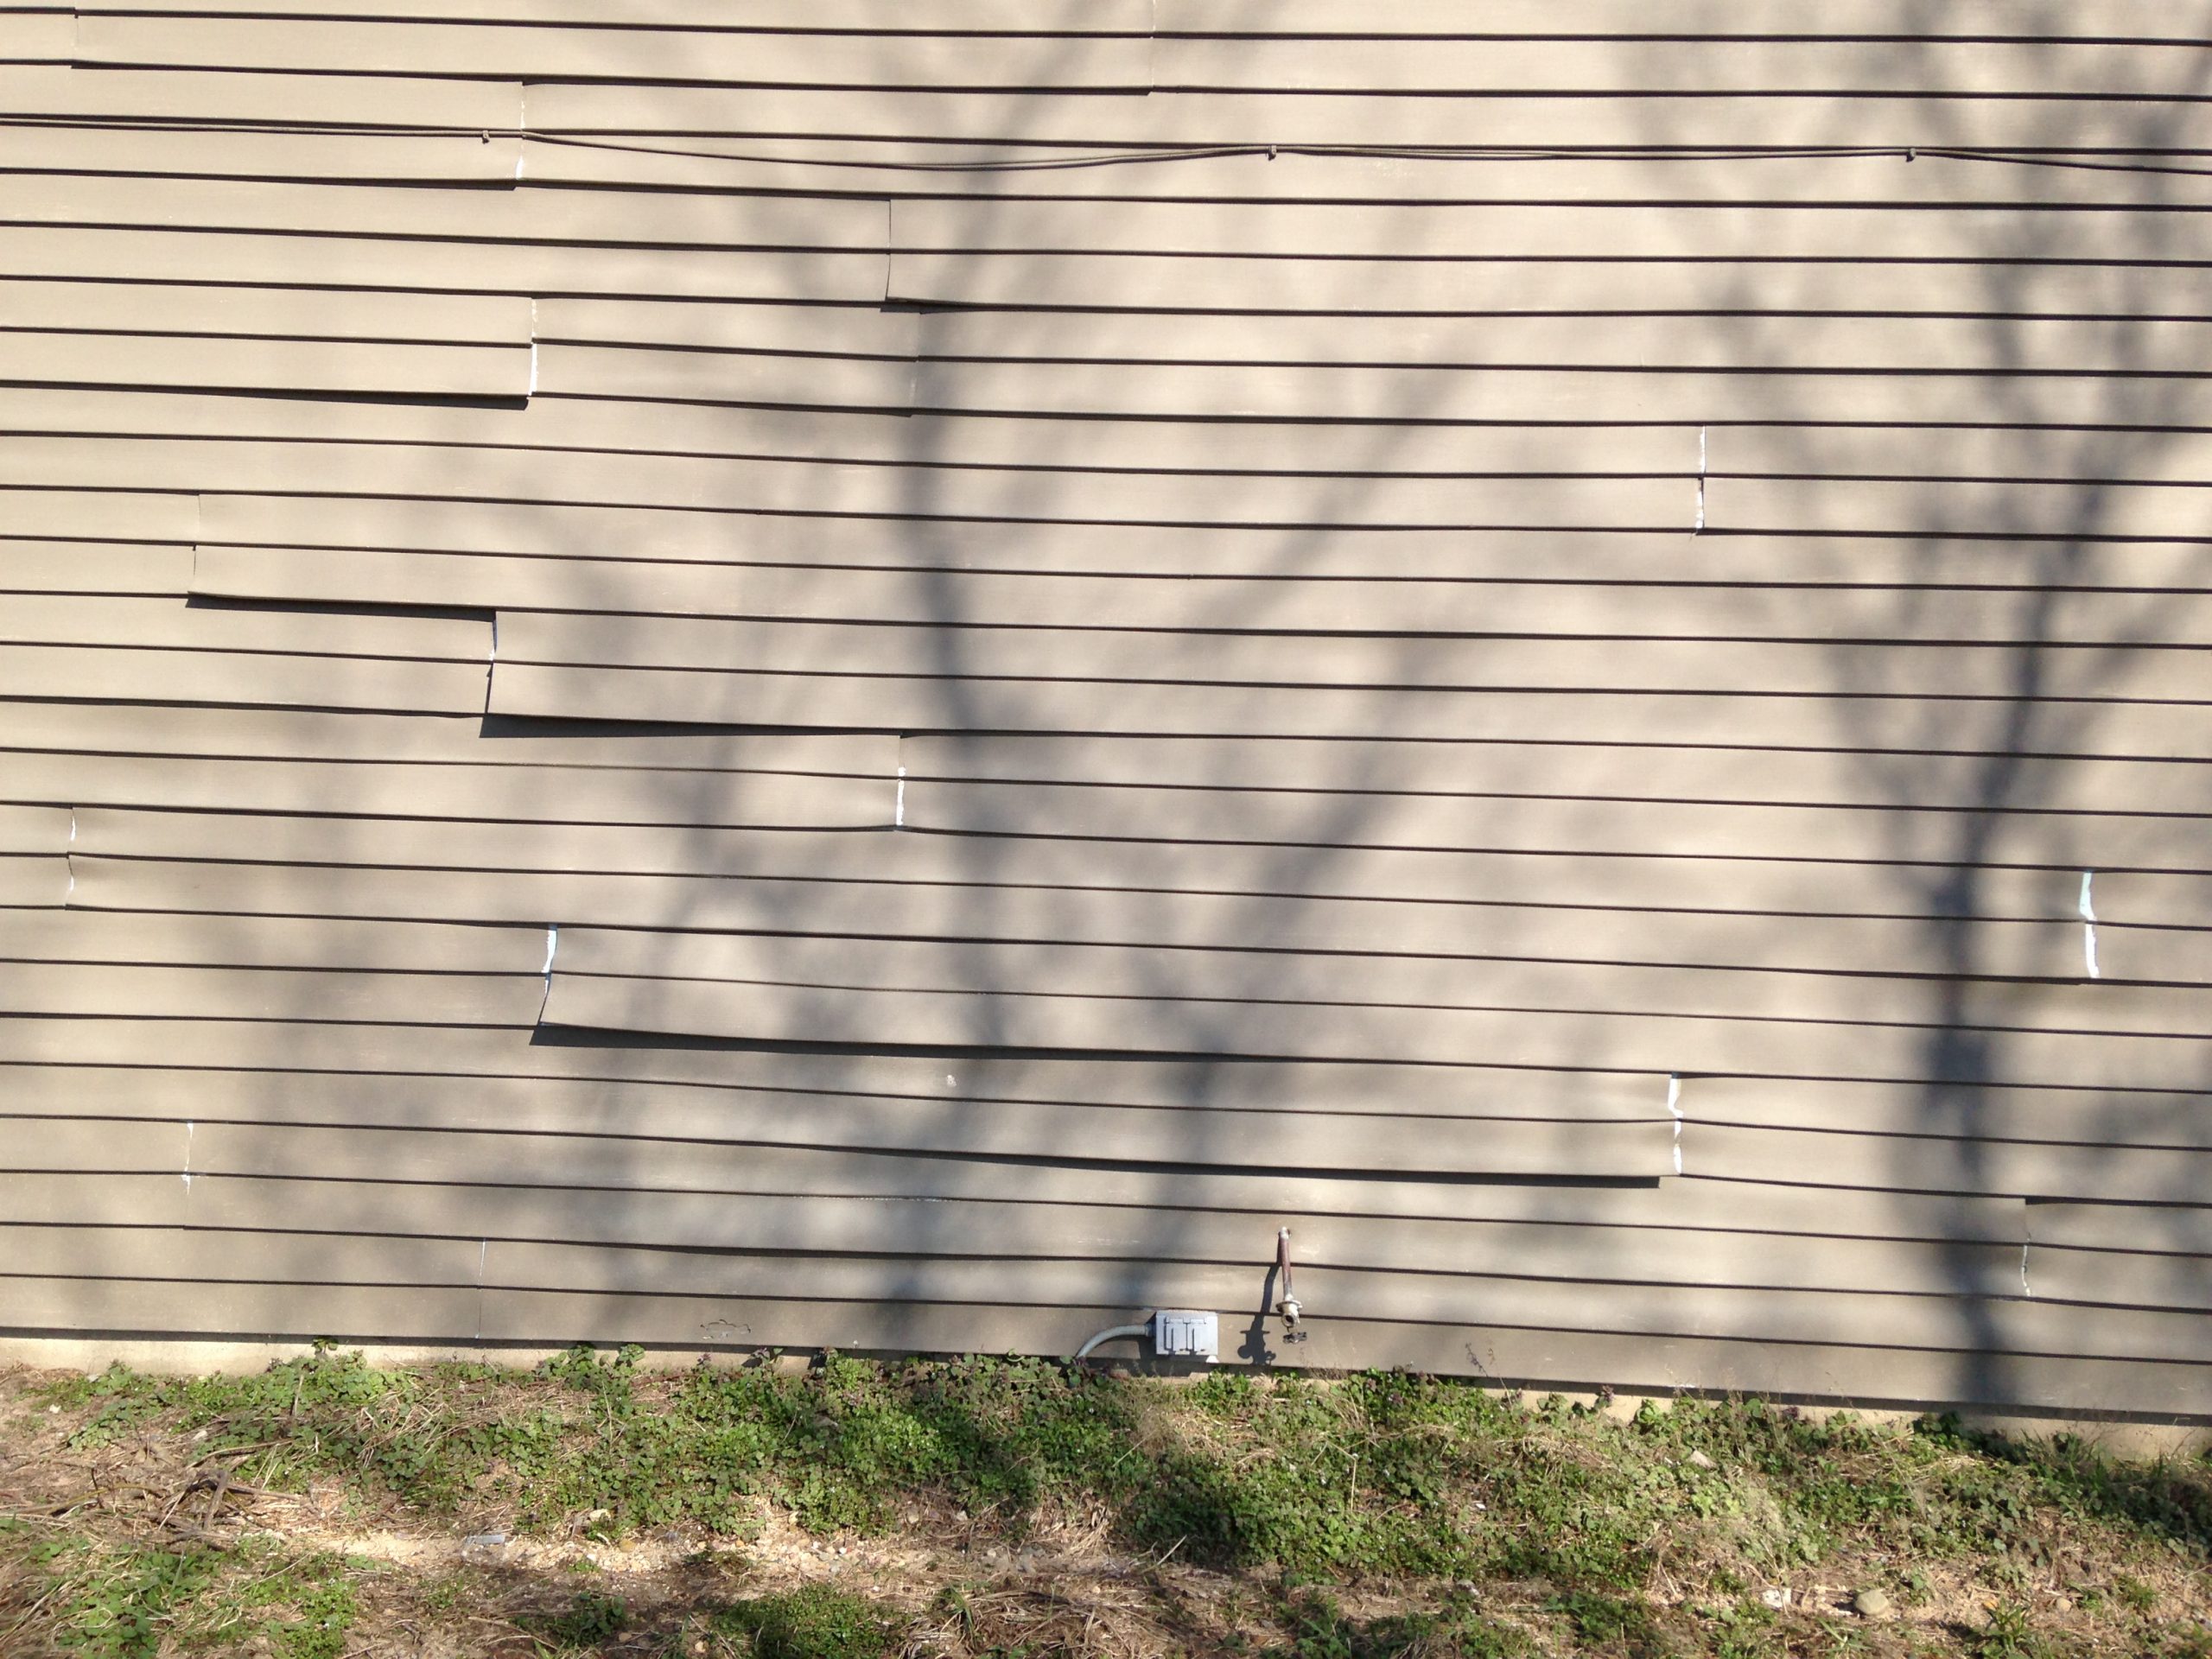
Below, we have a gallery showing you why you want to use vinyl safe colors! In the photos, the paint on the vinyl was simply regular exterior paint and a vinyl safe color wasn’t chosen. The new color was darker than the original vinyl and, in the sun, heated up so much that the actual vinyl siding warped, creating a problem that can only be fixed by replacing the siding. The lesson? Always choose vinyl safe colors!

APPLY IT and ENJOY: After cleaning and picking your paint (and vinyl safe color!) all that’s left is to do the work. Apply the paint on the cool side of the house, working out of direct sunlight. You can use a roller (we have various sizes), a paint pad, a brush (generally just for trim work), or even a sprayer (if you can safely do that without having overspray drift throughout your neighborhood!).
Painting the whole house is labor intensive. It will take you some time and it’s definitely a work out (you’re going up and down ladders all the time!). But, the good news is that once you’re done, you’ll be able to enjoy the benefits for many years to come!
If you decide to tackle a project like this, stop out at any RepcoLite, Port City Paints, or Snyder Paints location and let us give you the full rundown regarding method and tools!


 Dave Stegink is in his 4th year doing inspections full time for
  Kickout Flashing
 Water stains on a ceiling are depressing! They look terrible and worse, they are proof positive that there's a bigger issue at work in our homes. Maybe it's a leaky roof, maybe a burst pipe, or maybe we get lucky and it's just overeager bathers! On top of that, many of us have painted over a water stain only to see it almost magically bleed back through our new coat of paint. They're definitely frustrating. But the good news is, they can be easy to deal with. You just need to know the right way to approach the project and the right products to use!
 Selling your home isn't something most of us do on a regular basis. As a result, we don't always know the best ways to go about it. Personally, I'm always interested in what I should update and what's not worth the expense. Today, we're in the studio with realtor Roger Nyhuis from
 Mosquitoes are a giant pain in the neck! You just get your deck looking great and find that you can't even be out on it for more than 10 minutes at a time. And all of that time is spent running in circles, waving your arms, and trying to present them with a moving target.
 It's Spring and that means we're going to be working on our lawns soon enough. Is your lawn equipment ready? What do you need to do to make sure it's ready to go for the season?
We sit down with Brian Stacey from
It's Spring and that means we're going to be working on our lawns soon enough. Is your lawn equipment ready? What do you need to do to make sure it's ready to go for the season?
We sit down with Brian Stacey from