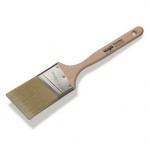
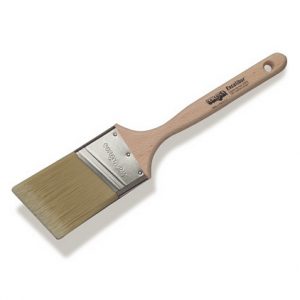
Over the course of the years, I’ve used all kinds of different brushes for my little fix-it jobs around the house. I’ve used cheap ones, expensive ones… brushes made for professional painters and brushes geared more for your everday homeowner- type needs. I’ve used all kinds of different brushes. Until I used the Corona Excalibur Brush. Once I used this brush, I quit trying other ones. In fact, I quit buying other ones. There’s no need. This is hands-down the best, longest lasting brush I’ve ever used.Continue reading
Author Archives: Dan Hansen
Worse Than the Disease?
 Have you ever paid attention during some of those “new Wonder Drug” commercials? You know, the wonder drug that’s supposed to completely relieve allergy symptoms? Yeah, the commercials usually show us a bunch of actors (ahem, I mean, real people who AREN’T actors) who are finally living their lives again thanks to this particular drug.
We see them running and jogging, exercising and hanging out with other folks their age. They’re driving convertibles and laughing and playing tennis and drinking fancy coffees. It’s amazing. Just days earlier, they had been curled up on the floors of their bedrooms and now their alive. Fully and completely ALIVE!
Well, the commercial usually goes on like that, but then, just before it ends, there’s that one fast-talking announcer who comes on to tell us about a few, minor side-effects. Oh, tiny things–things that are hardly worth mentioning. Insignificant-little-nothing things like sleeplessness, occasional headaches and the ever-popular uncontrollable and unpredictable bouts of vomiting and nausea.
Now, if that’s all the side-effects there were . . . maybe we’d be alright trying the drug. But the fast-talking announcer is usually just getting warmed up at that point. She goes on to explain that “in rare cases, users will experience dry mouth, bleeding gums, the loosening or losing of teeth coupled with a pronounced difficulty of saying words that have “th” in them. In ultra rare cases, patients” (notice how first the people are called “users” and now they’re called “patients”? Makes you wonder about the progression). Anyway, back to our fast talking announcer friend: “In ultra rare cases, patients may experience hair loss, liver damage, internal bleeding, immense weight gain and possibly death followed by loss of appetite.”
Wow. But usually, before we can ponder those horrible side-effects too long, the actors . . . I mean, the real, honest-to-goodness regular folks . . . come back on and tell us how none of that happened to them and how they’re finally living again.
Anyway . . . long description . . . but you’ve seen those before haven’t you? And if you have, you must have wondered, as I have, whether the cure is worse than the affliction.
Well, that brings me back to my point from the other day about Chlorine bleach cleaners on our decks. This is a typical example of a solution that’s worse than the condition it’s trying to remedy. See, many folks (and honestly, many home improvement centers) recommend deck cleaners that contain or ask you to add Chlorine Bleach. And while Chlorine bleach is a wonderful sanitizer and does a great job killing germs . . . it unfortunately also does a great job of killing all the trees and plants around your deck. It’ll take the natural color out of your deck as well as accelerate the corrosion of the nails, screws and structural hardware that hold the deck together. It kills or damages the naturally occurring lignin in the wood, causing the wood to deteriorate more rapidly and, to top it all off, the ionic structure of the Chlorine won’t allow it to penetrate into your wood. The water will–and after all, bleach is 99% water–but that really only makes things worse. The water penetrates and simply feeds the roots of the molds or algaes that are deep in your wood. Basically, it provides food for the things you’re trying to kill.
So that led me to urge you to lay off the Chlorine Bleach cleaning solutions when it comes time to clean your deck–you’re just likely to cause more damaging results than happy ones.
But, while that’s hopefully helpful information, it’s actually, kind of empty. Telling you not to do something or telling you about a product not to use is only half-helpful. The information’s only truly helpful if I supply you with an alternative–another product that can and should be used in place of Chlorine bleach cleaners.
Well . . . that’s the plan for today. See, while Chlorine Bleach is a bad, nasty and ultimately detrimental solution to cleaning your deck . . . Oxygenated Bleach is perfect.
First, Oxygenated bleach is safe for the wood of the deck–it won’t harm the lignin. It’s not going to cause the wood to break down and fail quicker than it naturally would. Also, it’s not going to bleach out the wood’s natural colors. It will clean away the washed out, sun-bleached gray look of your deck and it will restore those deck boards to something much more like their original cedar or brownish, red color.
Secondly, it’s safe for all the vegetation and plant life around your deck. With Chlorine bleach, all your landscaping needs to be protected at all costs. Even a little Chlorine bleach can bring about rapid death to plants. Oxygenated bleach doesn’t. It’s biodegradable and perfectly safe for most vegetation.
Thirdly, Chlorine bleach is a hazard to work with on your own account as well. It can bleach out your clothing, burn your skin, hurt your pets or kids. Oxygenated bleach won’t do these things and it’s safe around your pets and kids.
Add to this the fact that it actually works better than Chlorine bleach cleaners on a deck and it’s really a no-brainer. Why use a product that’s got a list of side-effects as long as your arm AND that will only work moderately well to fix the problem? Why use that when you could switch to a product with NO side-effects and which is 10x more effective?
So, when it comes to cleaning your deck, head to RepcoLite and we’ll steer you towards Defy’s Safe Oxygenated Bleach. It’ll cost about $21 for a container that will clean over 1,000 square foot, so it’s not going to break the bank . . . and best of all, it’s both easy to use AND effective.
Next time I’ll walk you through the deck cleaning project using a cleaner like this, and I’ll fill you in on a couple tricks that will make sure your project turns out great.
Father’s Day Ramblings

Well, we’re closing in on Father’s Day. Yeah. And on Father’s Day, every year, we have the same problems. In my home. The same problems every single year. And these problems are entirely brought about by me–by my failings as a person.
See, every single year, I make a big, profound display of telling everybody not to worry about presents. Because really, I’m an adult. I don’t need presents. I’m bigger than that. My reward is in knowing that my family loves me. I don’t need presents. So I tell them that. I tell them not to worry about it. I tell them to save the money. I assure them that they don’t need to worry about getting me anything . . . .
But the problems come about when they actually believe what I’m saying. See, when I say all those things . . . the sad little truth is that I’m lying. Oh, I say I don’t want presents, but what I’m REALLY saying is that I don’t want any CRUDDY presents. I want fun stuff. Video Games and electronics of all sorts. Things like that. Things that are wrapped in plastic and have anti-theft devices inside. Things with bubblewrap. Yes, I’m trying to sound big and adult and above the notion or need for presents, but inside, I really, really just want GOOD presents.
Well, unfortunately, my family doesn’t always clue in to this fact. No. They take me at my word and they don’t get me anything . . . and so when father’s day comes around and I wake up and don’t get anything . . . I usually get all pouty and I mope around the house until Tami says something along the lines of “Fine . . . I’ll go buy you your stupid present tomorrow!”
Well, when that happens half the fun is gone. And so I say that. I say, in my most adult and serious and honest voice, “No, no, no. I’m fine. I’m just being a crab. Besides, if you’d get me something now, half the fun would be gone because I complained so much. So really, don’t bother. I’m fine. Fine.”
Now, what she hears when I say something like that is this: She hears me say “I’m sorry for crabbing. I love the handmade cards I got and don’t need anything else. In fact, I don’t deserve a present and the fun would be gone anyway because of how I acted. So Don’t bother.”
That’s what my wife hears. And this is a lesson for all men and women out there about how differently we communicate. See, that’s what she hears, but if you remember what I said, you’ll realize how wrong she would be in interpreting it that way. See, what I actually said was, and I quote, “if you get me something now, half the fun would be gone” end quote. Now, do you see the difference?
She thinks I said “the fun would be gone” when in reality, I said, only HALF the fun would be gone. Now, maybe for you women listening, that makes no difference–maybe those two things mean the same things to you–but to a guy, there’s a world of difference. Let me explain: see, to a guy, what that means is that while half the fun would be gone . . . the other half of the fun would still be there… And half is better than none, right? I’d rather have half a dollar than no dollar. I’d rather have half a roast beef sandwich from Arby’s than no Roast beef sandwich. It’s not complicated. Half is always better than none.
See, the whole thing is code. It’s my way of saying, OK, go buy me something tomorrow–I know I was a jerk and I know that because of that I’ll feel bad about getting something. And I know that bad feeling I have will take away 50% of the fun I would have had. But I’m willing to sacrifice that 50% of fun in order to pick up the other 50% of fun the present will bring.
Really, the whole thing is very simple, when you break it down . . . but Tami just doesn’t get it and so that’s what happens on most Father’s Days. Oh, like I said, it’s my own fault. I know that. I know I’m being petty and childish and ridiculous. I know all that.
But that’s not the point. The point I wanted to make today is that this year looks like it’s going to be different. Oh, of course, I did the same thing I do every year. I made all the standard brush-offs when it came to presents. “Don’t get me anything–let’s just save our money” and other tripe like that. But this year, when I said those things I watched as as everybody looked at each other and winked and nodded. And that’s when I realized that they KNEW! They knew I was only saying that to sound like an adult. They knew I wanted presents!
I remember sitting at the table that night and almost rubbing my hands together: I was going to get presents this year.
But . . . . Yes, there’s a but. A big one. See, I thought this year would be different, BUT, a few days later we went to Target for some basic things and as I was walking through the store ahead of my wife and kids, I happened to turn around to ask them something and they all straightened up and acted like they weren’t doing anything. But I had seen them. Oh, I didn’t let on . . . but I started sweating . . . because I had seen them. I knew what they were doing: They were getting me my Father’s Day present.
Now, you’d think I’d be happy about this, but I have already told you: I’m a petty and small individual. And they weren’t standing by the electronics when I caught them. They weren’t standing by the Video Games. They were standing at some end cap display that was full of . . . are you ready . . . trophies. Yes. Trophies. They weren’t even metal trophies. They were that resin stuff and then painted to look kind of gold. They were trophies with a golf ball and some grass by it and the trophy said “Number 1 Dad.” They were $9.95 + tax and Caleb, as I stared at him, currently had one behind his back and was trying to pass it to Tami so she could slip it into the cart without me seeing it.
Well, I let that go. I don’t know if they bought it or not. I think it found it’s way back to the shelf, but I won’t know for sure until Father’s Day.
As the days went by, I forgot about it. It’s not a big deal–it’s just Father’s Day–and I went about my normal life. Until Caleb asked me if I had any scrap hunks of wood he could nail together. Well, I do . . . but I was curious what he was going to build. Oh, he was a little embarrassed and nervous to tell me but then he confided that he was going to build me something. With wood scraps and roofing nails. For Father’s Day.
Well, you can’t argue with a little boy building his dad a present out of wood scraps and roofing nails–oh, you can wish it was an ipod, but you can’t fault the little guy for trying–so I pointed him in the direction of the wood heap and told him not to poke his eyes out.
He hammered away for a while and then emerged with something that he decided was for him instead of me . . . and again, life went on. Time passed and I forgot about Father’s Day and presents and trophies and wood scraps . . . until the other night.
See, Tami and the kids were running a garage sale with my sister and they were all there the other day. As we were sitting around the table that night, eating dinner, Caleb and the kids confessed that they had spent much of their time at the garage sale . . . shopping. Caleb took a bite of his hamburger and put it down and said,
“Dad, I looked and looked, but didn’t find anything for you.”
I looked at the boy and thought he was joking. He didn’t seem to be. So I asked a clarifying question: “You looked for things for me at our own garage sale?” He nodded.
I looked at him a little longer and then asked another clarifying question: “You know what a garage sale is, right? You know that’s a place where people bring the junk they don’t want, put $.25 on it and hope somebody takes it, right?” He nodded.
“And you didn’t find anything for me?”
He shook his head. Well, I breathed a sigh of relief–last thing I wanted for Father’s day was an old 70’s lamp I was trying to get rid of. “Oh, don’t worry about it,” I said, “I don’t need anything anyway.”
Well, as I said in the beginning, we’re closing in on Father’s Day . . . and I have no idea if I’m getting anything or what I could be getting. But I’ve changed my mind on whether it’s important or not. It’s been fun watching their little minds work as they try to find something they can afford that they could give me. And 10 years from now, I’d rather have that #1 Dad trophy or that hunk of wood with nails on it sitting on my shelf than a hundred ipods. But you know, guys, in case your listening . . . I wouldn’t mind both . . . .
Caring for Exterior Wood Doors
 Exterior wood doors can be a beautiful addition to your home–a tremendous step up in appeal and appearance from a typical steel or fiberglass door. But, along with the added beauty comes added maintenance. Fortunately, this maintenance doesn’t need to be painful as long as you keep up on it!Continue reading
More Unique Headboards
I’m kind of frustrated. See, I would love to try some of these headboard ideas I’ve been writing about in my own home–but I can’t. Or really, to be more accurate, there’s no point. The beds we already own are adequate and they don’t lend themselves to this project. So I’m kind of frustrated. But, I take some comfort in the fact that I can still write about these and get you thinking about them and hopefully convince some of you to give the ideas a try.
Anyway, I’m going to breeze through a few ideas today with only brief descriptions or information. I think these particular ideas are pretty basic and don’t need too much explanation.
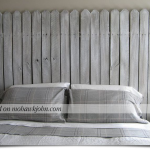
PICKET FENCE HEADBOARD
It’s just like it sounds. Buy either a section of Picket Fence at the lumber yard, or build one specifically. Since you’re using it inside, you could easily build it out of regular pine and then simply prime and paint it for that clean white look.
If you opt for this . . . don’t let yourself leave the motif without completing it. You’ve installed a picket fence in your bedroom . . . that means you need lots of greenery and “outdoorsy” stuff. Possibly sky blue walls, possibly (in a kids room) a tree mural. Maybe you need to wind some “greens” or “vines” through the slats of the fence. Whatever you do, have fun with the theme and build on it.
CHANGING SCREEN HEADBOARD
Here’s another idea that I think has a ton of potential. Buy or get your hands on (lawfully, of course!) one of those changing screen things you see at home decor stores and then it’s up to you how creative you can get.
Some of these screens are frames with scrolling and winding metalwork. That’s fine. They can be mounted directly behind the bed as is. I’ve seen other screens that are like the screen on the right. This one had a uniform brown canvas backer that was removed and replaced with the black and white fabric.
Again, whatever you do is up to you . . . the point is . . . think beyond what you immediately see!
WOOD SHIM HEADBOARD
I don’t know exactly how this one was done, but it seems to be more about patience than skill. It’s made entirely of those little wood shims can pick up at any lumber yard. They were probably sanded (though not necessarily) and varnished when the look was completed.
However they were put together, the look is a weird combination of modern . . . and warm and woodsy . . . you could really go any direction with something like this.
And there you go . . . a bunch of ideas for headboards. And the point, above all, is to remember to think creatively when a need arises. When you need a new headboard for a bedroom, you could jump in the car and drive to the home decor store, pick one out, and call it good. Or, you could get creative. Maybe you’ve already got everything you need for the perfect piece.
Old Shutters Headboard

Picture from M.E. Beck Design, Inc. at mebeck.com
In keeping with some earlier posts about headboards, here’s another idea worth your time and attention: what about using old shutters?
This idea works especially well if you’re interested in a distressed look (as we see in the picture at the left). If that’s the look you’re going for, it doesn’t matter if the shutters are old, chipping, faded or even broken (note the second white shutter). All of those things play into “the look.”
So, whenever you’re wandering through a large flea market or a mission store . . . keep your eyes open for little treasures like these!
VARIATIONS
- BUILD YOUR OWN. Now, if you can’t find some plantation shutters like the ones above, don’t worry–you could still imitate the look with some very simple exterior shutters. And if you can’t find any wooden ones for sale, you could easily build your own. Just take a look at the picture to the right for inspiration. The shutters don’t need to be complicated. Just create some shutters, finish them in whatever style appeals to you and mount them.
- MIX and MATCH. Don’t be afraid to combine headboard ideas into one. For example, an obvious combination would be to start with 1 old window and then install a shutter on either side of it. Go crazy and complete the look by building a small flower box underneath the window with greens or real potted plants.
Whatever you do, as with all these ideas, have fun. Don’t jump at the first idea that crosses your mind. Think about it for a while . . . turn it over in your brain . . . and you’ll be surprised how creative you really can be!


