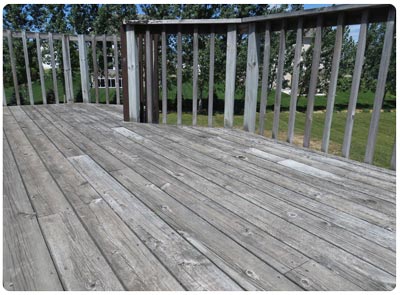
 “We just bought a new house and the deck looks terrible! It’s gray and faded. How do we get it ready for a new coat of stain?”
This is a question we hear all the time–in one form or another. Sometimes, it’s about a deck that’s never been stained or protected. Other times it’s about a deck that has been stained, but so long ago that you can barely tell.
In either situation, people are concerned about how to get the deck looking good again. Some even wonder if they can.
Well, the good news is that yes, in most cases, you can completely revitalize your old deck. It’s just a matter of knowing the right steps and using the right products.
So, here’s the scoop:
Step 1: Check for Rotten Boards
The first step in any deck project is easy: look at your deck. Very carefully. Check the wood over. If it’s rotting, splintered, falling apart, or full of knot holes you’ll have to ask yourself a tough question: is it even worth trying to save this?
Stains will protect your wood and give it some water repellancy, but they won’t turn something that’s rotten into something that’s sound! The hard truth is that some decks just aren’t worth trying to save. It’s better and more expedient just to start over.
So check your boards over. If some need to be replaced, do it. If more need to be replaced than not, then consider building a new deck.
Step 2: Sweep it Off
Once you’ve looked it over and either have replaced the boards that needed it or decided that the deck is sound (even though it’s currently gray and ugly!), then it’s time for step 2: Sweep it. Yes, it’s that simple. Brush off the leaves, buds, acorns, branches and whatever else has collected there.
Step 3: Apply the Cleaner
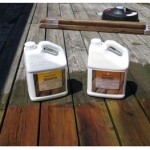
Next, it’s time to start the actual work of cleaning the deck. At RepcoLite, we recommend two different cleaners depending on your situation:
RESTORE from Benjamin Moore: This cleaner’s for old, weathered wood that either has no stain on it or so little as to be completely negligible. This cleaner will restore your old wood to a nearly new look.
REMOVE from BENJAMIN MOORE: This cleaner’s for decks that still have a noticeable amount of stain on them. REMOVE will . . . remove . . . that stain. Now, we want to clarify that REMOVE will work well on transparent and semi-transparent stains. It’s not designed to remove solid color stains from your deck.
Whatever cleaner is appropriate for your situation, the application is the same: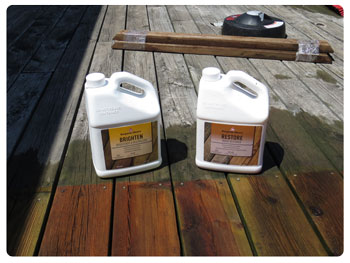
A. Mix it with water according to the label instructions.
B. Mist your landscaping and siding (near the deck) with water to protect them.
C. Spray the cleaner onto the deck with a garden sprayer.
D. Wait 10 – 30 minutes depending on the condition of your deck. And be sure not to let the cleaner dry out in this step! If necessary, mist more cleaner onto the deck to keep it wet.
E. Scrub the boards with a good scrub brush in the direction of the grain. This is an important step! The better you do here, the more effort you put in, the better your end results.
F. After scrubbing the deck, rinse it clean with a power washer or a garden hose. Be sure to give your plants and siding a quick rinse as well!
Step 4: Apply Brighten
Once you’ve rinsed the deck, you’re likely going to be very excited at the results you’re seeing. And you’ll be tempted to quit and wait for the deck to dry. But don’t do that–not just yet. There’s one more step: you need to apply BENJAMIN MOORE’S BRIGHTEN to the boards. This will neutralize the cleaner that you just rinsed off and will also brighten the boards considerably.
Application is essentially the same as the cleaner and should be done immediately after cleaning the deck.
Mix it according to label instructions, mist the landscaping and siding, spray it onto the deck, let it sit, scrub it around, and then rinse it off.
Step 5: Let it Dry
And you’re done! With the cleaning step, that is. All that’s left before you apply a stain is to let the deck dry. We recommend waiting at least 3 good drying days. And by “good drying days” we mean days without rain. Stain needs to be able to penetrate into the wood of your deck to perform. If the deck is damp, the stain can’t penetrate as well . . . and problems usually follow! So let it dry.
And that’s pretty much it. Cleaning an old deck and getting it ready for stain may sound like a complicated process or a long project, but it’s not! The work goes quickly and, on the right day, can actually be a great 2-3 hours spent outside. And the results you’ll get will be more than worth it.
If you’re still not convinced, check out this video we made last summer when we sampled the Benjamin Moore cleaners. And if you’d like more information about decks and what’s required to get them ready for summer, why not give a listen to our Color Me Home Podcast all about decks! You can listen on your computer or download it and listen to it later on your phone or any mp3 player. Check it out!
And here’s our video:

 During the discussion about porches, Dan suggested that the famous porch on the Grand Hotel on Mackinac Island was painted blue. He was adamant. Betsy was, of course, skeptical. She offered to check with a “reliable source”, who turns out to be her father. Who turns out to be the supplier of much of the paint that’s used on the Island. Who confirmed that Dan was indeed wrong. The actual color on the huge covered porch of the Grand Hotel is called “Grand Hotel Porch Green”.

 We ended this episode discussing the importance (and ease!) of simply doing a little cleanup around your house. Sure, this is pretty obvious, but we wanted to highlight a couple things that might make this easier for you. First off, as we mentioned above, when it comes to cleaning your vinyl siding, we recommend Jomax. It’s a concentrate you mix with water and it’s designed to help you easily remove tough dirt and stains. Mix it with a little bleach and it will kill mold and mildew fast! (Just watch out for your plants and landscaping . . . or you’ll be in big trouble. Remember: we warned you!)