


Last week, I had the opportunity to go through the Meyer May House in Grand Rapids, a home designed by America’s premier architect, Frank Lloyd Wright. And while touring the home is a great way to spend an afternoon, it’s also an experience from which we can draw hundreds of design and decor lessons and inspiration! I wrote in a previous post that one of the lessons I came away with was that it’s OK to buck the trends–OK, but not always easy (as someone pointed out in the comments). If you’d like to read that post, you can find it here.
A second lesson I came away with is this: Strive for Form AND Function! So often when we’re designing a new home, planning a remodel, or simply redecorating, we run into situations where we find ourselves believing that we have to select one or the other: form over function OR function over form. Occasionally we buy into the idea that this room or that architectural element in our home is either going to look good OR be functional. One or the other. Either we sacrifice looks for practicality, or we sacrifice function for beauty.
Frank Lloyd Wright refused to do that. Everything he designed took into account both design and function! He never compromised one for the other. It was always a marriage of the two.

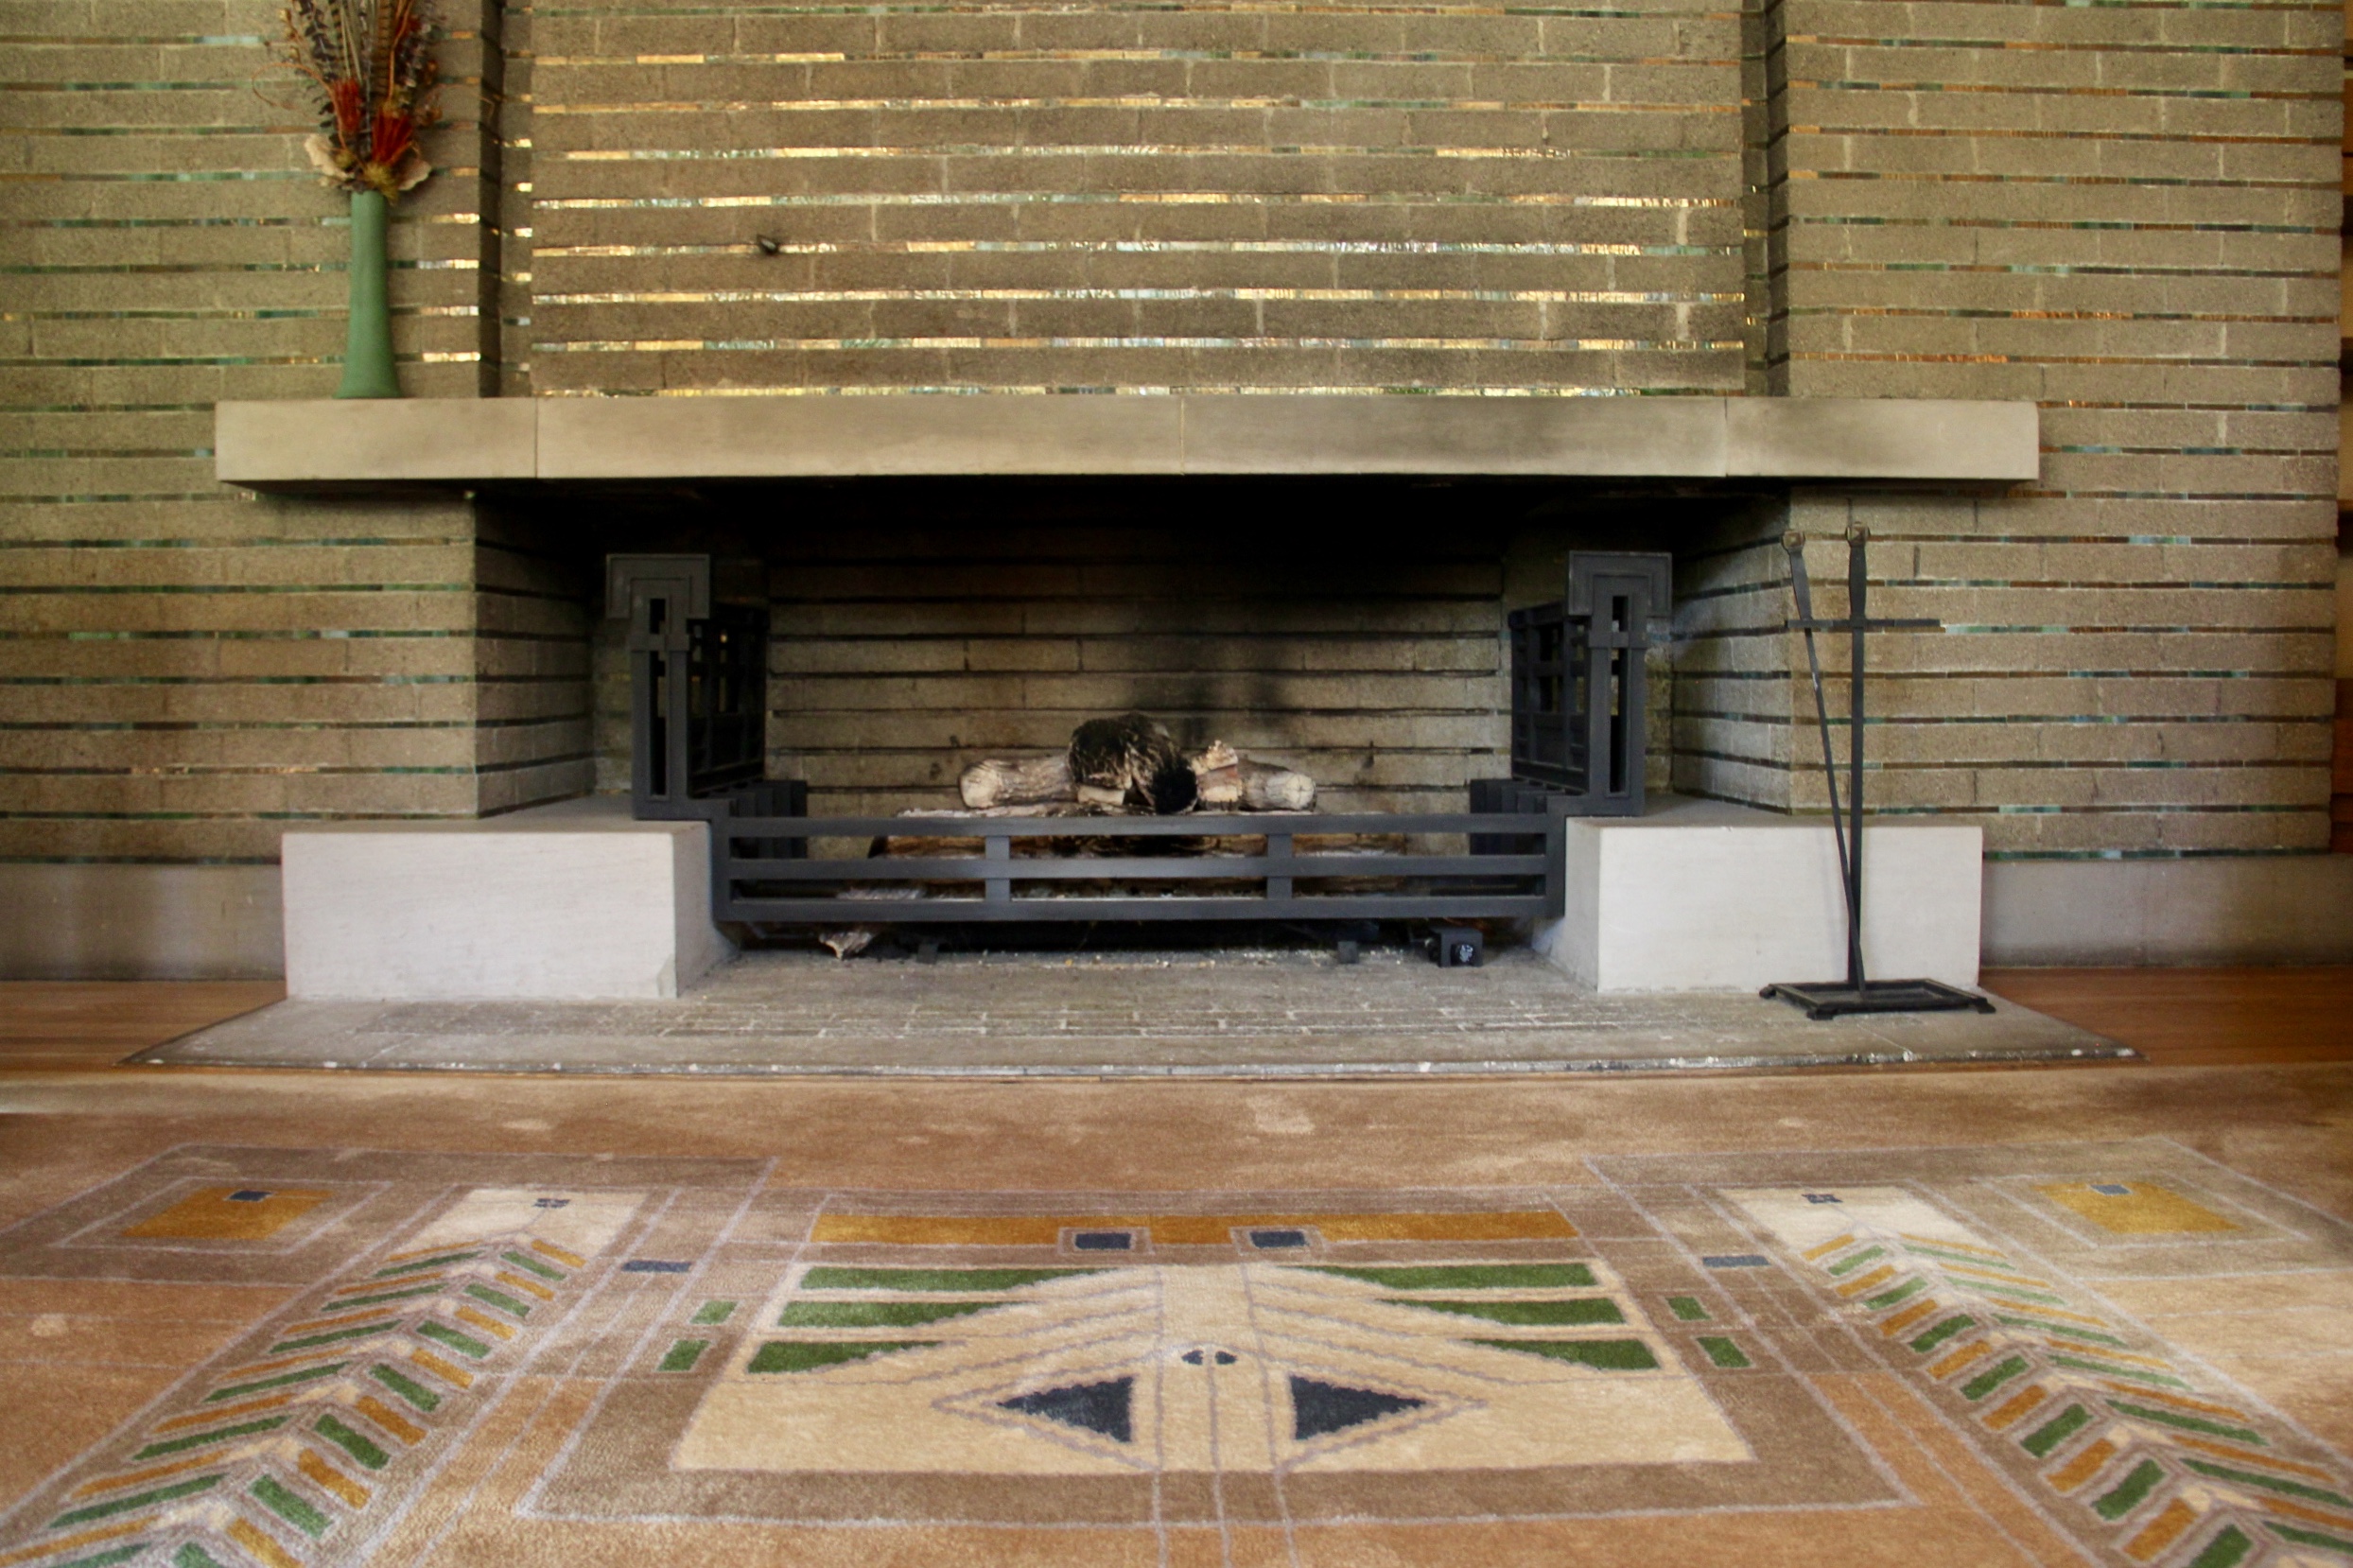
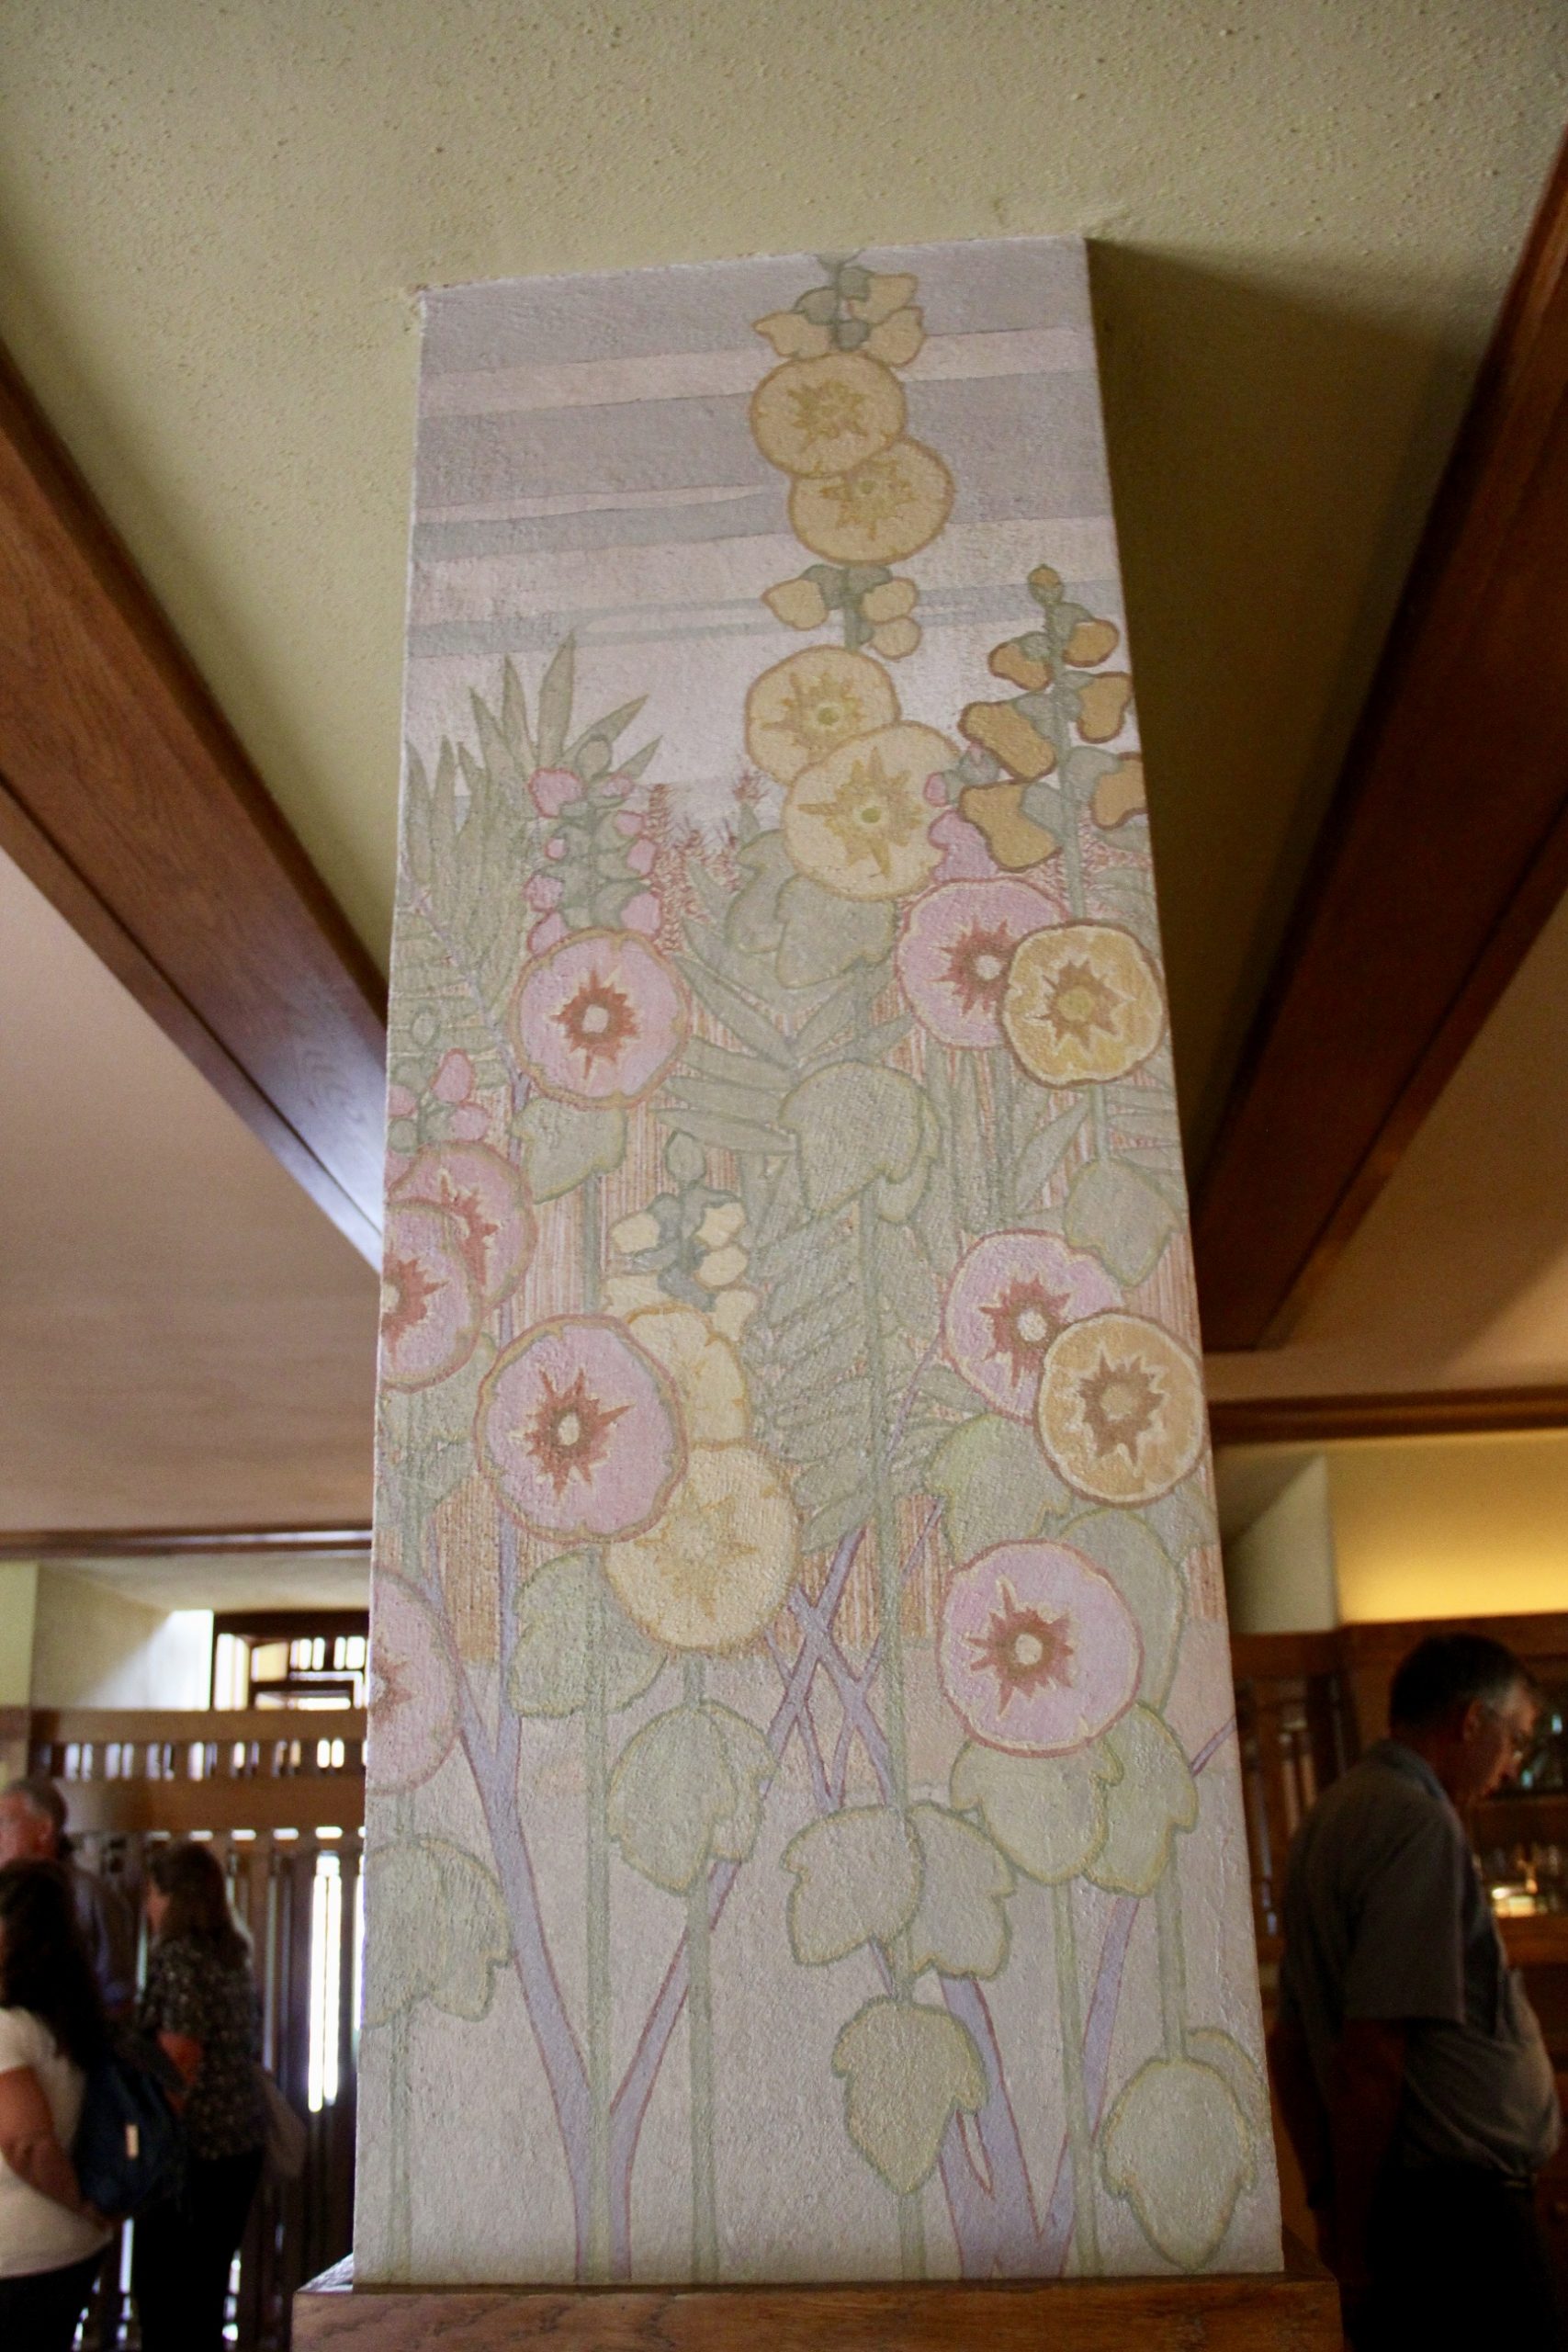
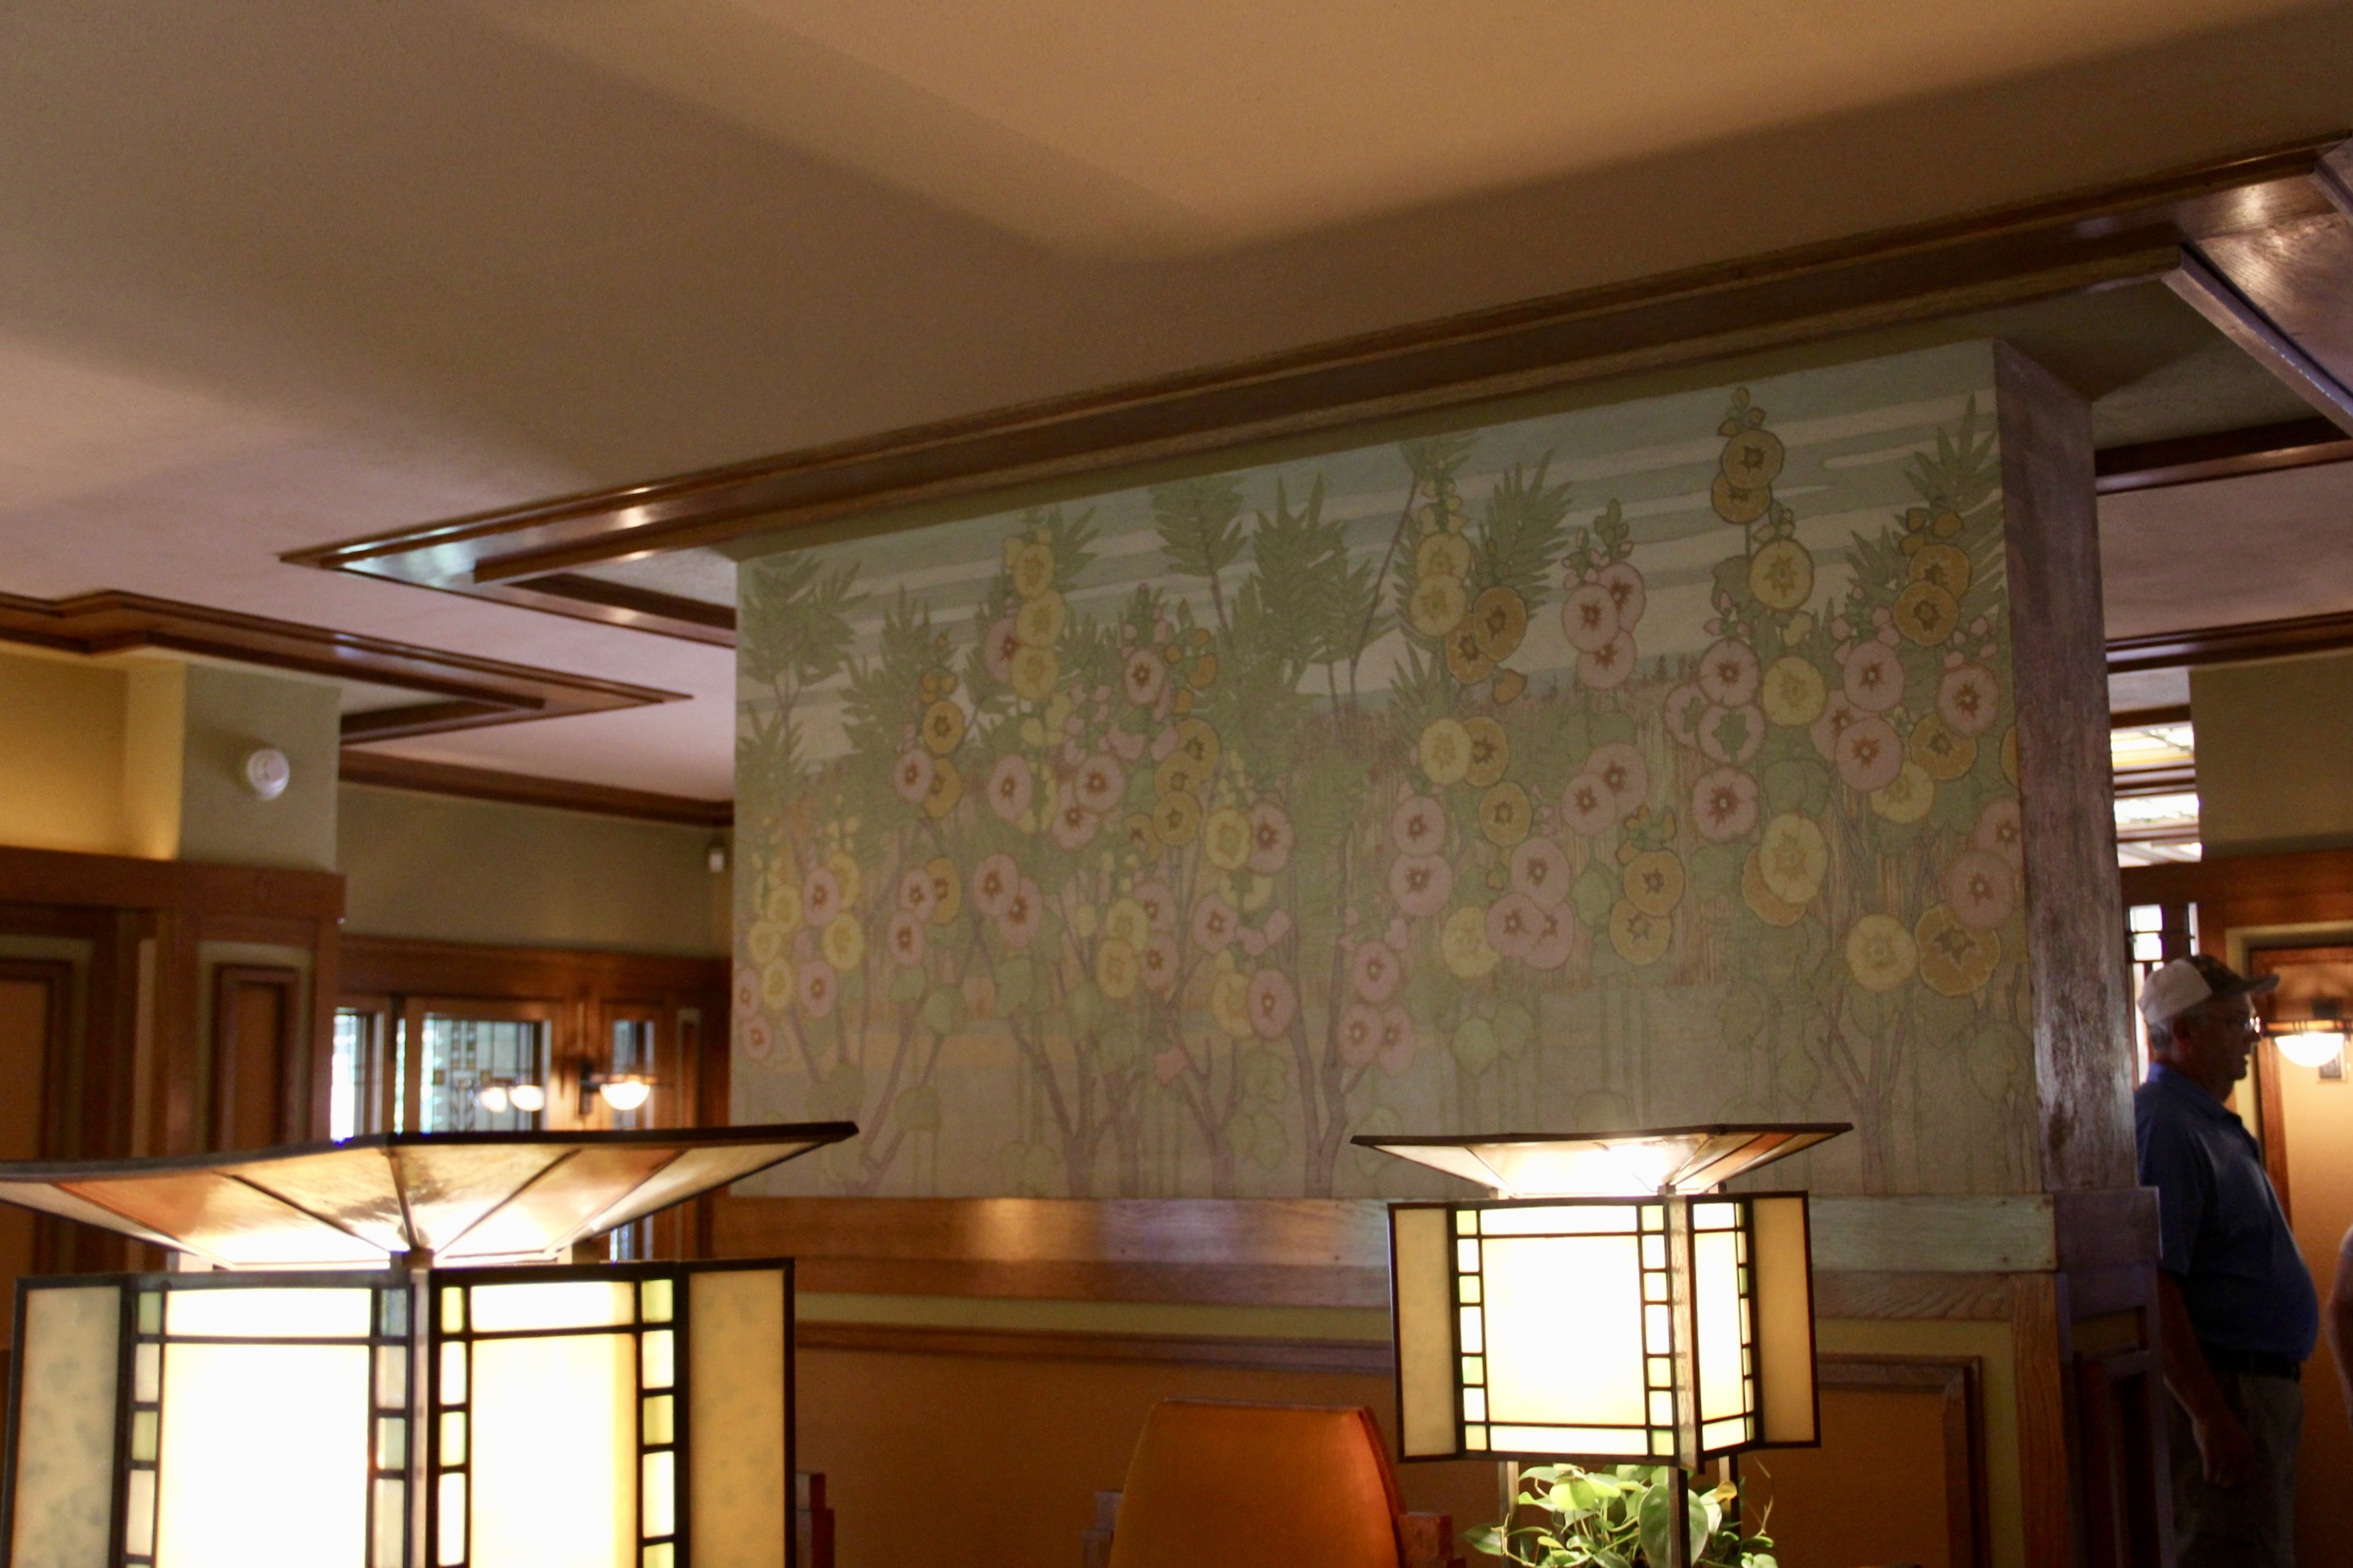
For example, in the picture above, you’ll see a load bearing wall between the dining room and the living room. It’s a necessary architectural element. And an unfortunate one at that: a wall that interrupts the open floor plan of the Meyer May House. However, rather than willingly sacrifice form for function, Wright has the wall painted with a beautiful mural that mirrors the flowers and natural beauty that pours in through the living room windows. The end result is an element that adds beauty and design to the home while at the same time performing its necessary function! A perfect marriage.
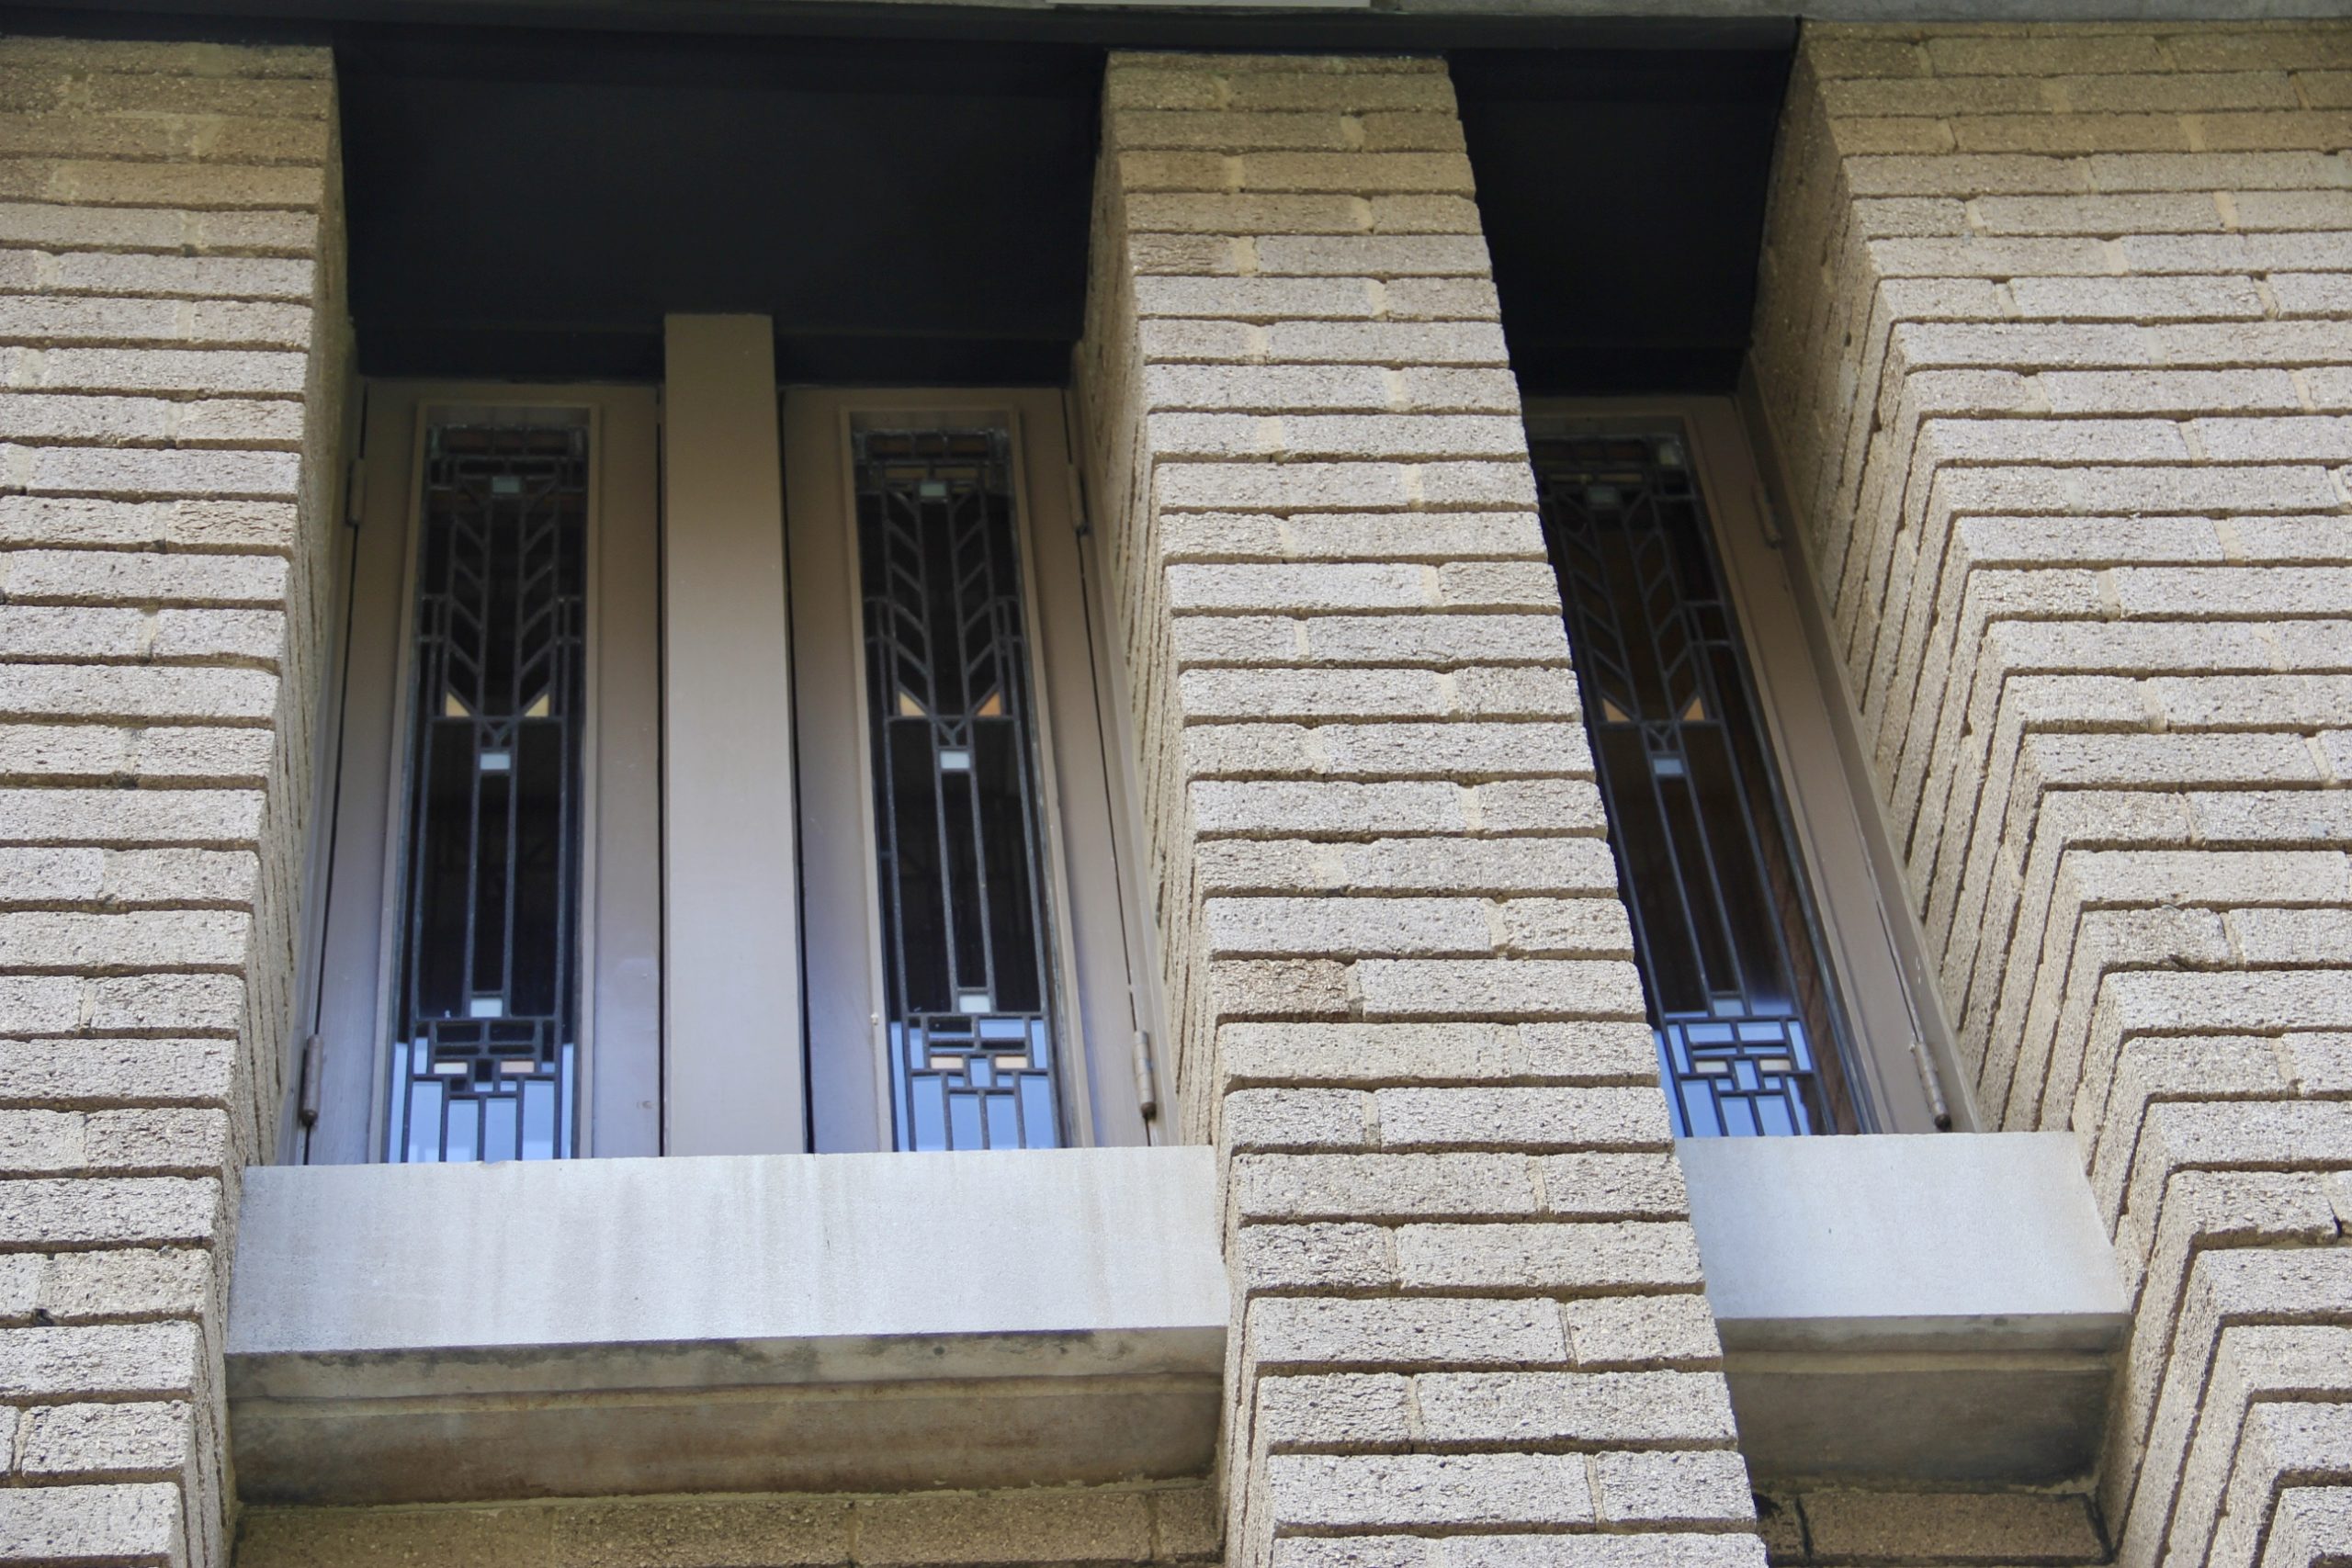
Also, the foundations of all the other houses in the neighborhood are standard cinder block foundations. Wright hated that look. A foundation is necessary, of course, but it that doesn’t mean it needs to be ugly or plain. And so the foundation of the Meyer May house actually accentuates the overall design of the house. It’s a functional element that actually adds to the design. Form and function once again.
And so in our homes we should never resign ourselves to having to live with certain architectural elements that are less appealing than we’d like simply because “we have to have them”. Get creative and find ways to bring beauty even to these areas. (And paint’s a great place to start!)
For example, I have an exposed steel rafter that runs across my living room ceiling. It’s an architectural element I don’t particularly enjoy! But, rather than leave it painted black and boring, I decided to get creative. I painted it with a metallic paint and then installed LED lighting across it. Suddenly the element that detracted from the look of my living room became something of a conversation starter, adding ambiance and even beauty.
So never willingly give up form for function. You can have both! And don’t forget that it works the other way as well. Don’t create beauty with limited (or no) function.

A great example of this is the dining room table in the Meyer May House. It’s a beautiful table that can be lengthened or shortened as necessary to accommodate the May’s guests. What makes the table somewhat unique are the pillars with electric lights that are affixed to the four corners. These pillars make up a integral aspect of the table’s overall beauty and design. However, they’re not just beautiful. They’re also incredibly functional.
Here’s why: in typical situations, electric lights set up in this manner would impose a serious limit on the function of the table due to the cords. Sure, the cords could be hidden in the columns, but what about when the table had to be lengthened or shortened for a dinner party? The columns are affixed to the table. At some point, the cords would be exposed, right? And that would severely limit both the beauty and the function of those attached lights.
Wright wasn’t willing to make the compromise, so he designed a table that somehow can be lengthened and shortened while still keeping the electrical cords powering the lights in the pillars from being exposed.
Creativity, brilliance, design, and planning can overcome many obstacles! Remember that in your decorating! Few of us are as brilliant as Frank Lloyd Wright, but we can still come up with solutions to keep our homes and our rooms beautiful and functional!


 Trying to discuss and convey the influence, importance, and the style of an architect like Frank Lloyd Wright is the work of biographers, not bloggers. There’s no possible way to do any justice at all to the man in a few short paragraphs. But after a trip to the Meyer May House in Grand Rapids, Michigan, I find myself wanting to give it a try.
The Meyer May House, located at 450 Madison Ave SE in Grand Rapids, was designed by Frank Lloyd Wright for Meyer May and his family in 1908 and construction was completed the following year.
In 1985, a major restoration was begun and by 1987 the home had been meticulously restored to Wright’s original vision. Today, it’s open to the public for free tours and is truly a great experience. Knowledgeable guides lead you through the home, pointing out every detail that Wright incorporated into his design. When the tour ends, you’re left with a better understanding of the architect’s brilliance.
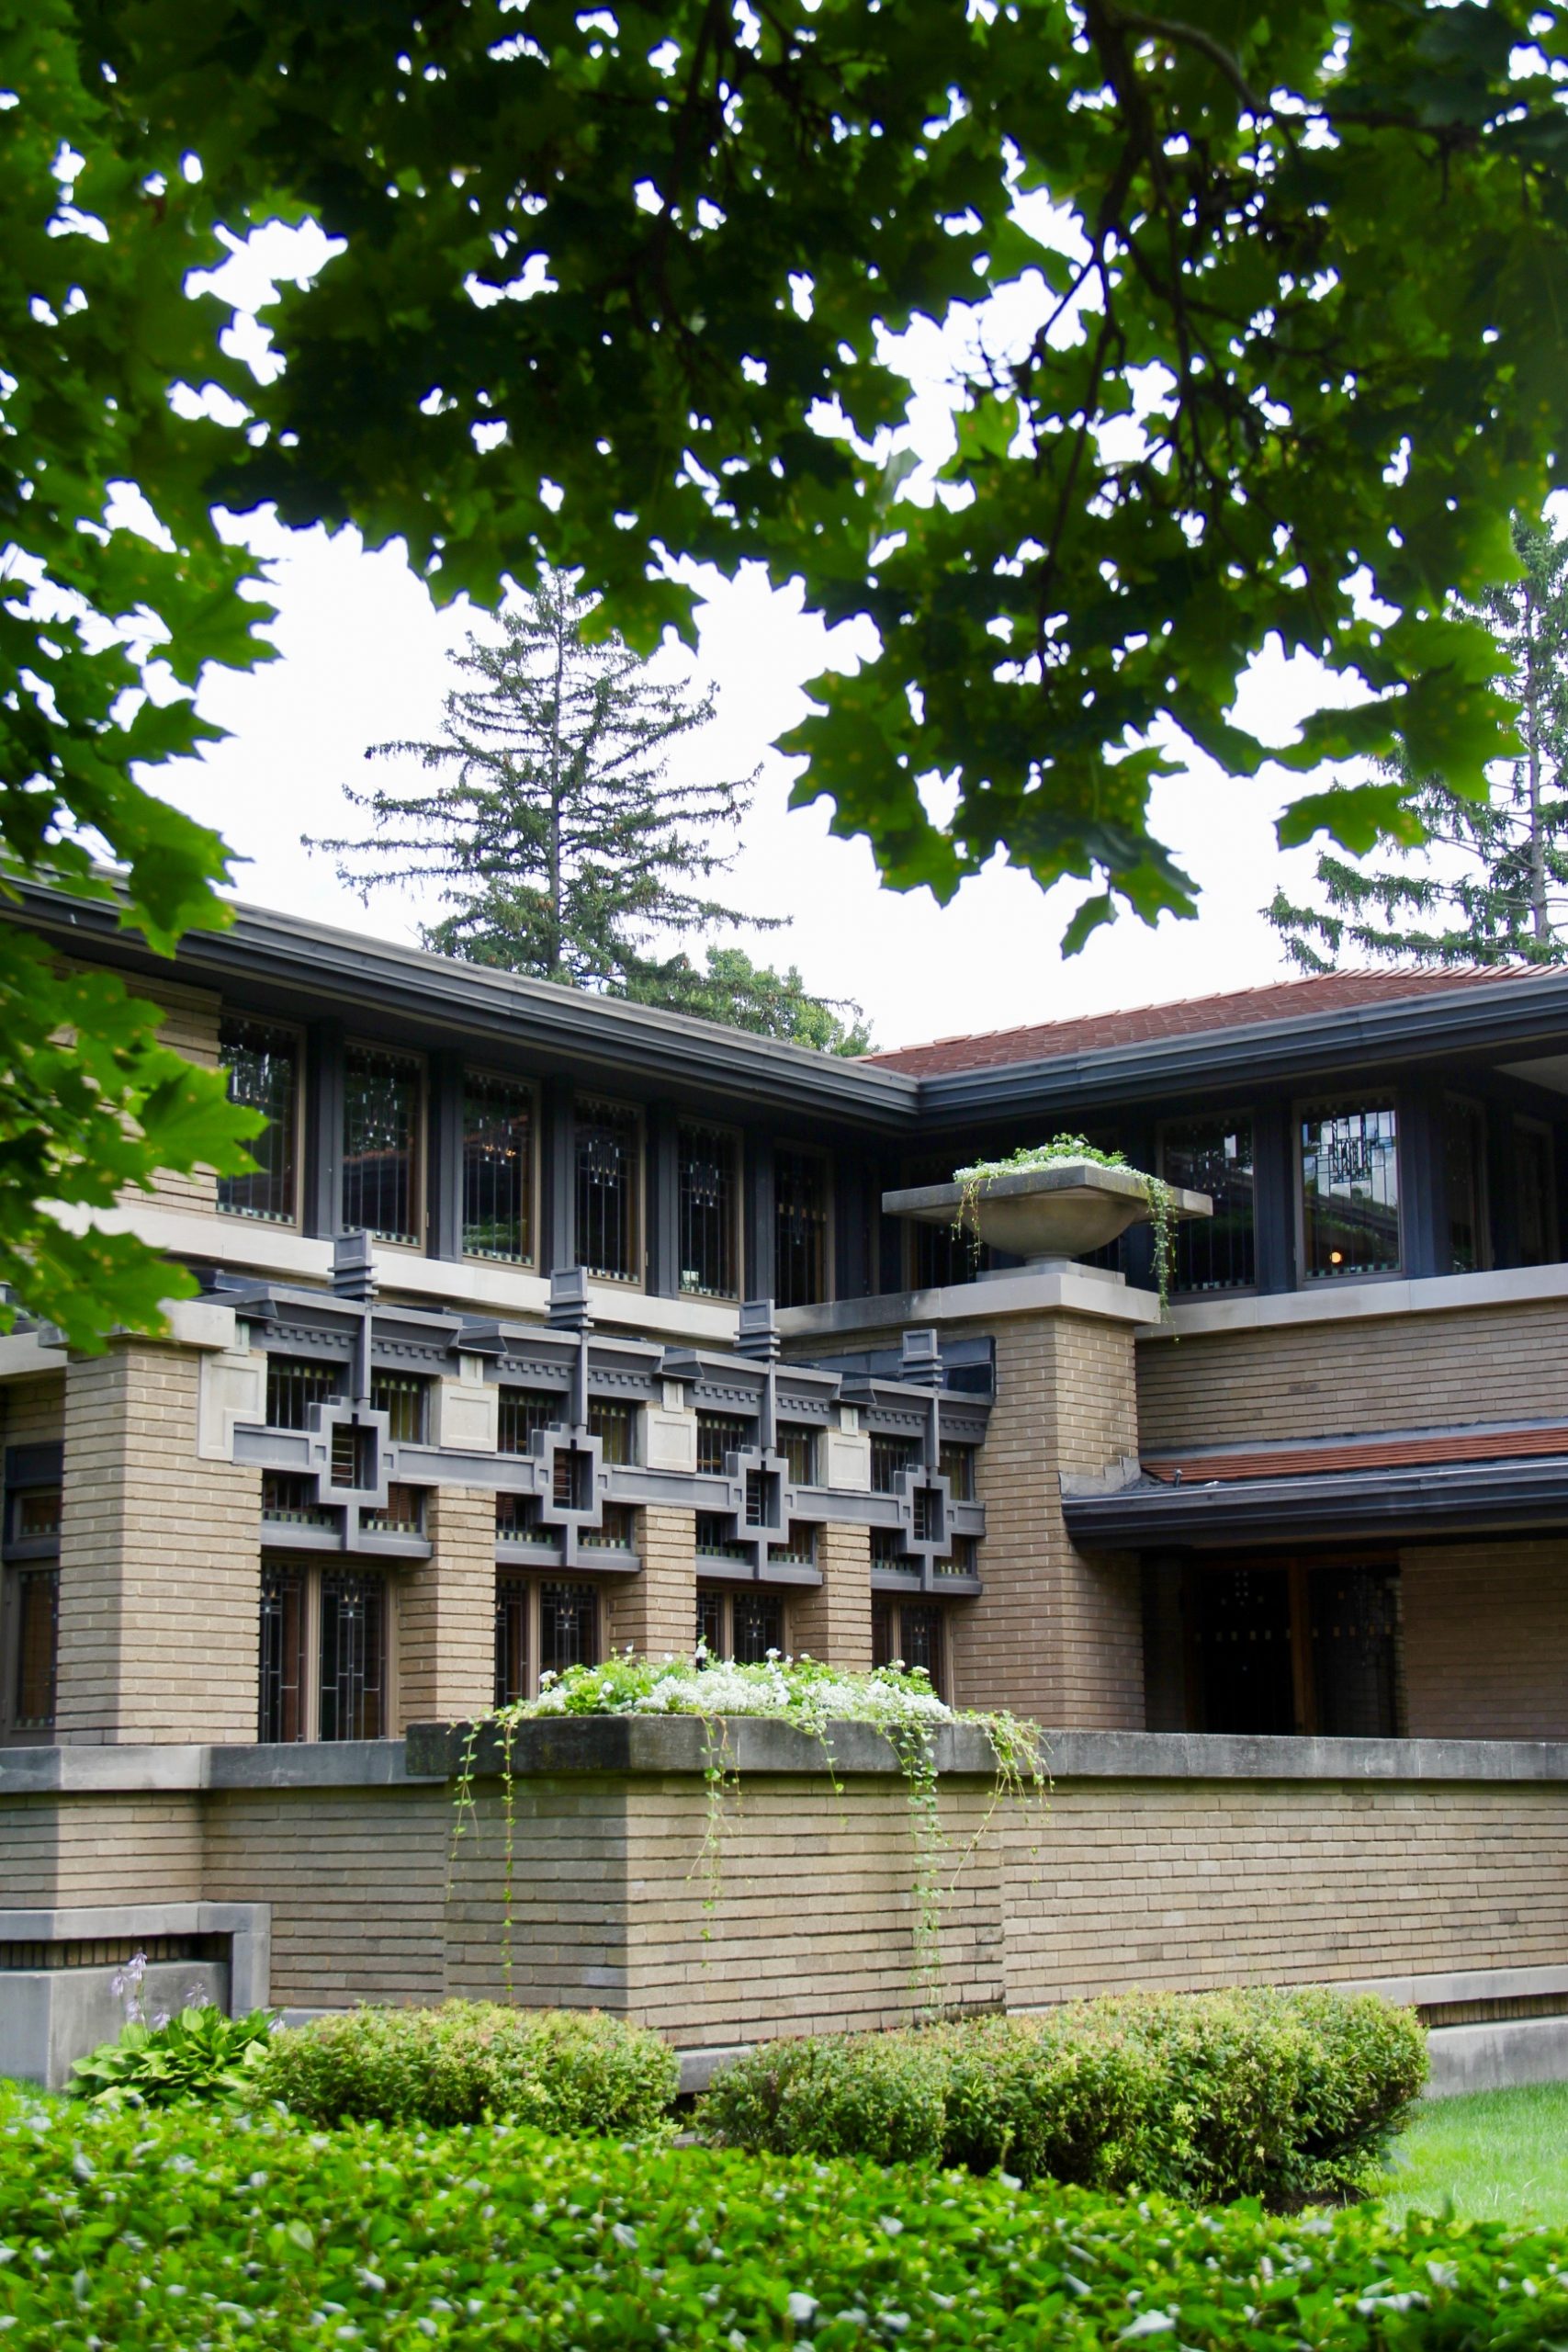
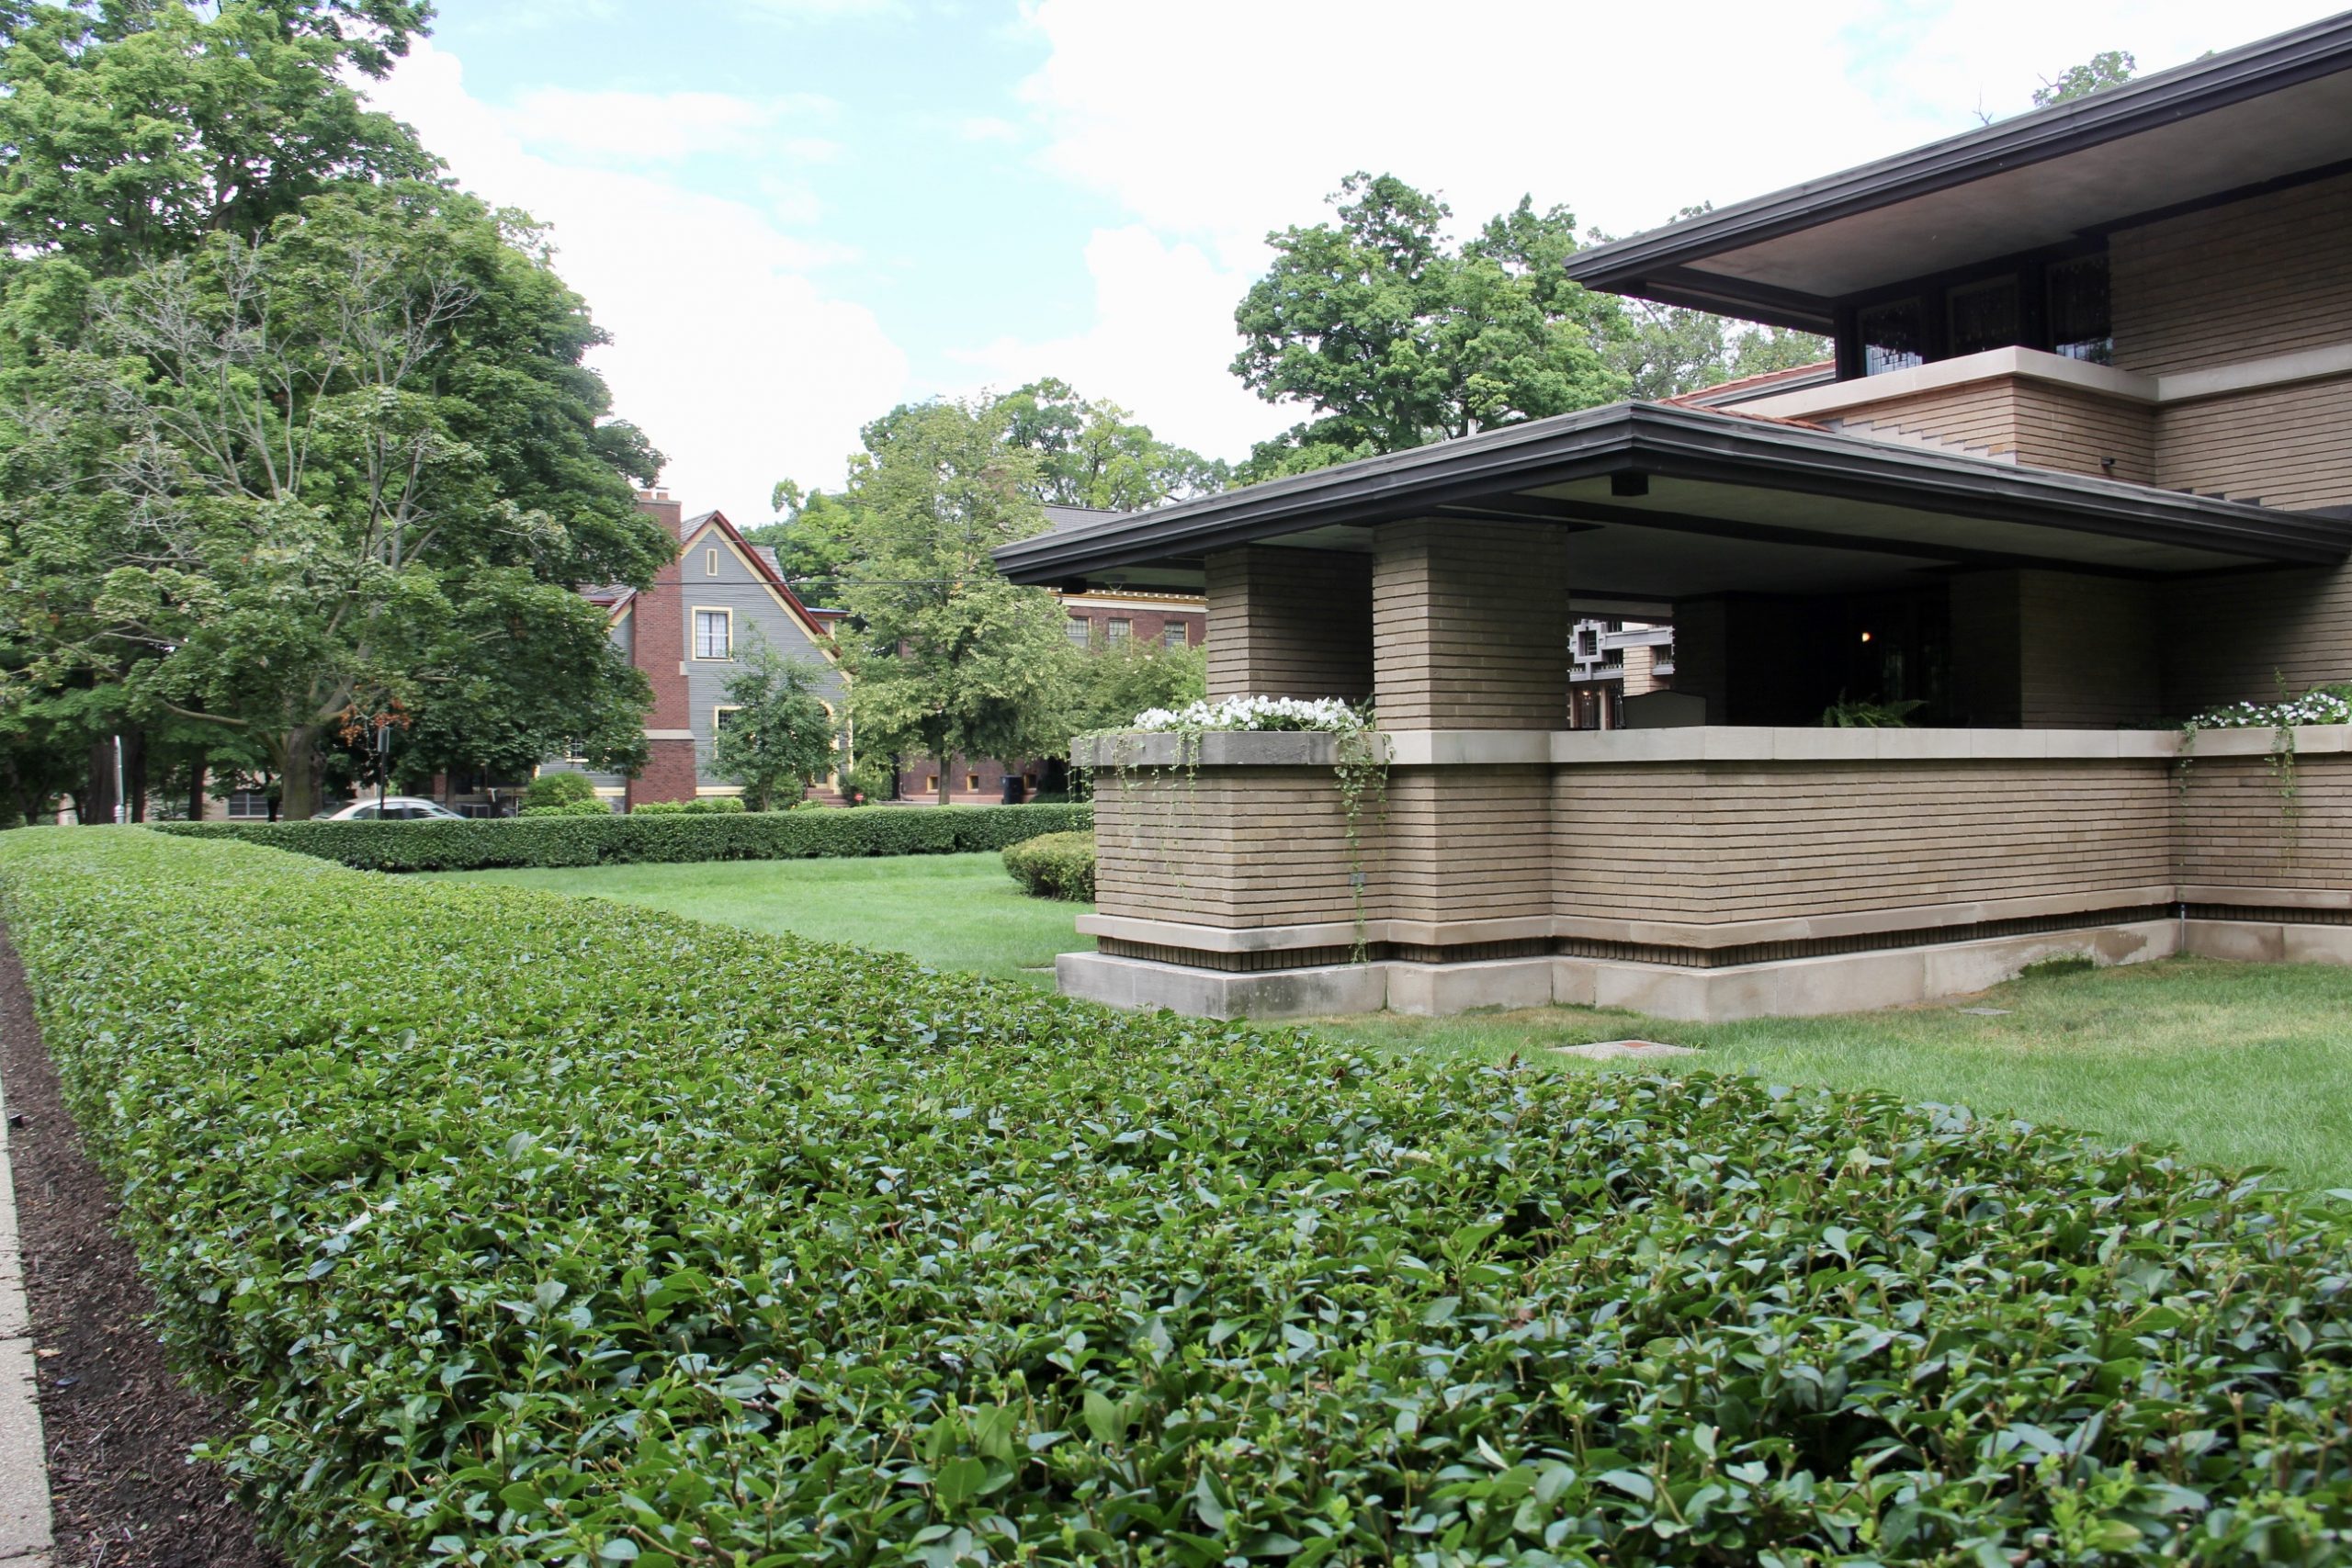
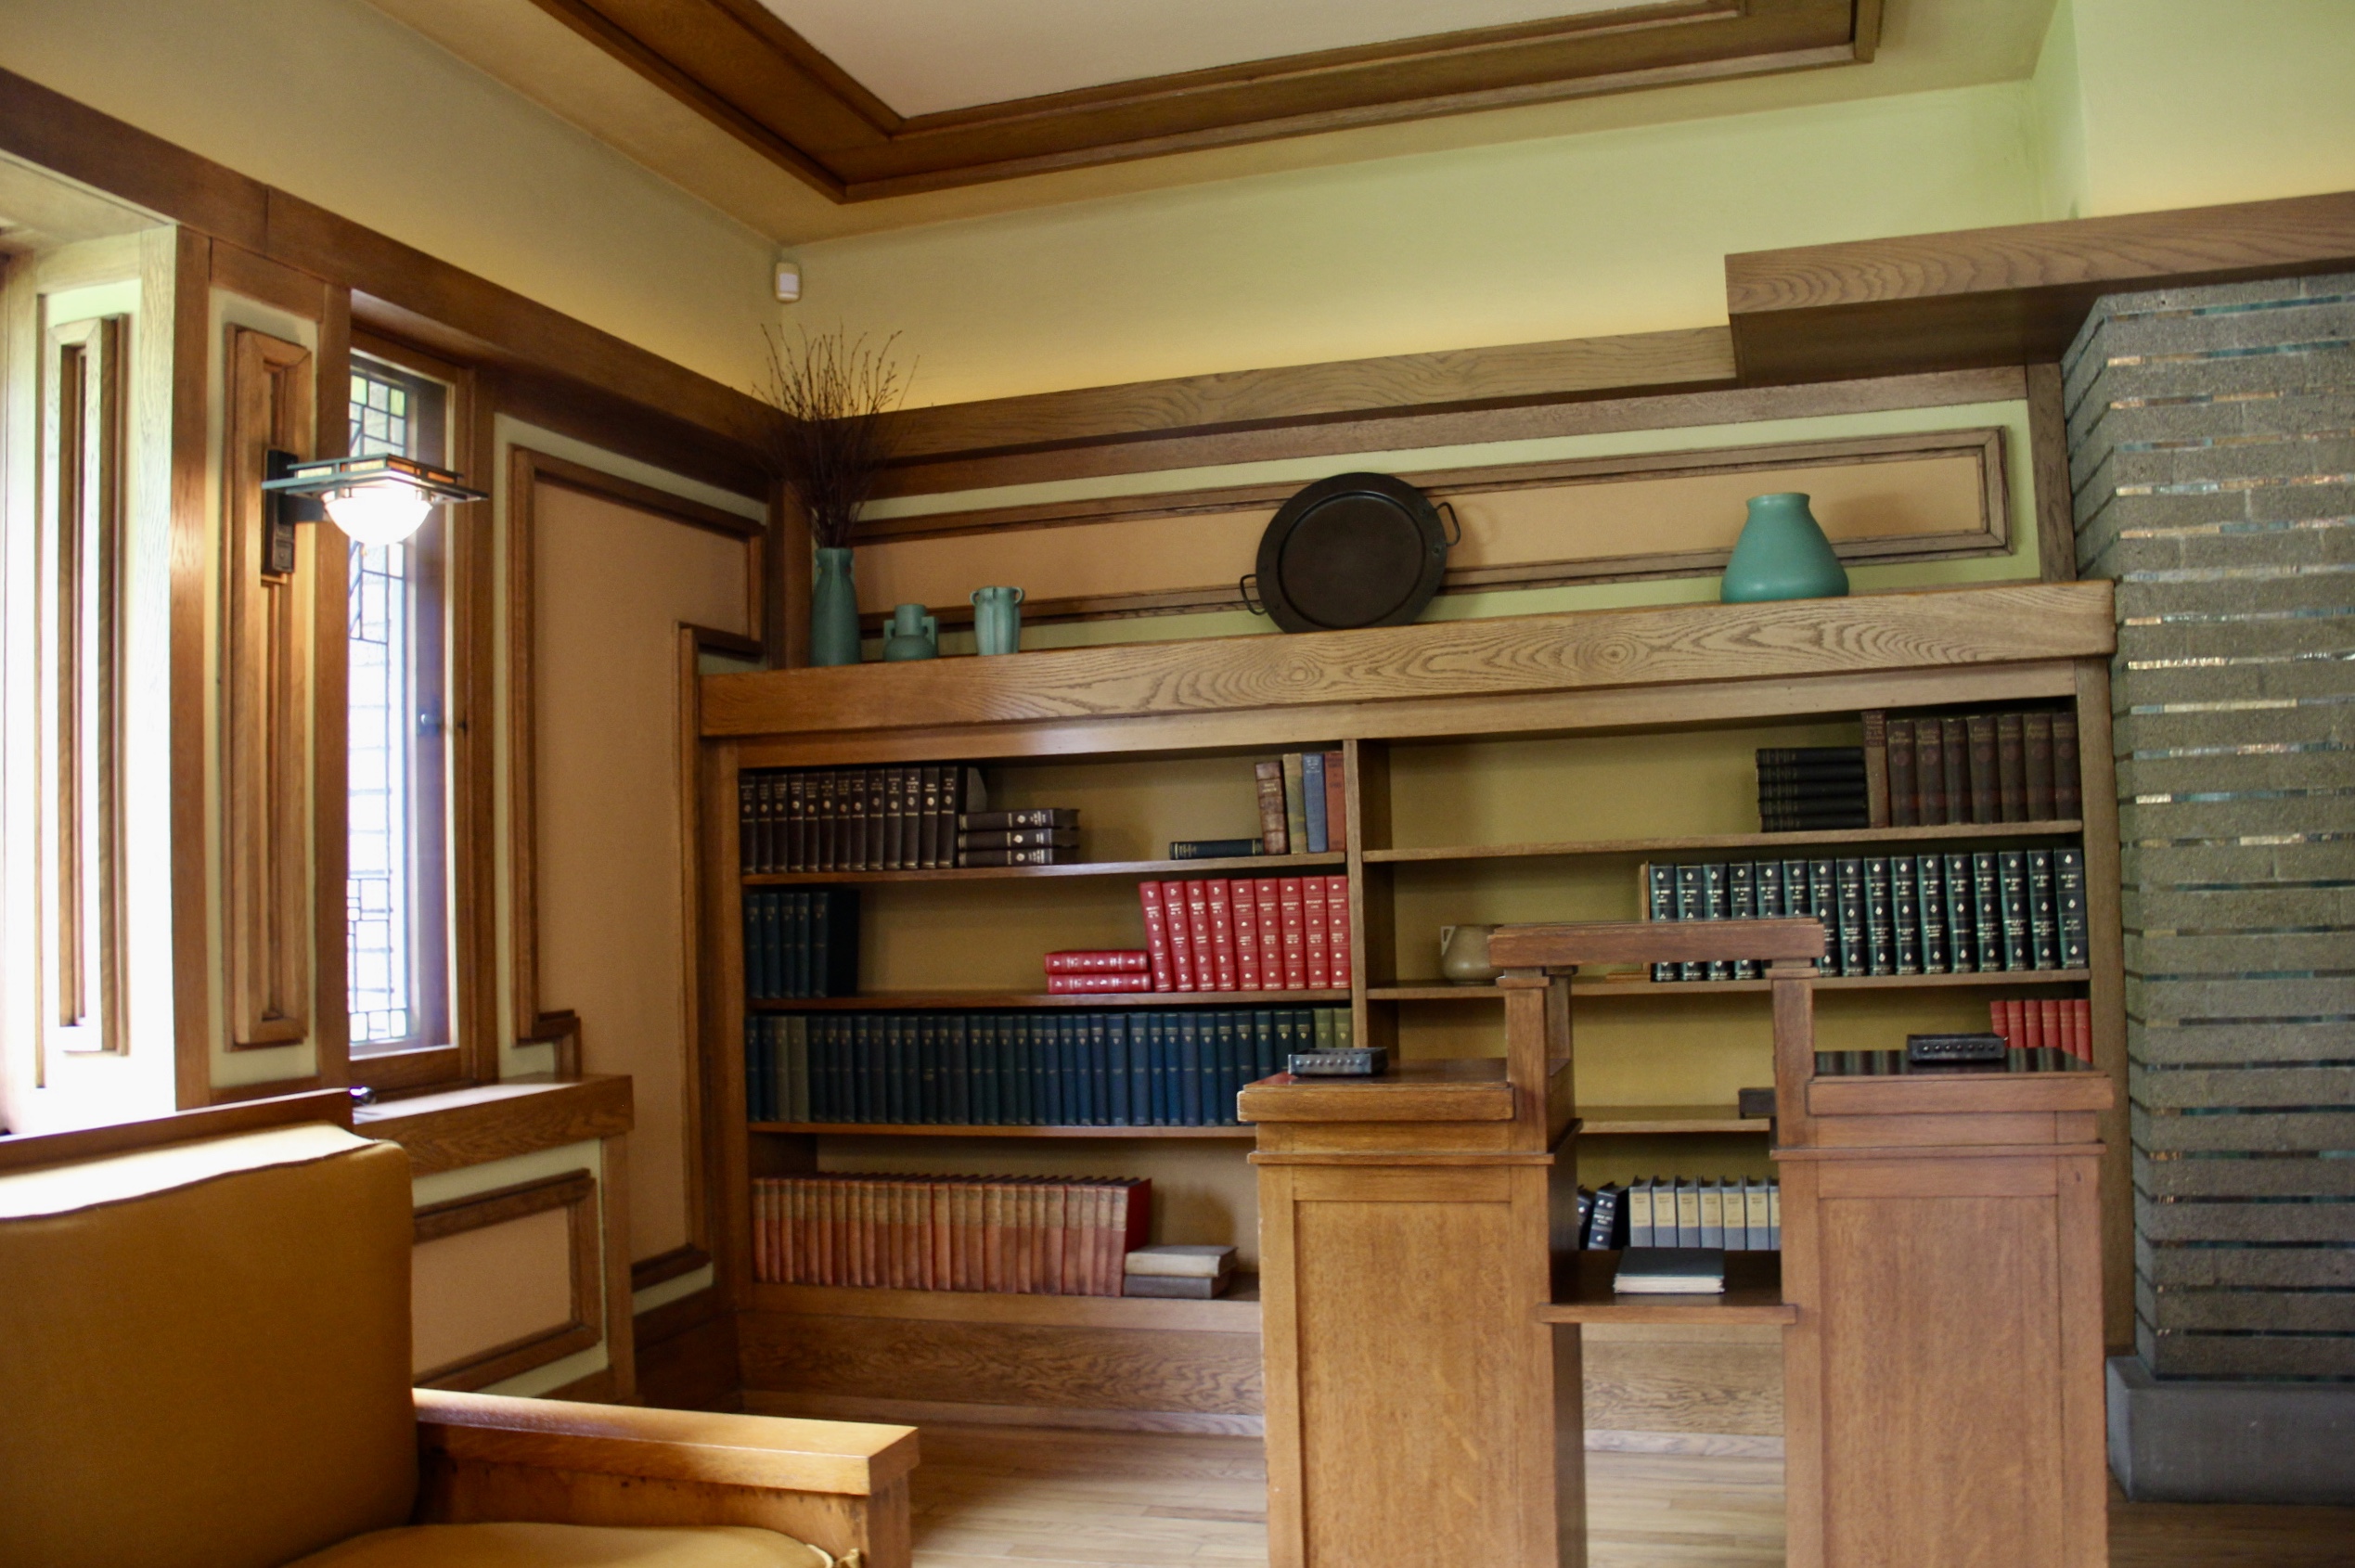
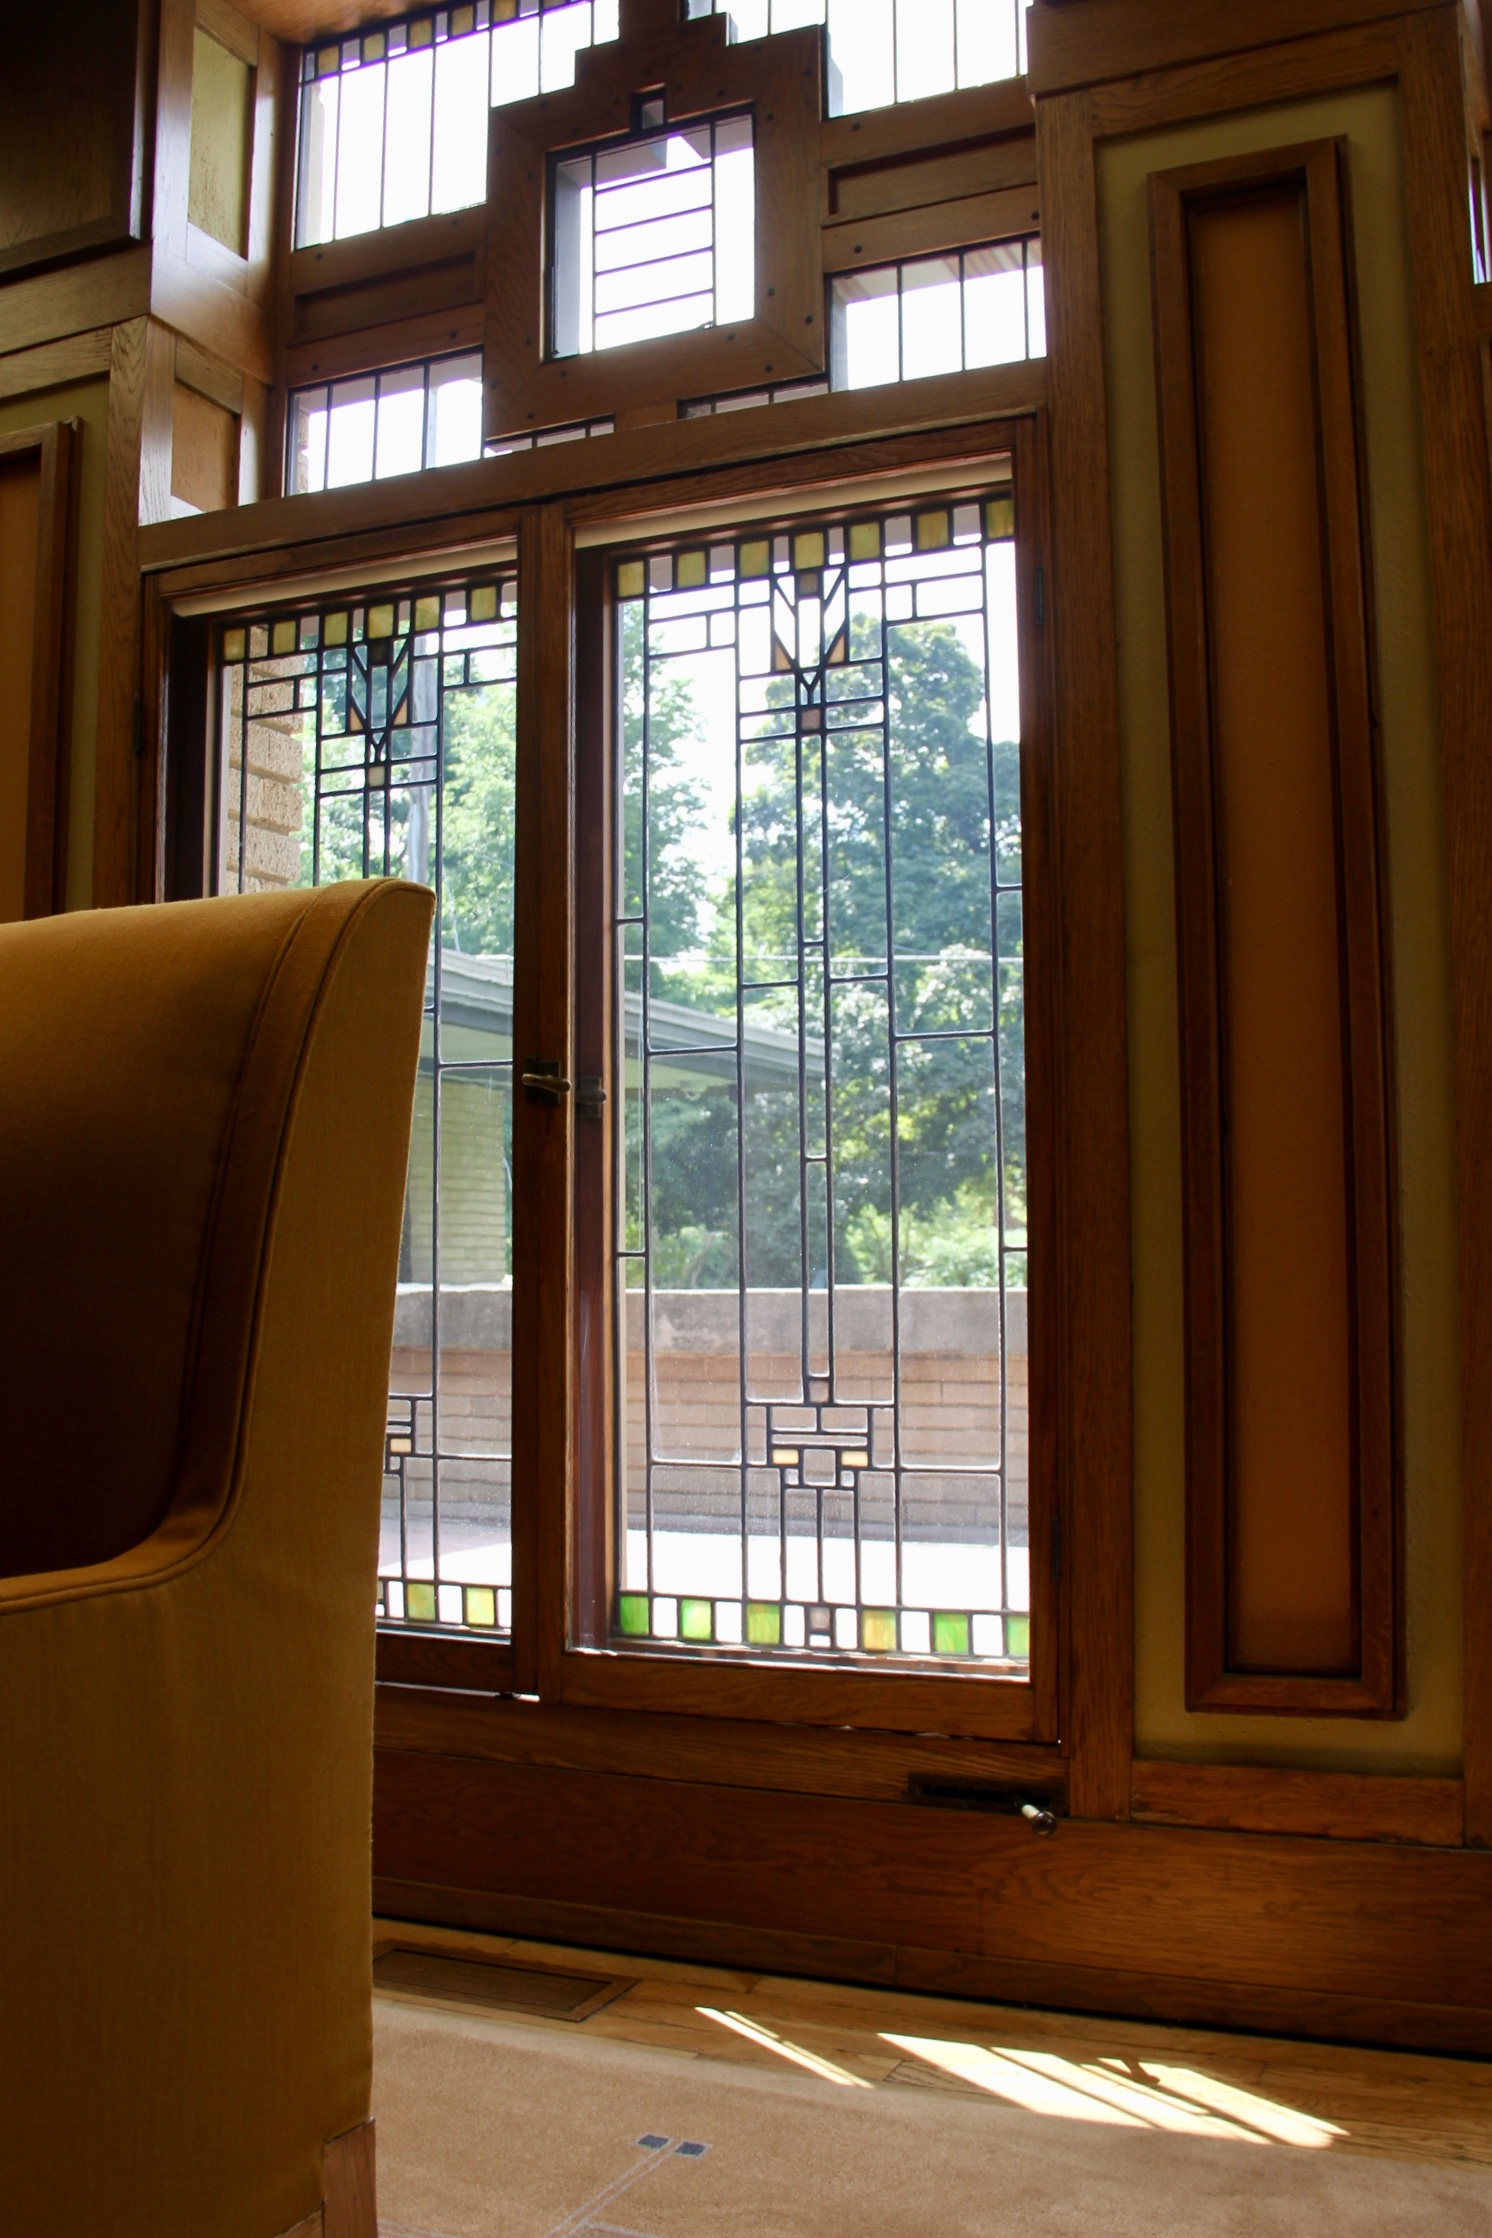
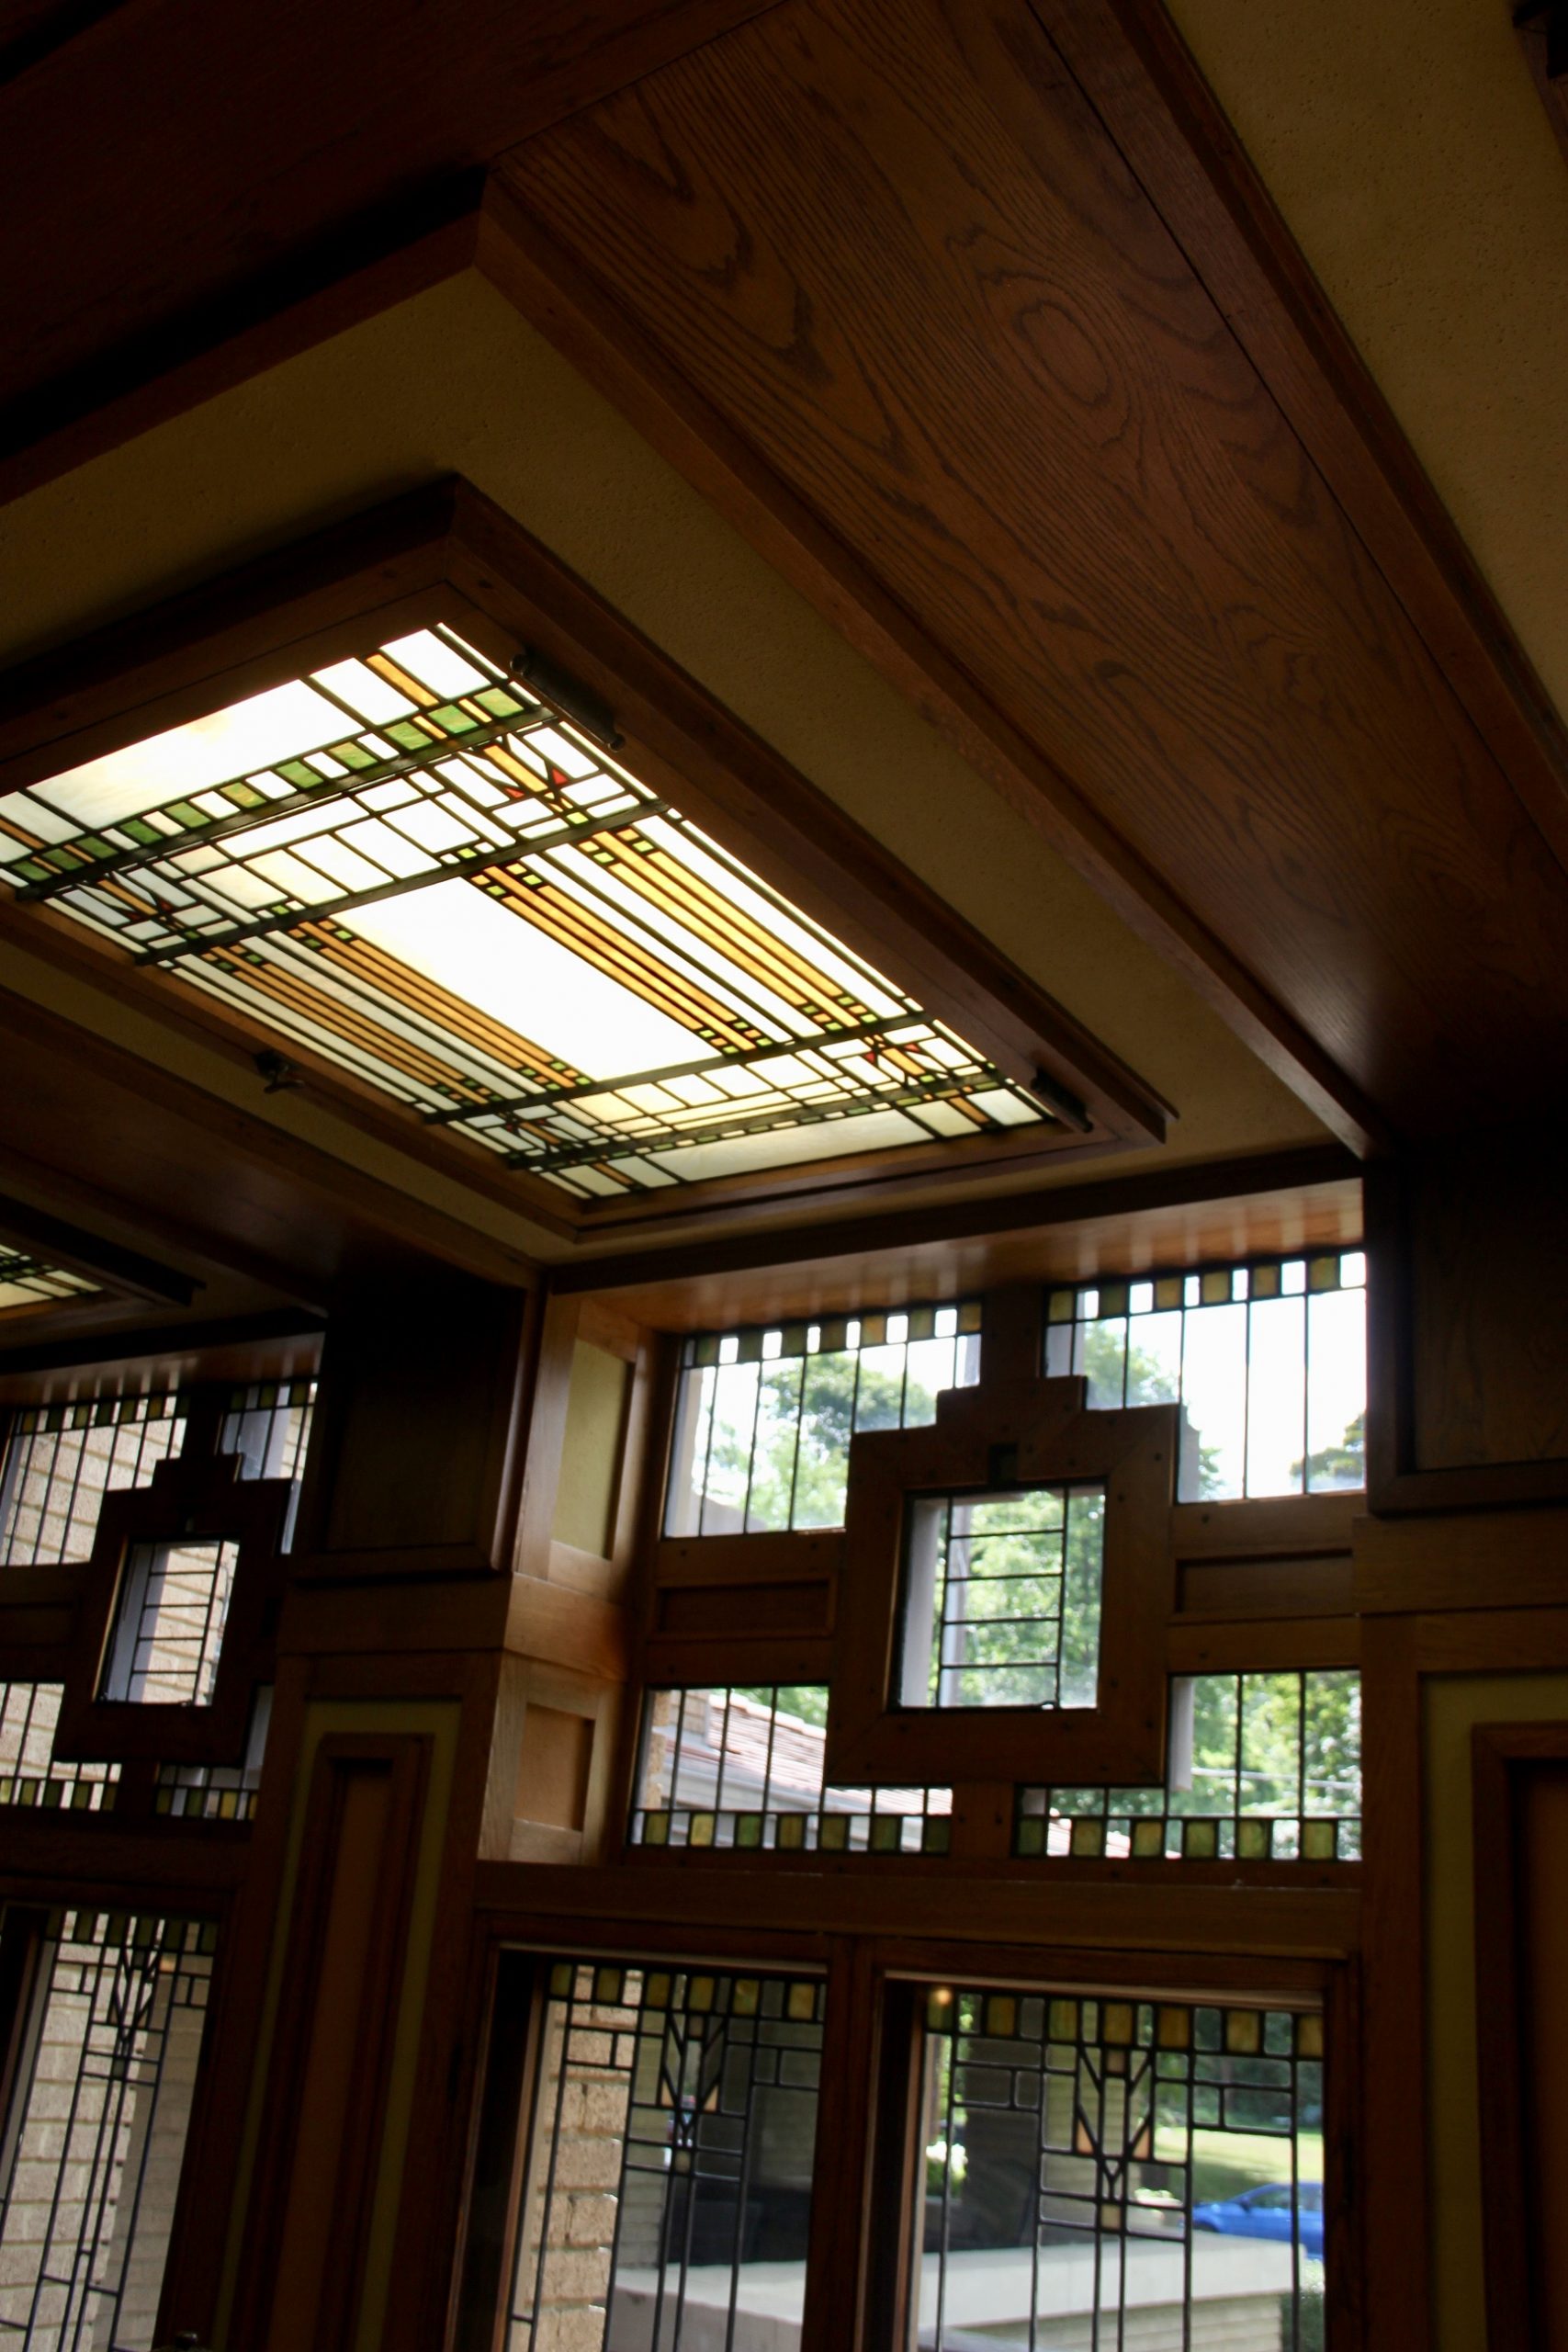
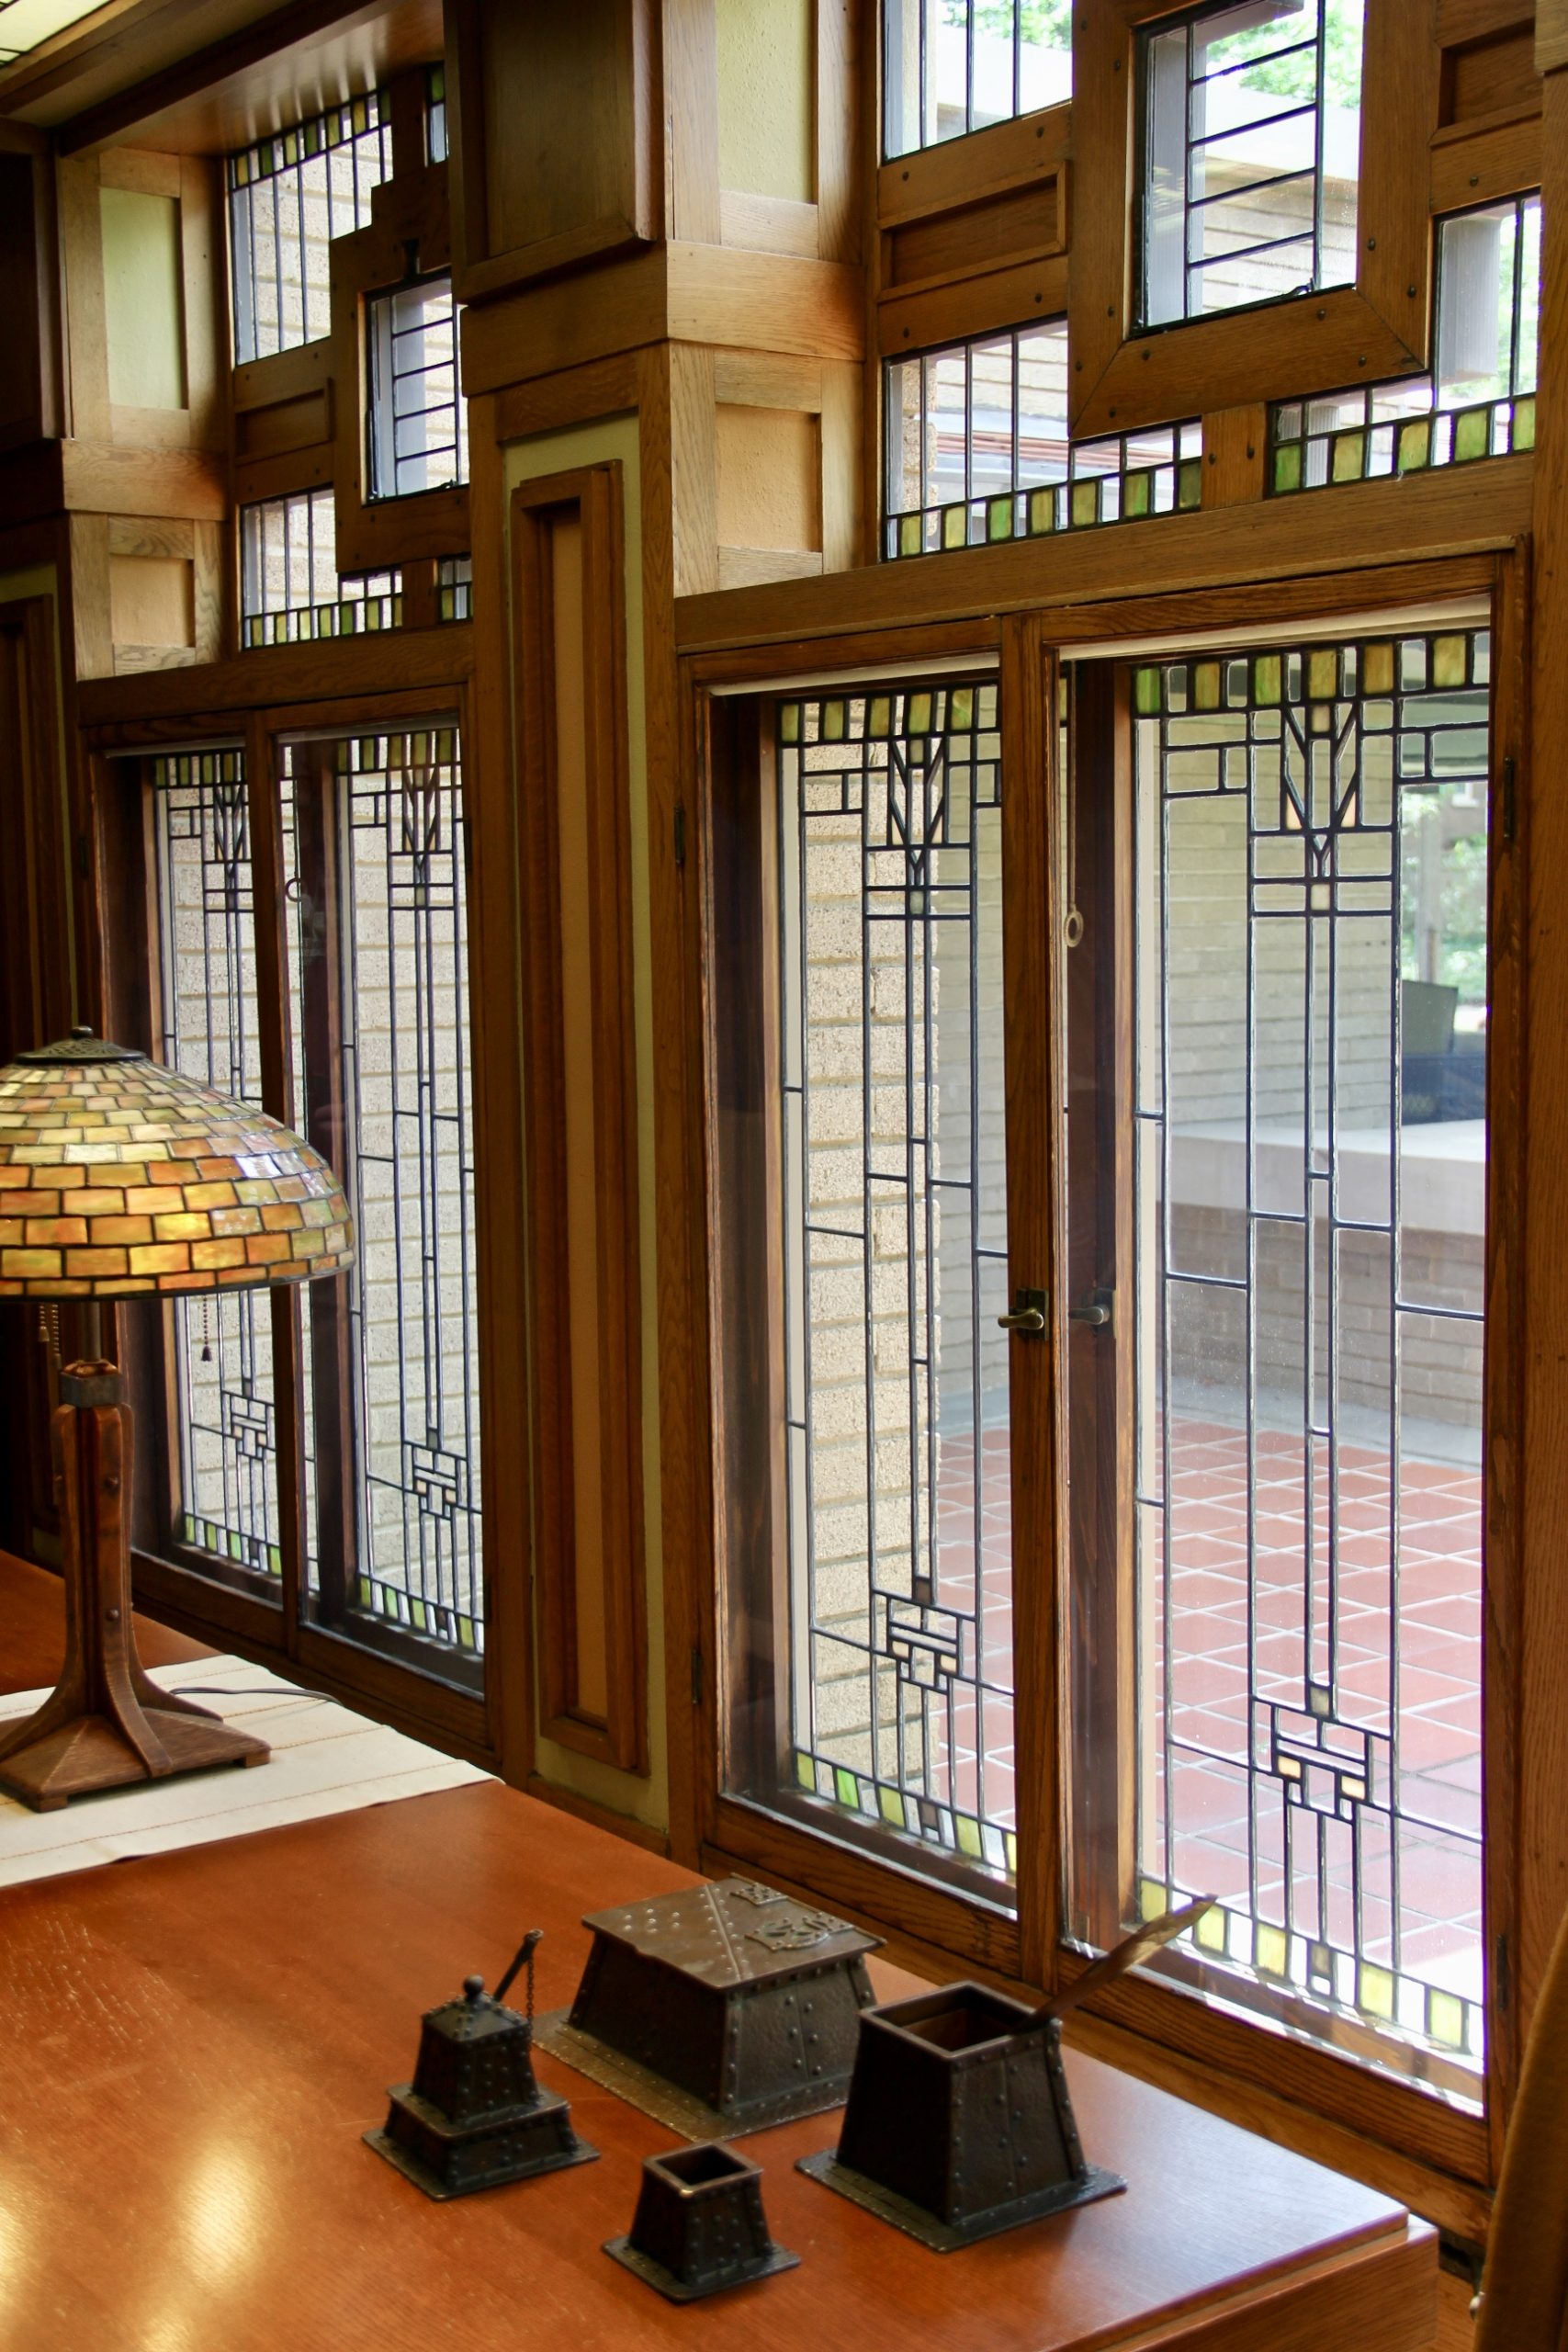
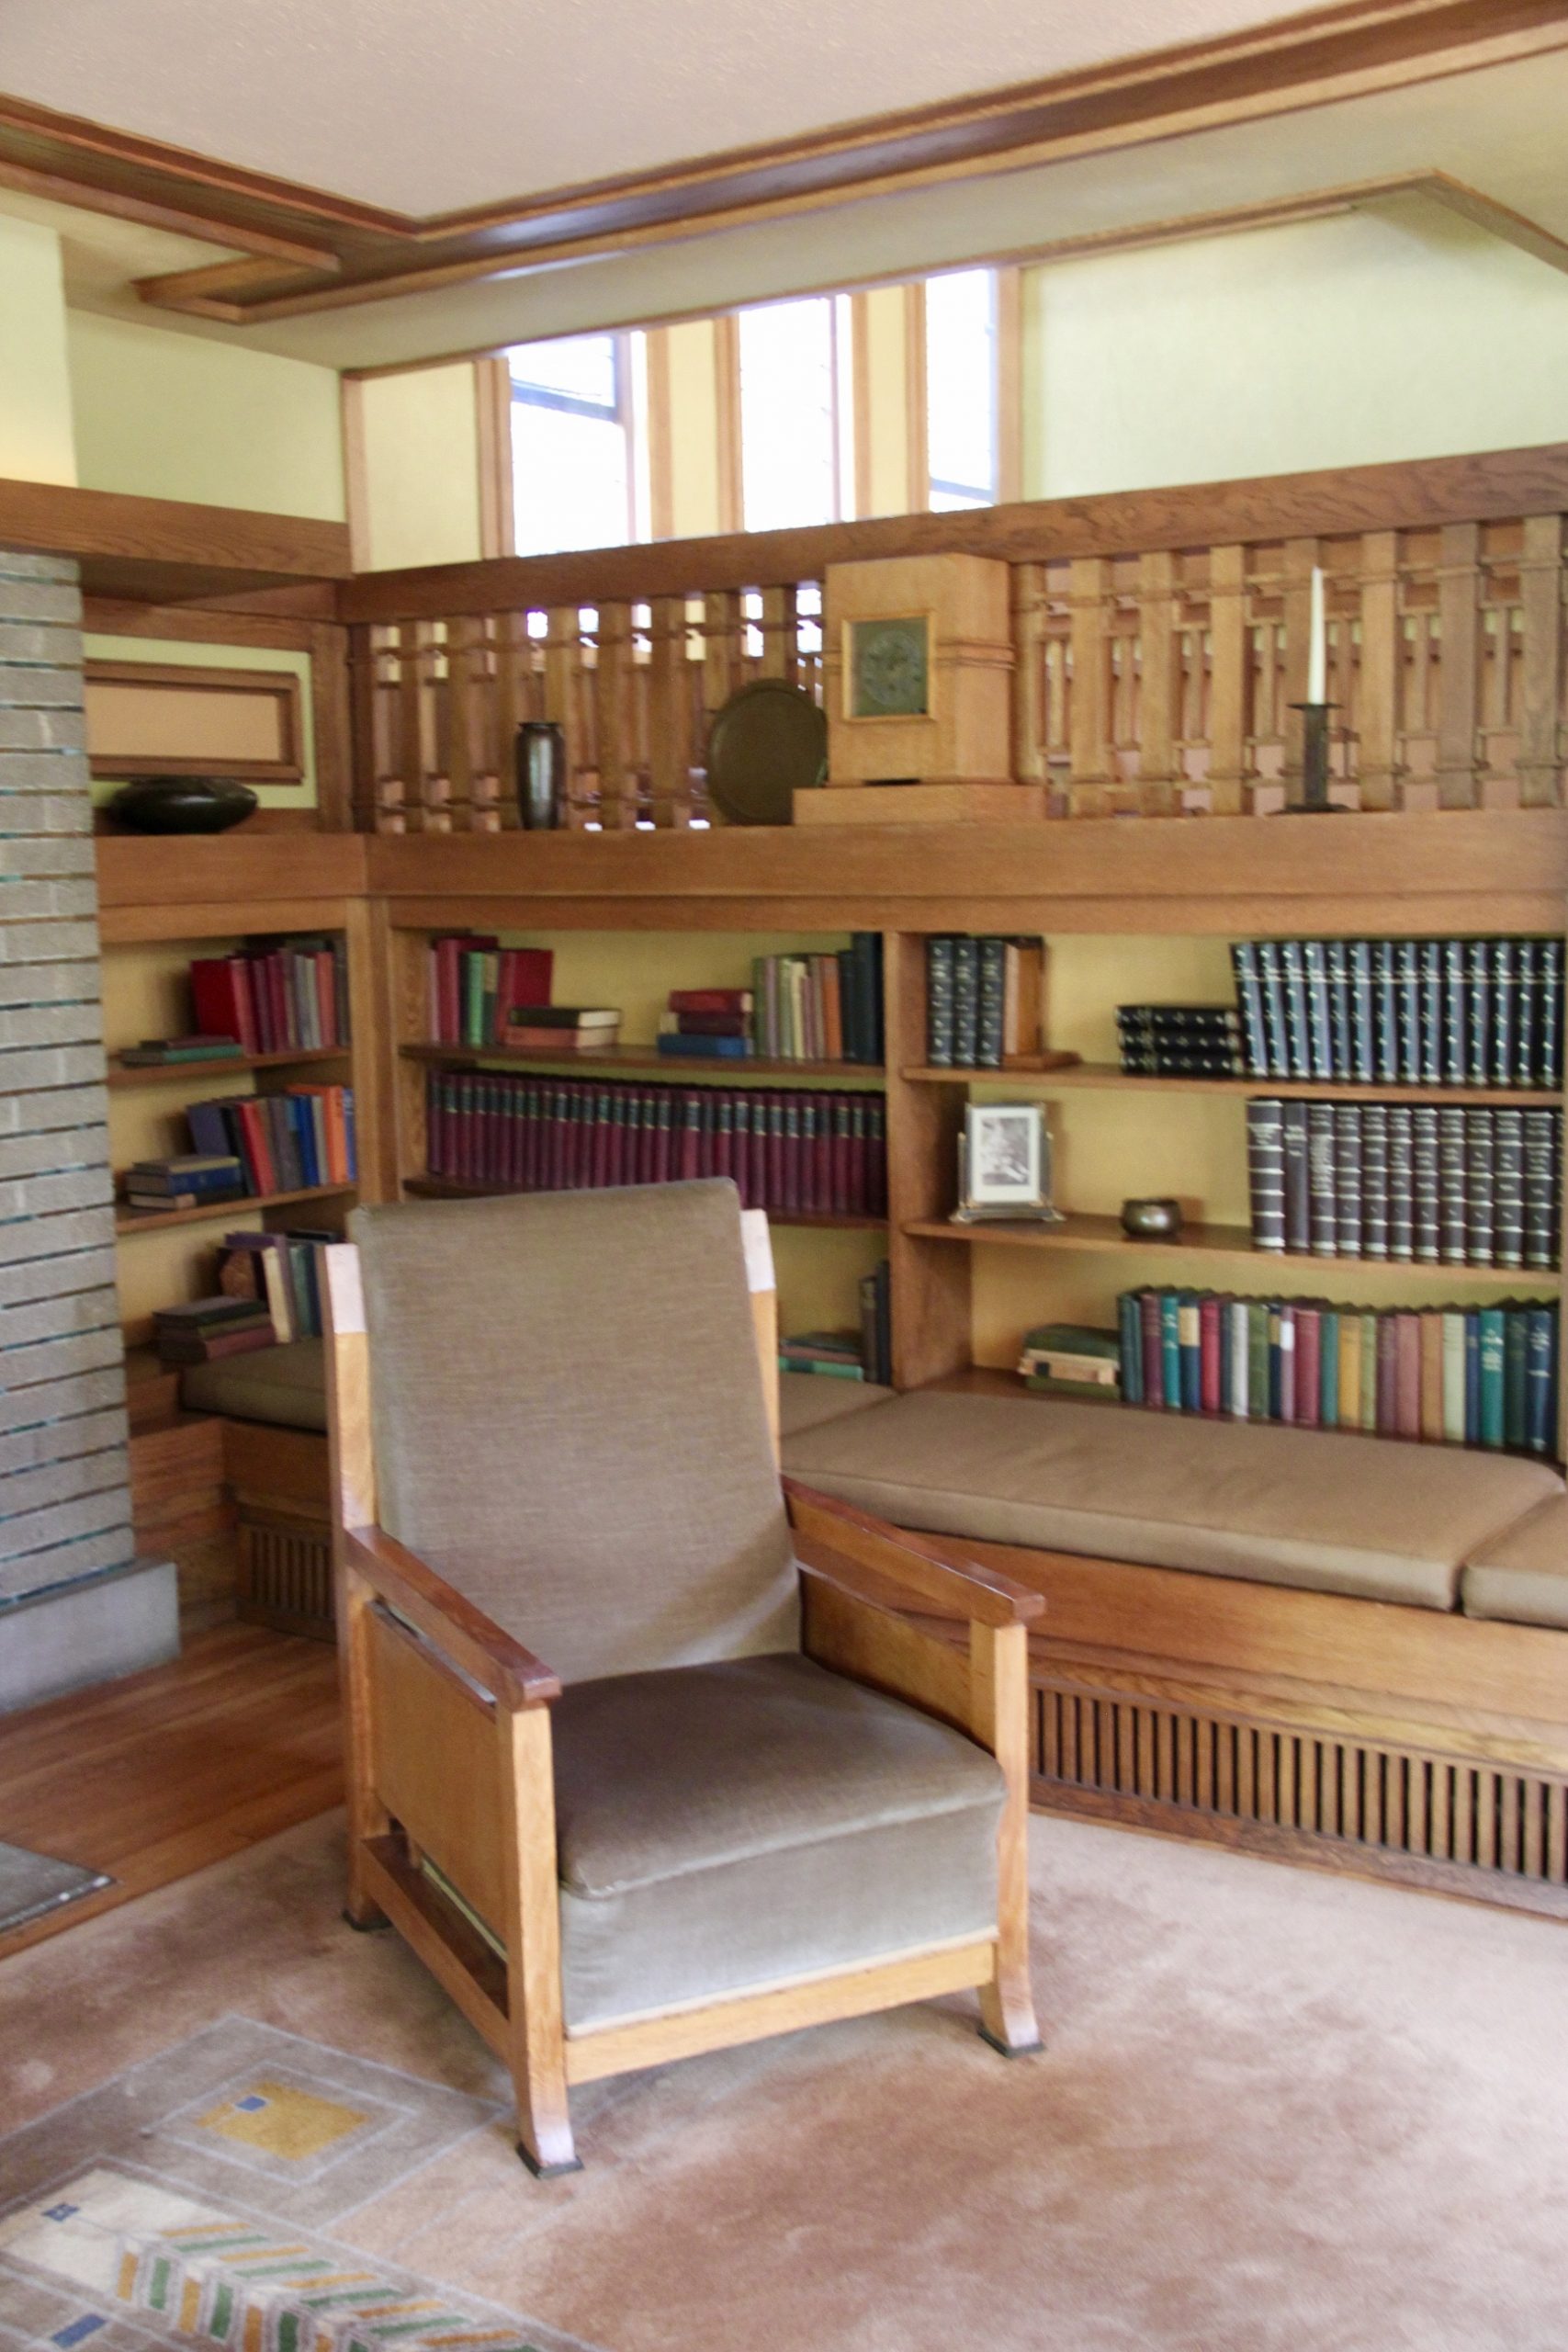
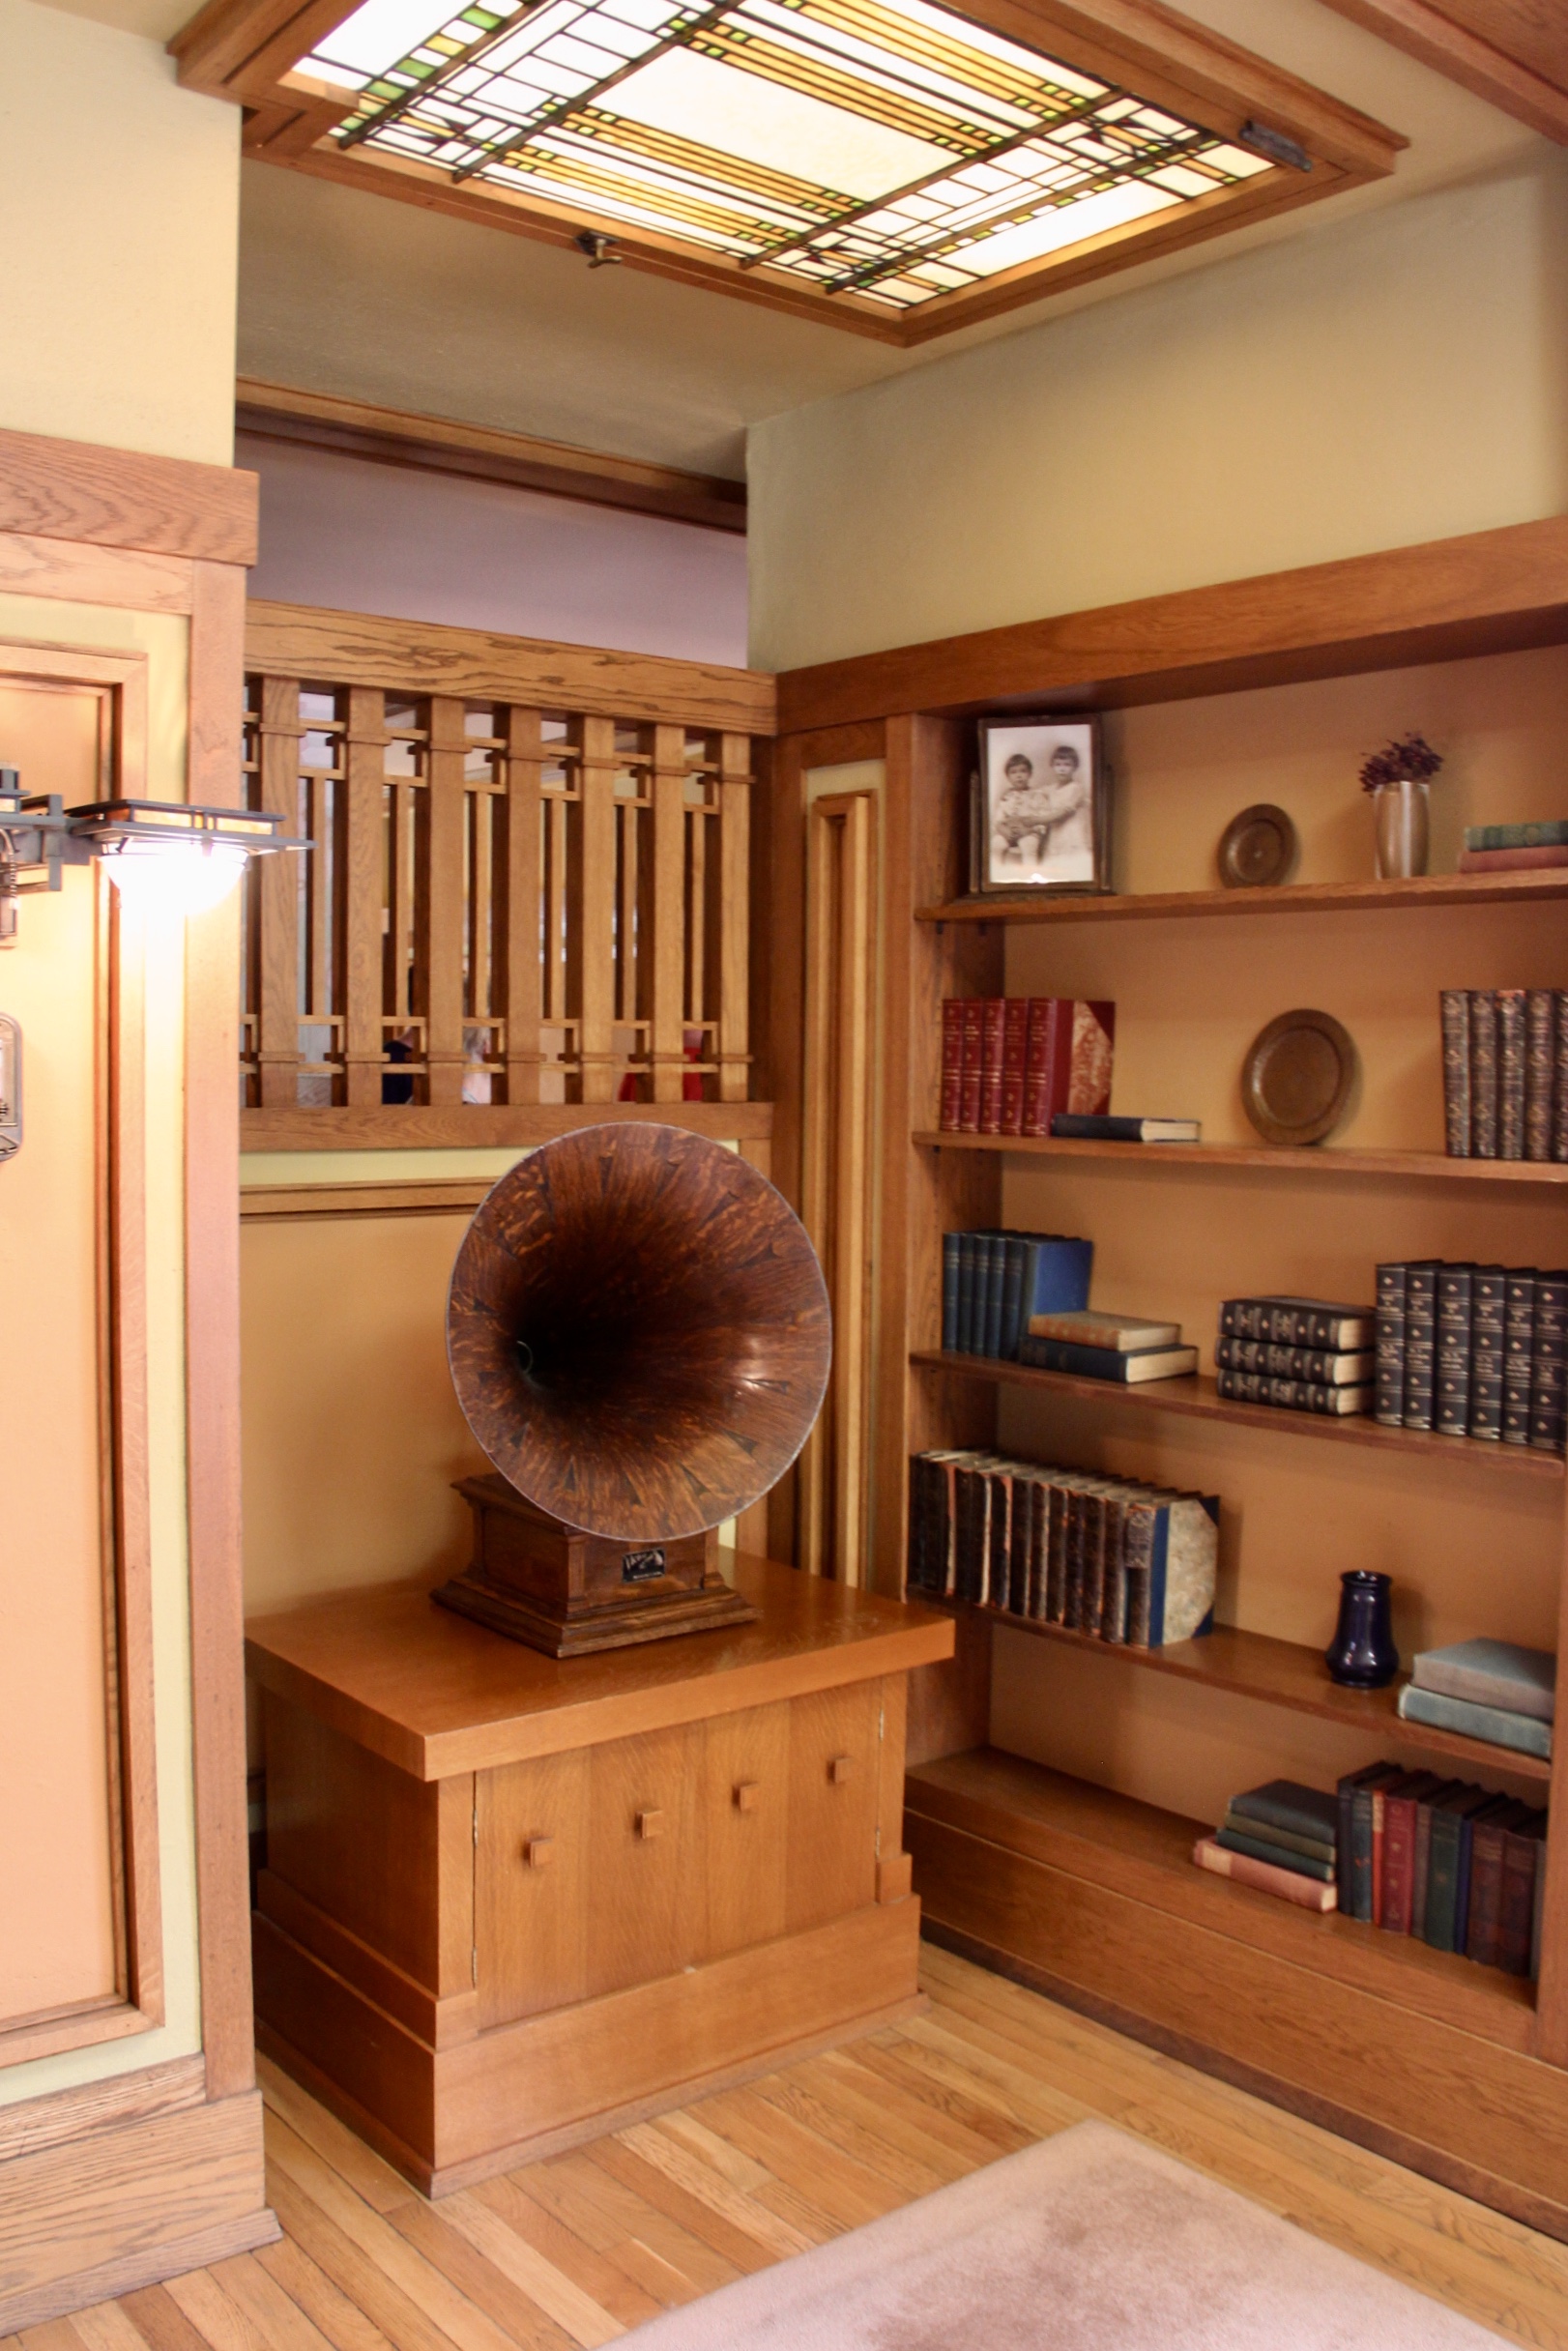
If you’re not familiar, Frank Lloyd Wright’s architectural style was all about horizontal lines, simplicity, and a desire to integrate the home with the environment. His designs are marked by simplicity in design and decoration (yes, he was involved in everything that went into the home). The structures were noted for pronounced horizontal lines and flat or low hip roofs. This style came to be known as Prairie Style Architecture and the Meyer May House is a perfect example.
Recently we toured it and were struck by the foresight and thought and the beautiful design work that went into the project. And while there are literally hundreds of “lessons” or ideas to take from the home, here are a few concepts we came away with that can be applied in any of our homes!
So often, we want to be “trending”. We want to be right in line with what other people are doing. It’s more comfortable there sometimes. But, Wright completely ignored trends and worries about “what was popular” when he designed his homes. In fact, almost everything about the Meyer May House bucks the trends. It’s completely unique in the neighborhood. The houses around it (many of which were already standing when construction began in 1908) are all ornate, “boxy” homes. Traditional homes. The kind of homes everyone built.
And then there’s the Meyer May House with a style and flair all its own. It’s long horizontal lines, low, flat roofs and modern feel must have seemed strange in that neighborhood all those years ago. Not to mention the way it’s set on a lower grade than the street so that it actually seems to rise from the earth organically! Look for the front door all you want, but you’ll never see it from the street. It’s tucked away along the side of the home. There’s a beautiful veranda that can be seen from the street, but oddly enough, there’s no approach! A line of hedges seals that front porch off from uninvited guests.
The exterior is definitely unique in that neighborhood, but even more interesting (in our opinion) is the interior. Wright designed this home specifically for the Meyer May family. The ceilings are low (Meyer May was 5′ 8.5″ tall) and the furniture (designed by Wright as well) is made for people of that height. The windows are set lower than you might think. In fact, everything about the house is designed specifically for the Meyer May family. We even noticed on our tour that taller people felt much less comfortable there than those of us closer to Meyer May’s “near perfect” height! And that’s perfectly fine! Taller people don’t feel at home there because, in Wright’s estimation, they shouldn’t: it was not their home. This home belonged to Meyer May and his family. And as such, it was built for them specifically–not for anyone else. The main priority was comfort for the family who lived there.
And that’s a great decorating point! So often we choose colors based on trends. We wonder what’s popular, what’s “in”, what’s cool. We worry what other people will say about colors we select. We’ve all been there. We’ve all picked a color for a room and shared it with someone in the family (or a decorating-savvy friend) only to watch that friend wrinkle her nose and make a face of complete distaste. “You can’t use that color! You’ll be stuck in the 70’s forever if you do!” In the end, we often decorate our home to match tastes other than our own!
Taking advice and second guessing our original thoughts isn’t a bad plan. Just remember that the home you’re decorating is your home! Just as Frank Lloyd Wright didn’t think twice about designing a room with low ceilings, neither should you worry too much about choosing colors you love just because they’re not current or popular. If you love them, that’s what matters. It’s not about what designers say or decorators recommend. It’s not about what’s currently trending or popular. It’s not about Benjamin Moore’s Color of the Year. All of that is interesting and helpful, but in the end, it’s all about what colors you like!
So, design and decorate your home first and foremost with you and your family in mind. That’s the first point. We’ll get to the next one tomorrow!

This week we talk to the Wall Doctor and get tips to make our your next drywall project go more smoothly. If you’ve ever hung your own drywall, you know there are little things that can make the project frustrating. Today, you can listen to an expert spill the beans on everything he does to make sure every project goes well!
We’re also in the studio with Brad Krause from Service Professor to talk about power generators. Sure, we all know about the portable options, but are you aware that there are systems that are permanent? That can be installed at your home and which will automatically kick on within 10 seconds of a power failure?
On top of all of that, we talk about an amazing opportunity right here in Grand Rapids! The Meyer May House is a home designed by none other than Frank Lloyd Wright. It was completely restored in 1985 and is now open for free tours! It’s a remarkable opportunity to take a peek into the mind of one of America’s finest, most brilliant architects!
Listen here:
We promised pictures of our visit and here they are!


Now, the last post may have left you wondering whether our chemical stripping had ACTUALLY led to success. Were the very sweaty hands in heavy rubber gloves really worth it? Was it really worth the extra expense of buying a stripper?
The undeniable answer is ABSOLUTELY YES!!
As we slowly scraped away the chemical stripper with a plastic putty knife (yes, that is important because we didn’t want to risk scraping the wood) we saw that the paint on the top wasn’t hiding problems but amazing potential.

The legs and some of the decorative work needed a few extra coats of chemical stripper to get all the old paint off–mostly because it refused to give up its seat in all the little nooks and crannies–but eventually we saw our little desk for all that it was. And we were thrilled!
Well, except for those back legs that were missing chunks because of rot…. And the drawers that were so broken that the slightest tug left you holding the front of the drawer while the rest of it fell to the ground in a clatter of old wood!
So, we’d discovered beauty beneath all the old paint. But we were also left with a number of problems that made us pause and consider our options. As we mentioned in the last post: furniture refinishing is ALL about rolling with the punches. It’s about being flexible. We had wanted to stain the entire desk, bringing out the beautiful wood we just “knew” was there. Turns out with the broken and rotted legs, staining was out of the question. We’d stain the top of the desk, but paint the rest. But that still left us with some problems: broken, crumbling drawers and the rotted legs.


And that’s the next lesson: There’s usually a fix. Never forget that! And don’t zip by it tooquickly. Understand that even if you don’t know the answer to a problem, that doesn’t mean there isn’t an answer. At RepcoLite, we work with these types of projects all the time. We’ve helped with so many different situations, there’s a good chance we’ve seen what you’re working on. Also, there are many tools and products on the market of which homeowners are completely unaware.
So to go back to the desk example: those rotting legs needed repair. To help with that, we pulled a container of Min-Wax Epoxy Wood Filler from our shelves and mixed up a batch. It’s an incredibly tough wood filler that hardens chemically and, therefore, very quickly.
We mixed it up according to the directions and then built a sleeve out of cardboard to go around the legs that needed help. The sleeve helped us form the putty into the shape necessary and it held it long enough for it to harden and hold that particular form. Then we removed the cardboard and started sanding. It didn’t take long before the legs were once again solid and smooth. And best of all, the epoxy wood filler we used was durable and tough! These legs were basically better than new!
Then it was on to the drawers! And this was an easy fix. The dovetail joints holding the drawers together were already weakening. So all we did was carefully pull them apart the rest of the way, clean off any glue residue that remained, and then cut a new drawer bottom out of 1/4″ MDF. After that, it was just a quick matter of putting everything back together and regluing those joints! The end result, again, was better than new!
And that’s the big point here: you may tackle a project and run into a complication that leaves you frustrated or ready to give up. The rotted legs and the broken drawers didn’t do much for our attitudes regarding our desk, after all! But, before you call it quits on a particular project remember that there is usually a fix! You may need to ask some questions. You may need to learn about some new products. You may need to pick up a new repair skill. But the answers and the fixes are out there! Stop out at any RepcoLite or Port City Paints and ask. We’ll get you moving in the right direction.
