Foolproof Strategies for Painting Small Spaces

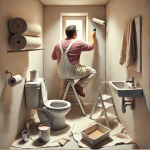
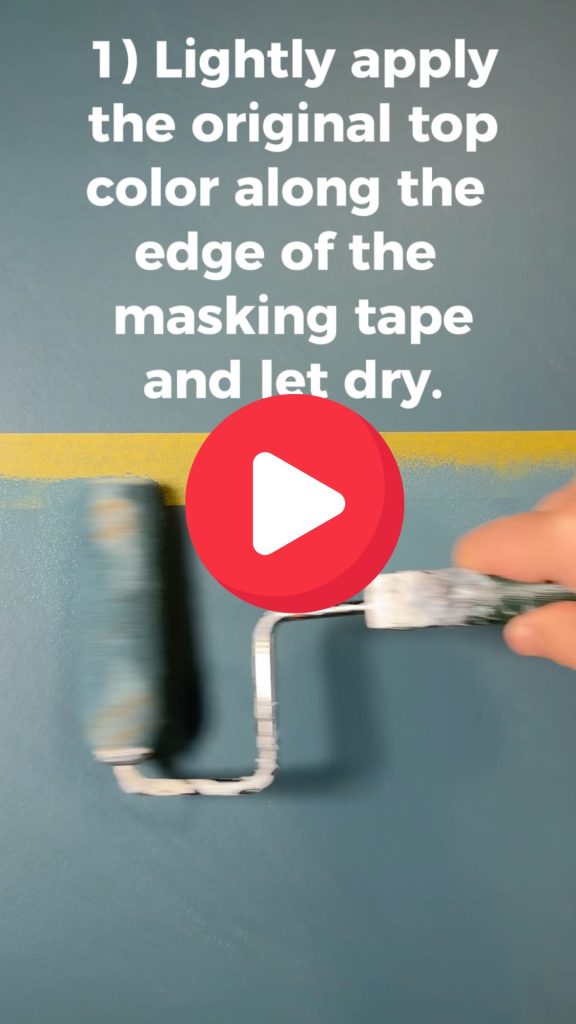
Painting small spaces can be tricky, but with the right strategies, you can transform tight quarters into beautiful, polished areas. Whether you’re working in a bathroom, hallway, or any small room, these tips will help you avoid common pitfalls and make the process smoother.


1. Schedule Enough Time for the Job

It’s easy to assume that painting a small space will be quick since there’s less wall area to cover. In reality, small rooms often require more detailed work, like cutting in around fixtures and working in confined areas. Tasks like rolling in tight spaces or navigating narrow hallways can take longer than expected.

To avoid frustration, plan on spending extra time. Don’t start a project with the idea that you can “fit it in” before you have to leave for Grandma’s birthday. You’ll find it takes longer than you thought and you’ll find yourself in a dilemma: either finish in a rush or leave your home in chaos with half-finished work. Save yourself the stress by allocating more time than you think you’ll need.


2. Minimize Helpers

While extra hands are helpful for large spaces, small rooms can feel crowded quickly. Trying to work with multiple people in tight quarters often leads to frustration—and accidental bumps, spills, or even arguments. Instead, tackle small-space painting solo or assign other tasks to your helpers, like cleaning up, prepping dinner, or making a supply run to RepcoLite!


3. Prep Thoroughly

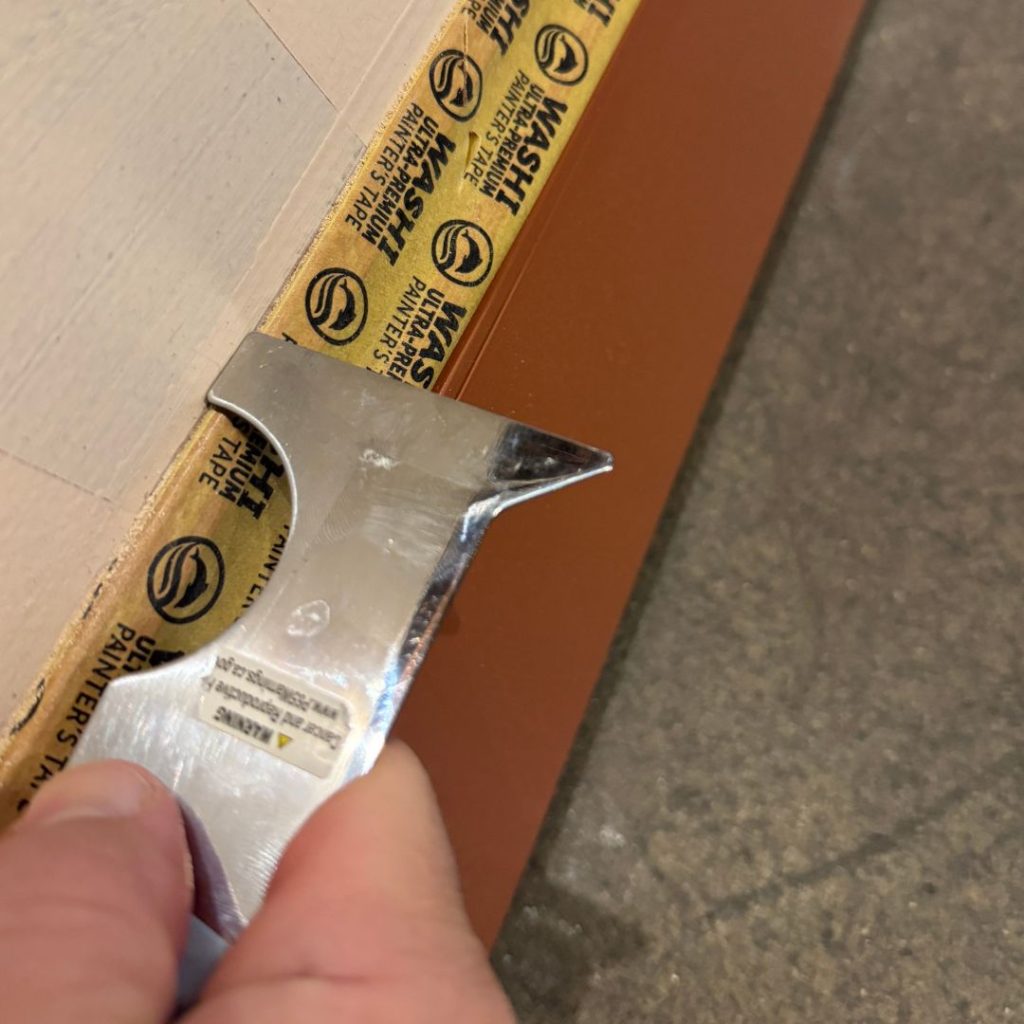
Good prep work is essential no matter the room size. In small spaces, where every detail is more noticeable, skipping these steps can lead to unnecessary headaches. Here’s what to do:

  • Remove Nails and Screws: Painting around them might seem quicker, but it often results in drips, roller snags, or uneven finishes.
  • Fill Holes and Sand Glossy Surfaces: Ensuring a smooth, clean surface will make the final coat look flawless.
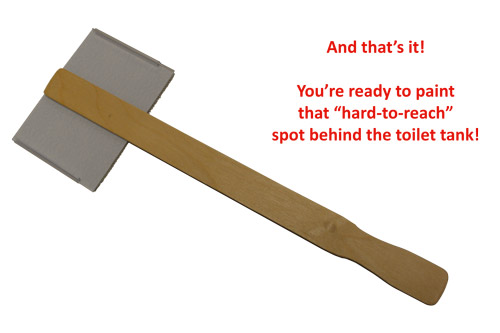
  • Clean Everything: Dust and grime build up in surprising spots like behind toilets, on vent covers, and atop doors. Wipe down all surfaces for the best results.
  • Remove Items from the Walls: Whenever possible, take down towel racks, switch plates, and other fixtures to make painting easier and neater.

Check out the podcast version of this post (it’s the PREMIUM way to experience this info!)

4. Set Up an External Workstation

Avoid setting paint cans and tools on the floor in cramped spaces. Instead, create a workstation just outside the room with a small table or a setup made from sawhorses. Keep your materials close but out of the way to prevent spills and accidents.


5. Work Methodically and Stay Mindful

Small spaces leave little room for error—or for movement. Slow down and think carefully about each step before you make it. Consider these tips:

  • Be mindful of where your paint tray, tools, and freshly painted walls are at all times.
  • Avoid sudden movements that could lead to spills or accidental smudges.
  • Place your paint tray strategically—outside the room or in a secure spot to prevent tipping or stepping into it.

6. Get Creative with Placement

When working in tight spaces, the location of your tools matters. Instead of keeping your paint tray on the floor, try these alternatives:

  • Use the Hallway: Place your tray on a drop cloth outside the room. This keeps it accessible while reducing the risk of stepping into it.
  • Consider a Ladder Hook: If space allows, hang the tray securely on your ladder—just be careful to avoid bumping it when standing up!

Final Thoughts

Painting small spaces can test your patience, but with these foolproof strategies, you can tackle even the tightest quarters with confidence. Plan ahead, prep thoroughly, and work mindfully to ensure your project turns out beautifully.

Looking for expert advice or premium supplies? Stop by your nearest RepcoLite location or check out the RepcoLite Home Improvement Show Podcast. Listen on Spotify, Apple Podcasts, YouTube, or at repcolite.com.

Choosing the Right Glue for Your DIY Projects

Have you ever stood in the glue aisle feeling overwhelmed by endless options? Choosing the right glue can sometimes seem tricky! Different brands, types, and flashy promises can make it tempting to grab whatever catches your eye. But here’s the truth: not all glues are created equal. Using the wrong glue can turn a simple project into a frustrating mess and leave you doubting the effectiveness of adhesives altogether.

I’ve been there. For years, I used Elmer’s glue for woodworking and was always disappointed. Nails and screws became my go-to, even for projects where they weren’t ideal. Then I discovered the problem wasn’t the glue—it was me. I was using the wrong type for the job. Once I switched to proper wood glue, everything changed.

wooden toy, too many screws

Let’s break down the most common types of glue and how to use them correctly. That will make choosing the right glue a much simpler undertaking!


PVA Glues: Versatile and Reliable

Wood Glue: Perfect for woodworking, wood glue penetrates wood fibers to create a bond often stronger than the wood itself. Use it for furniture repairs, securing joints, or edge-to-edge board joins. Key tips:

  • Clamp your project while it dries.
  • Clean excess glue with a damp cloth before it dries—it won’t disappear later!
  • For outdoor projects, choose water-resistant wood glue.

Elmer’s Glue: Also known as white craft glue, this is ideal for lightweight projects like paper crafts, cardboard, and school projects. Avoid using it for heavy-duty tasks—it’s not designed for structural bonding.

Mod Podge: A glue, sealer, and varnish all in one, Mod Podge is excellent for decoupage and craft projects. Use it to adhere paper to various surfaces, then apply a finishing coat for durability.


Hot Glue: Quick Fixes and Temporary Bonds

Hot glue is excellent for quick projects, especially with porous materials like wood and cardboard. However, it’s not ideal for glass or metal and shouldn’t be used for long-term bonds. Remember, hot glue is a temporary solution—don’t rely on it for permanent repairs.


Epoxy: The Heavy-Duty Solution

Epoxy comes in two-part syringes containing resin and hardener. When mixed, they create an extremely strong bond. Ideal for:

  • Metal parts and heavy machinery repairs
  • Bonding plastics, ceramics, and glass
  • Industrial and automotive uses

Tips:

  • Mix carefully according to instructions.
  • Work quickly—epoxy starts setting within 10 minutes. Only mix what you can use in that time.

Super Glue: Small Repairs Made Easy

Super glue (cyanoacrylate) is perfect for small repairs on non-porous surfaces like metal, plastic, or glass. Use sparingly—a little goes a long way! Be cautious with your fingers; acetone can help if you get stuck.


Contact Cement: Instant, Strong Bonds

Unlike other adhesives, you apply contact cement to both surfaces, let it dry, and then press them together for an instant bond. It’s commonly used for:

  • Laminate to wood applications
  • Rubber and plastic bonding
  • Leatherwork and shoe repair

Key Considerations:

  • Align carefully—once bonded, there’s no repositioning.
  • Use in a well-ventilated area due to strong fumes.

Surface Preparation: The Secret to Strong Bonds

No glue will work well without proper surface preparation. Ensure surfaces are:

  • Clean and free of dust, oil, or moisture
  • Lightly sanded (for non-porous materials) to improve adhesion
  • Aligned perfectly before applying glue

Conclusion

Choosing the right glue doesn’t have to be daunting. By understanding different types of adhesives and their ideal uses, you can ensure strong, lasting bonds for any DIY project. Whether it’s wood glue for furniture, epoxy for heavy-duty repairs, or super glue for quick fixes, the right choice makes all the difference.

Tools for Painting Small Rooms and Tight Spaces

Working in tight spaces like bathrooms, closets, or even tricky corners can feel daunting. Limited room to maneuver means every mistake stands out. But with the right tools and strategies, you can make the process smooth and even (reaching for the stars, here) enjoyable! Here’s your guide to essential tools for painting small rooms.


Must-Have Tools for Painting Small Rooms

1. Small Step Ladder

Nothing earth-shattering here, but choose a ladder with the smallest footprint that still lets you reach all necessary areas. A lightweight, compact step stool is ideal. Ensure it’s easy to fold and maneuver to avoid clunky obstructions in tight quarters.

2. Painter’s Tape

Mask your baseboards quality painter’s tape like 3M Blue or Green Frog Tape. For freshly painted surfaces (over 24 hours old), use delicate surface tapes such as Yellow Frog Tape. Taping may seem tedious, but for most DIYers, it’s going to be quicker to tape and paint than it is to cut-in that line by hand. Plus, taping ensures clean lines and reduces strain—especially crucial in confined spaces.

3. Short-Handled Brush

A short-handled brush, like the Wooster Shortcut, is perfect for tight corners. These stubby brushes offer excellent control without a long handle getting in your way. They fit comfortably in your hand and navigate confined spots effortlessly.

4. Wooster Sherlock Extension Pole

This adjustable pole extends from 2 to 4 feet and features a quick-connect system for seamless transitions between different roller frames. Unlike traditional fixed poles, it’s versatile and locks securely, preventing loose roller frames—a common frustration with cheaper options.

5. Jumbo Koter Mini Rollers

Pair Wooster’s Jumbo Koter mini rollers with their larger counterparts for consistent texture and finish. Smaller rollers are essential for areas above doors or behind fixtures. Using high-quality mini rollers ensures seamless blending with larger rollers, enhancing the overall look.

6. Floor Protection Options

While canvas drop cloths are excellent, white masking paper is often better for small spaces with hard floors. It’s affordable, tapeable, and prevents tripping over loose edges. Plus, it’s great for protecting floors during winter moves or entertaining kids with giant coloring sheets!


Don’t Skimp on Paint Quality

Using high-quality paint ensures better coverage and durability—vital for small rooms where details matter. For bathrooms, choose Benjamin Moore’s Aura Bath and Spa, which offers moisture resistance and a beautiful matte finish. For other areas, RepcoLite’s Optima or Benjamin Moore’s Regal (currently on sale) are excellent choices.


Unique Tools and Hacks

  • Headlamp: Perfect for poorly lit spaces, providing hands-free lighting.
  • DIY Brush Hack: Create a behind-the-toilet brush using an edger pad and stir stick. No more awkward stretching! Check out our blog post on this DIY toilet brush!
  • Foil Trick: Wrap brushes and rollers between coats to keep them fresh, reducing cleanup time.

Conclusion

The right tools can turn the challenge of painting small rooms into a manageable, even enjoyable, project. For a detailed tool list and more painting tips, visit RepcoLite.com.

Want more painting tips and tricks? Check out the full episode of the RepcoLite Home Improvement Show. Listen on Spotify, Apple Podcasts, YouTube, or at repcolite.com

How to Paint Two-Tone Walls

Two-Tone Walls Made Easy

Two-tone walls are one of the hottest trends in home decor, and for good reason—they’re stylish, sophisticated, and can add a touch of drama to any room. But if you’re scrolling through Instagram or Pinterest and thinking, “That looks complicated,” don’t worry! With the right tools and techniques, you can master how to paint two-tone walls like a pro.

Here’s a step-by-step guide to help you achieve this striking look.


Step 1: Paint the Top Section of the Wall

Start by choosing your colors and deciding where they’ll meet on the wall. The dividing line can be in the middle, higher, or lower—whatever works best for your space.

Pro Tip: Use a laser level to create a perfectly straight line. This is the way to go if possible–especially if your floors or ceilings aren’t level. There are a lot of options out there, but one we’d recommend checking out is the DeWalt DW088K Laser Level, which costs around $150.

Once your line is set, paint the top section of the wall. Roll slightly past the dividing line and feather out the edges to avoid thick paint lines. A tool like the Wooster Jumbo Koter System is perfect for this. It ensures your mini roller texture matches your standard roller, resulting in a seamless finish.


Step 2: Tape the Dividing Line

After the top section is completely dry (wait at least 24 hours, longer if possible), it’s time to tape the dividing line. Re-measure and mark your dividing line one more time (very lightly!!); or use the laser level from Step 1.

Then, use a safe-release tape like Yellow Frog Tape or 3M Delicate Surface Tape to avoid peeling off your fresh paint.

Here’s a trick for flawless lines: Before painting your second color, lightly apply the original top color along the edge of the tape. This seals the tape and prevents bleed-through. Let it dry completely before moving on.

This technique is a must-know if you’re serious about learning how to paint two-tone walls perfectly. Check out the video for a great example of this process!


Step 3: Paint the Second Color

Now, paint the bottom section with your second color. Roll carefully up to the tape without overlapping the top section.

Key Tips:

  • Apply the second coat promptly—don’t leave the tape on the wall for too long.
  • Before removing the tape, lightly score the edge with a razor blade to cut any paint film. This prevents peeling.
  • Remove the tape slowly and carefully to avoid smudging wet paint.

Finishing Touches

Patience and the right tools are the secret to a great looking two-tone wall. A laser level, safe-release tape, and quality mini rollers can make all the difference.

If you try this project at home, I’d love to see your results! Send your photos or questions to radio@repcolite.com.


Catch More Tips on the Podcast

Want more painting tips and tricks? Check out the RepcoLite Home Improvement Show Podcast. Listen on Spotify, Apple Podcasts, YouTube, or at repcolite.com

Get Perfect Results When Using Masking Tape

For those of us who aren’t professional painters (and even many who are), masking tape is an essential tool for achieving sharp, professional-looking paint lines. But using it effectively isn’t as simple as slapping it on the wall and hoping for the best. The type of tape you choose, how you apply it, and when you remove it all make a difference. Here’s everything you need to know to get perfect results when using masking tape!


Step 1: Choose the Right Tape

Not all masking tapes are created equal. Different tapes are designed for different surfaces and situations, so selecting the right one is critical.

  • Delicate Surface Tapes: These masking tapes are ideal for applying over freshly painted surfaces or even wallpaper. They’re designed to release cleanly without damaging the underlying layer.
  • Frog Tape: This isn’t just another brand—it’s a game-changer. Frog Tape features PaintBlock Technology, a special coating that reacts with water-based paint to instantly seal the tape’s edges. This helps prevent bleeding and ensures sharp, clean lines.
  • General Painter’s Tape: These tapes are perfect for standard projects on clean, cured surfaces.

Pro Tip: Don’t choose your tape based solely on price. Instead, ask about the options at your local RepcoLite. Using the right tape for your project can make all the difference.


Step 2: Prep Your Surface

This should come as no surprise, but proper surface preparation is the key to ensuring your masking tape sticks well.

  • Clean the area thoroughly with a damp cloth to remove dust and dirt.
  • Allow the surface to dry completely before applying the tape.

Skipping this step can result in poor adhesion and paint bleeding under the tape.


Step 3: Apply Tape in Manageable Strips

When applying masking tape, work with strips about three feet long. Overlap each strip slightly where they meet to ensure a continuous barrier. This method makes the tape easier to remove later and helps maintain clean edges.


Step 4: Secure the Edges

Once the tape is in place, press it down firmly along the edges. Use a putty knife, a painter’s 5-in-1 (or 7-in-1) tool rather than your fingers. This extra pressure seals the tape and minimizes the risk of paint bleeding underneath.


Step 5: Remove the Tape at the Right Time

Timing is crucial when it comes to removing painter’s tape.

  • Remove the tape while the paint is tacky but not fully dry.
  • Slowly pull the tape at a 45-degree angle to avoid tearing or peeling paint.
  • Be mindful of wet paint on the tape—don’t let it transfer onto other surfaces.

Special Offer on Painter’s Tape!

Right now, all RepcoLite locations have 1.5-inch painter’s tape on sale for just $5.50 per roll—that’s over $2.00 off per roll! This deal runs through the end of November 2024, so stop by and stock up while supplies last. Whether you’re tackling a DIY project or restocking your supplies as a contractor, this is the perfect time to grab quality tape at a great price.


Closing Thoughts

Knowing these simple tips can transform your painting projects. By choosing the right tape, prepping your surface, and following best practices for application and removal, you’ll get perfect results when using masking tape!

Have questions about masking tape or other painting tools? Stop by your nearest RepcoLite store, or send us an email at radio@repcolite.com. We’d love to help!

Catch More Tips on Our Podcast!

Want more painting tips and tricks? Check out the RepcoLite Home Improvement Show Podcast. Listen on Spotify, Apple Podcasts, YouTube, or at repcolite.com

Freshen Up Your Space: 5 Reasons To Try Two-Toned Walls In Your Home

Two-tone walls are a modern twist on the classic accent wall. Instead of painting one wall a bold color, this trend splits a wall—or even an entire room—into two colors, either horizontally or vertically. The result? A dynamic, visually engaging look that’s as customizable as it is creative. Let’s dive into 5 reasons to try two-toned walls in your home.

1. Add Drama Without Overwhelming the Room

Two-toned walls let you experiment with bold colors in a way that feels balanced. By confining a vibrant or dark shade to only half the wall, you minimize the risk of overpowering your space. This approach creates a sense of harmony, as the bold color is often paired with a more neutral or softer hue.

Even better, the contrast between the two colors draws the eye and amplifies the overall visual impact. It’s a striking yet subtle way to make a statement, giving your space energy and personality without overwhelming the senses.

2. Highlight (or Hide) Architectural Features

This painting technique isn’t just stylish—it’s functional, too. Use two-tone walls to:

  • Tone Down Elements: If you have a less-than-ideal feature like a utilitarian stove or a visually busy entryway, a two-toned paint scheme can blend these elements into the background. For instance, a horizontal stripe of neutral color at stove height can help it disappear into the design.
  • Showcase Features: On the flip side, two-toned walls can highlight your favorite pieces. Imagine a bold painting or unique furniture placed right at the dividing line between two colors. This framing effect adds depth and enhances the visual impact of your decor.

You can even extend the two-tone concept to doors, trim, or built-ins to create a cohesive, streamlined look that feels intentional and polished.

3. Mimic Classic Paneling Without the Cost

Love the elegance of wainscoting or paneling but not the expense, labor, or even the commitment? Two-toned walls give you a similar vibe with just paint. By dividing the wall into upper and lower sections, you create the illusion of architectural detail. This modern interpretation brings depth and sophistication to any space, with far less effort than traditional woodwork. And when you’re ready for a new look, there’s no materials to remove—just prep and repaint

4. Create the Illusion of Height and Space

Strategic use of two-toned walls can make a room feel larger or taller:

  • Elongate a Space: A horizontal division can visually extend a room, perfect for hallways or smaller spaces.
  • Add Height: Painting the upper half of the wall and ceiling in a lighter shade draws the eye upward, giving the illusion of higher ceilings and a more expansive feel.

This trick works wonders in rooms that feel cramped or low-ceilinged, creating a sense of openness without structural changes.

Check Out Our Podcast on Two-Toned Walls (starts at 29:06)

5. Perfect for Kids’ Rooms

Two-tone walls are ideal for kids’ spaces, offering a playful yet practical design solution. They bring energy and fun to the room without overpowering it, and they can help parents and kids compromise on color choices. For example:

  • Balance Bold Choices: If your child loves a strong, bright hue, confining it to half the wall can keep it manageable.
  • Share the Space: In shared bedrooms, each child can choose a color, creating a coordinated yet individualized look.

This technique is a great way to incorporate creativity and ensure everyone feels heard in the design process.

A Final Thought

Two-tone walls are an incredibly versatile way to refresh your space. They’re bold yet balanced, functional yet stylish, and customizable for virtually any room or decor style. Whether you want to add drama, disguise problem areas, or experiment with color in a new way, there are a lot of reasons to try two-toned walls in your home!

Ready to jump in? Head to your nearest RepcoLite store and let us help you start transforming your walls!